


The Fascinating World of Quail Egg Incubation
Incubating quail eggs is a rewarding experience, and it’s becoming increasingly popular across the UK. From rural homesteads to urban apartments, more people are discovering the joys of hatching these small but mighty birds. The relatively short incubation period and minimal space requirements make it an accessible hobby for many. But what exactly makes quail egg incubation so fascinating, and how can you achieve success in your own hatching endeavors? Let’s explore the science and art behind incubating quail eggs.
Understanding the Biology of Incubation
Successful quail egg incubation depends on understanding nature’s delicate balance and applying modern techniques. The incubator acts as a surrogate mother hen, carefully replicating the environment a broody hen would naturally provide. This involves maintaining a stable temperature, providing the right humidity, and regularly turning the eggs.
Turning the eggs, for instance, mimics the hen’s natural movements. This distributes warmth evenly and prevents the developing embryo from sticking to the shell membrane. This seemingly simple action is crucial for healthy development and greatly influences hatch rates. Want to learn more? Check out this helpful resource: How to master the incubation of quail eggs.
Key Factors Influencing Quail Egg Incubation
Several vital factors determine successful quail egg incubation. Just as improving developer experience streamlines software development, understanding these factors helps troubleshoot and optimize the incubation process.
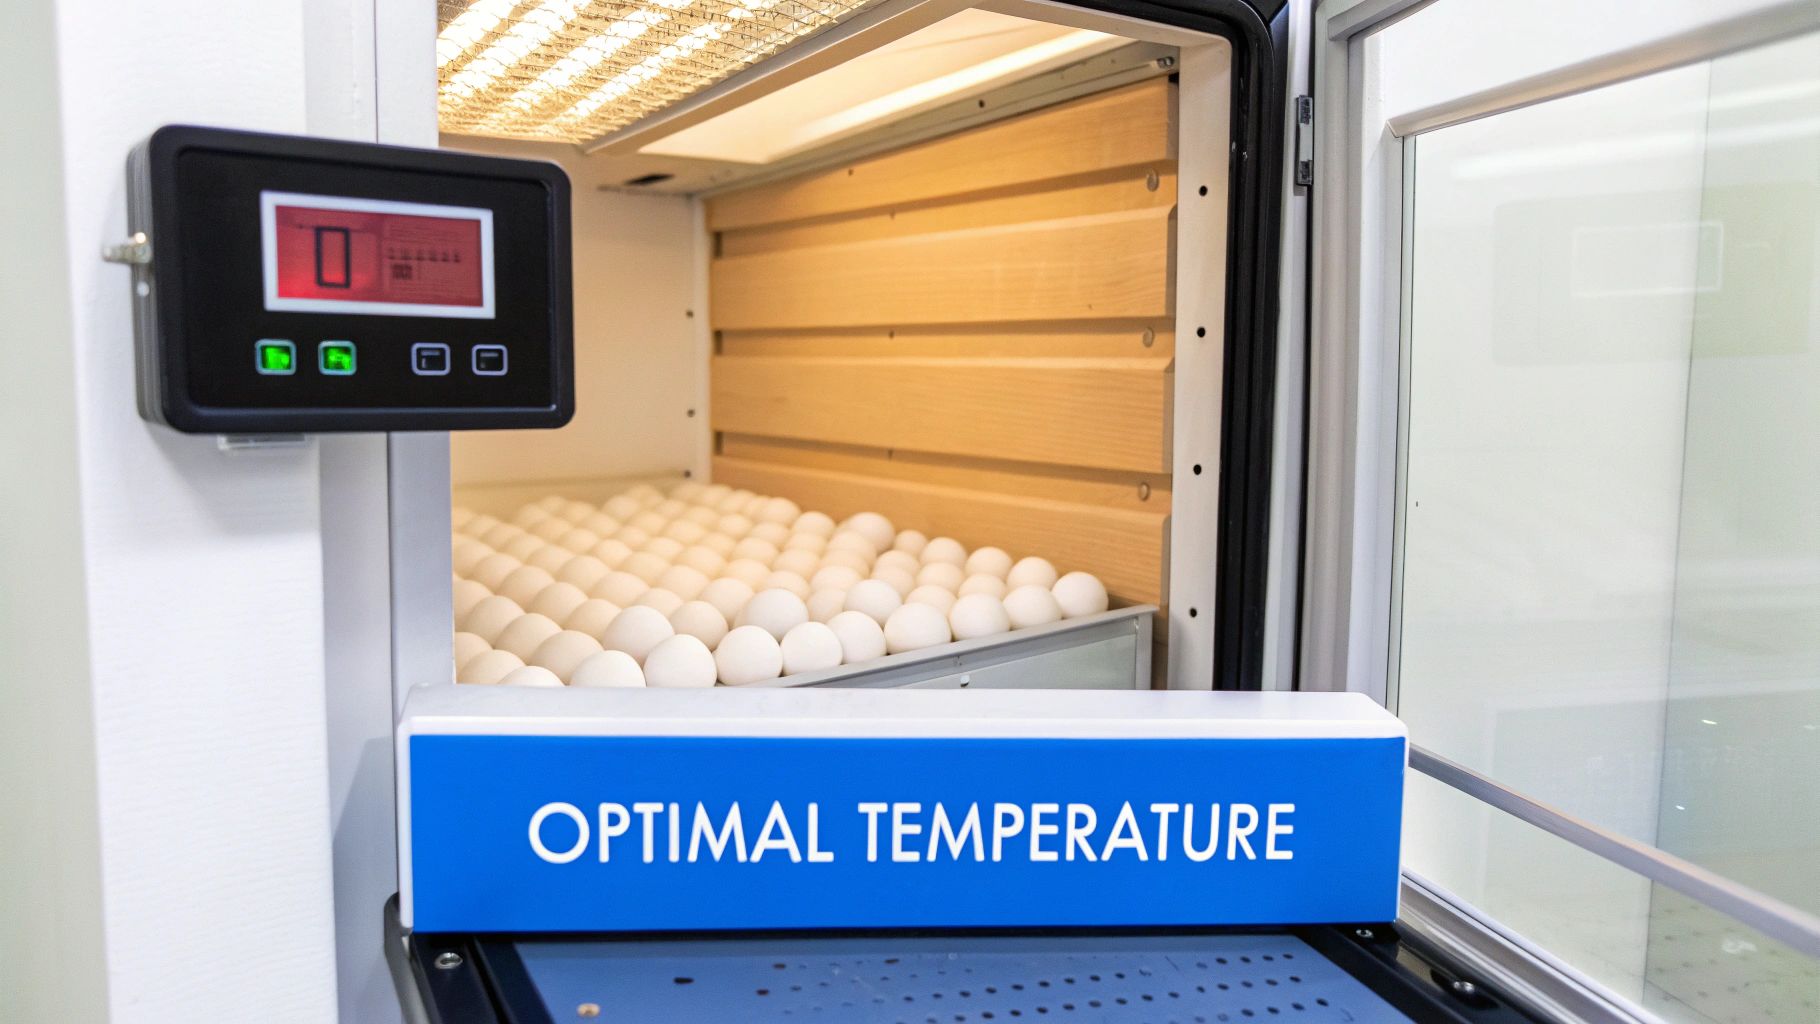
- Temperature: Maintaining a consistent temperature around 37.5°C (99.5°F) is crucial. Even small temperature fluctuations can negatively impact the hatch rate.
- Humidity: Proper humidity is essential. Maintain 45% to 55% humidity for the first 14 days, then increase it to 65-70% for the remaining days. This higher humidity prevents chicks from sticking to the shell upon hatching.
- Turning: Turn the eggs regularly, at least three to five times per day. This promotes even development and prevents the embryo from adhering to the shell.
Incubation in the UK: Specific Considerations
Incubating quail eggs successfully in the UK requires careful environmental control. Maintaining the optimal temperature of 37.5°C (99.5°F) is crucial. Even minor deviations can significantly affect embryo development and, ultimately, the hatch rate. Humidity control is also essential, typically maintained at 45-55% for the first 14 days, increasing to 65-70% for the final days of the roughly 16 to 18-day incubation period. Under ideal conditions, hatchability can often exceed 75%. The UK also has specific biosecurity and animal welfare guidelines that influence incubation practices. UK government statistics on egg production provide further context.
By understanding and diligently applying these key factors, you’ll be well-equipped to hatch healthy quail chicks and enjoy the rewards of this fascinating process.
Choosing Your Incubation Equipment: What Really Matters
So, you’re eager to start hatching quail chicks? It’s an exciting venture! Before you greet those fluffy newcomers, you’ll need the proper equipment. Choosing the right incubator isn’t about fancy features; it’s about smart investment in what truly helps your hatch rates. We’ve talked to UK breeders and uncovered the real essentials.
Temperature Stability: The Key to Success
Forget flashy digital displays. Temperature stability is the most important factor in incubation. Just like baking, consistent heat is crucial for proper development. Quail embryos are highly sensitive to temperature fluctuations. Even small changes can significantly impact growth and reduce the number of successful hatches.
This means a reliable thermostat is vital, even in a basic incubator. Many experienced breeders use a separate thermometer inside the incubator for double-checking, ensuring accurate temperature readings.
Turning Mechanisms: Mimicking Nature
In the wild, a mother quail diligently turns her eggs multiple times each day. This prevents the embryo from sticking to the shell and promotes healthy development. Your incubator should mimic this crucial process.
- Manual Turning: Budget-friendly incubators often require manual turning. This method works well, but it requires dedication. You’ll need to turn the eggs at least three to five times a day.
- Automatic Turning: Automatic turners offer convenience, but they typically cost more. These devices gently rotate the eggs at regular intervals, mimicking the natural turning process. This is particularly helpful for larger hatches or busy schedules.
Manual vs. Automatic: Choosing the Right Fit
Choosing between manual and automatic turning depends on your situation. If you’re starting with a small number of eggs, manual turning is perfectly fine. As your flock grows, or if you prefer convenience, an automatic turner becomes more beneficial. How to master the art of incubating eggs. offers a great introduction to the process.
Evaluating UK Incubator Models
The UK incubator market offers a variety of options, from basic models to high-end units. Let’s take a look at the different types you might encounter:
To help you choose the right incubator, we’ve compiled a comparison table highlighting key features and price ranges of different models available in the UK.
Comparison of Quail Egg Incubator Types:
This table compares different types of incubators available in the UK market, highlighting their features, benefits, drawbacks, and suitability for different breeding scales.
| Incubator Type | Price Range (£) | Capacity (Quail Eggs) | Key Features | Best For |
|---|---|---|---|---|
| Still-Air Incubator | Under £50 | 12-24 | Basic temperature control, manual turning | Beginners, small batches |
| Forced-Air Incubator | £50-£150 | 24-48 | Fan-assisted air circulation, manual or automatic turning | Hobbyists, medium batches |
| Automatic Incubator | £150+ | 48+ | Automatic turning, humidity control, digital display | Serious breeders, large batches |
As you can see, still-air incubators are a good starting point for beginners, while forced-air and automatic models cater to larger operations. Consider your batch size and budget when making a decision.
Ultimately, the best incubator isn’t the priciest. It’s the one that provides consistent temperature, a suitable turning mechanism, and fits your budget and flock size. Choosing wisely sets you up for healthy chicks and a successful hatch.
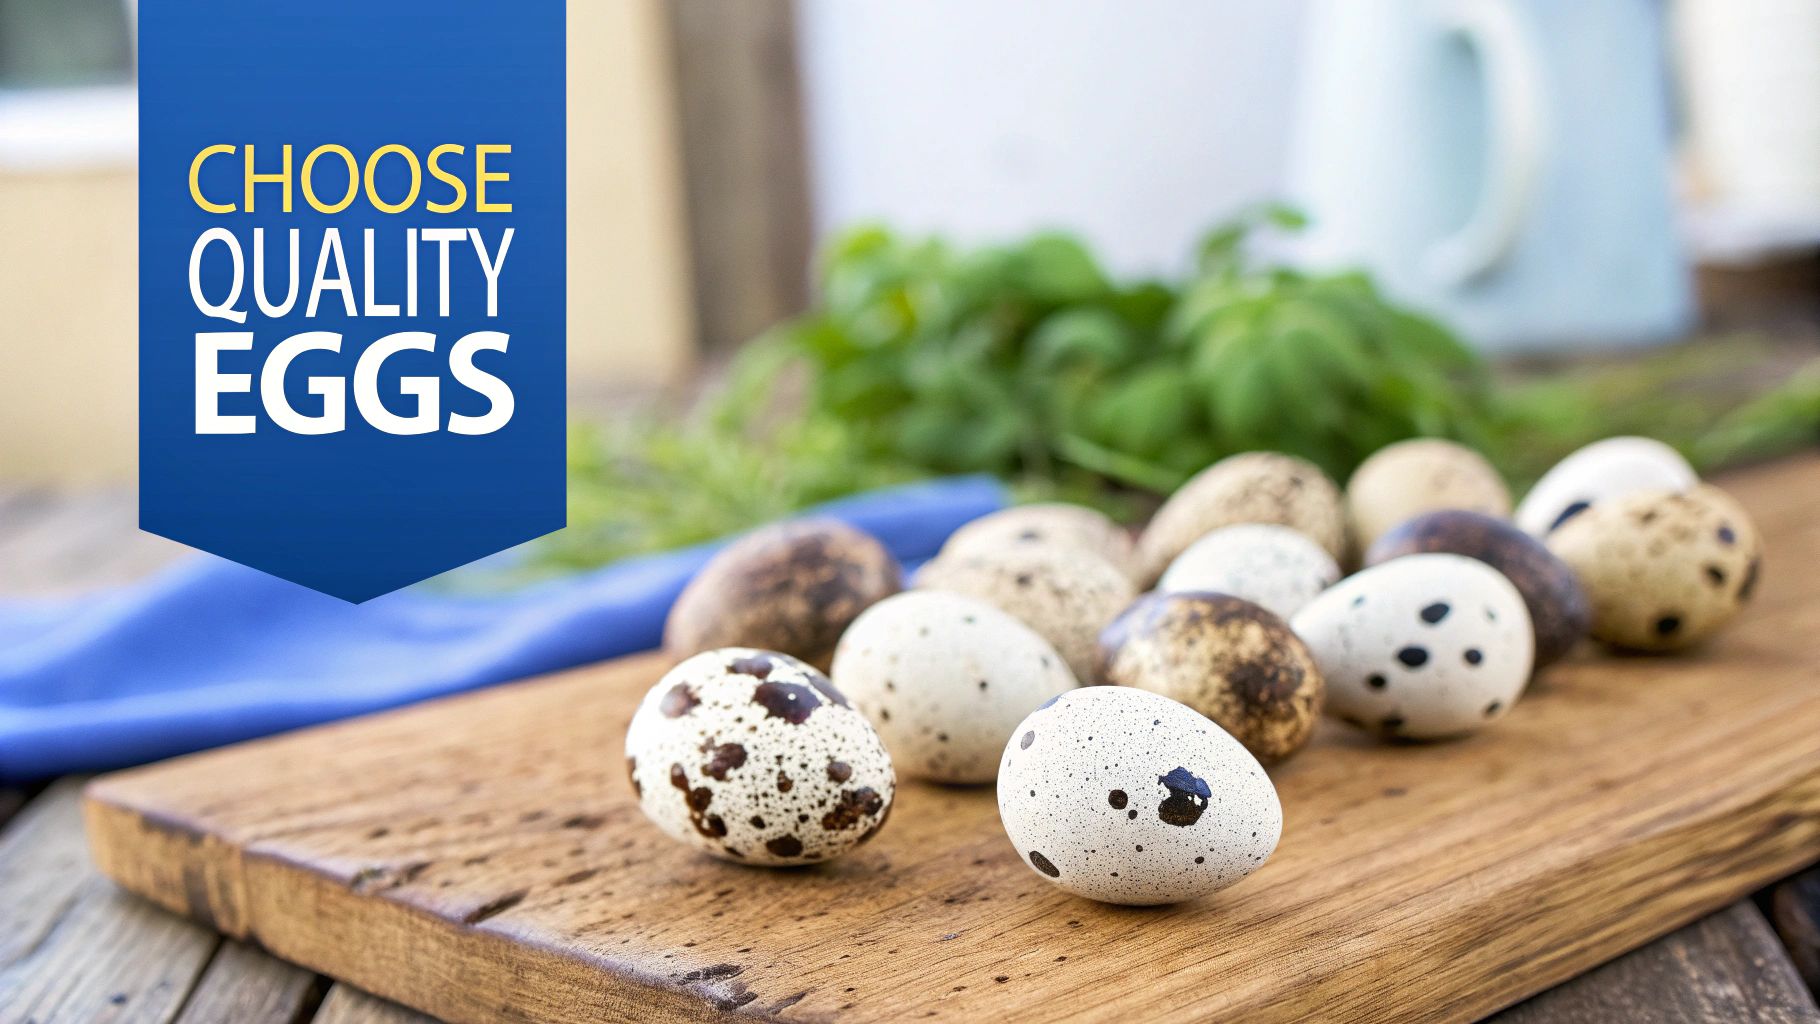
Selecting Fertile Eggs: The Foundation of Success
The journey to a brooder bustling with healthy quail chicks begins with selecting the right eggs. Choosing fertile eggs is paramount for successful incubation. This careful selection process can dramatically improve your hatch rates. Let’s explore how experienced breeders identify viable eggs and why this initial step is so crucial.
Recognizing the Signs of Fertility and Quality
Identifying a fertile egg isn’t always easy. However, a few subtle cues can help you choose the best eggs for incubation. Some characteristics, like shell texture, are immediately visible, while others require a closer examination.
Shell Texture: Opt for eggs with a smooth, uniform shell, free from cracks or thin spots. These flaws can indicate weakness and compromise the egg’s ability to protect the developing embryo.
Egg Shape: Uniformly shaped eggs, without unusual bumps or ridges, are generally ideal for incubation. While minor variations are normal, significant deformities can indicate developmental issues.
Egg Age: Fresh eggs, ideally less than seven days old, are recommended. As eggs age, their viability diminishes, resulting in lower hatch rates.
Sourcing Fertile Eggs in the UK
For new quail breeders, obtaining fertile eggs from a reputable UK supplier is an excellent first step. Which eggs are used for hatching? provides helpful insights into egg sourcing. Many local breeders and online marketplaces offer fertile quail eggs, ensuring access to quality stock. When purchasing online, make sure the supplier has positive reviews and prioritizes proper handling and storage.
Storing Eggs for Optimal Viability
Even with fertile eggs, incorrect storage can quickly reduce their hatchability. The UK’s fluctuating climate can pose challenges, so maintaining a consistent storage environment is essential. Store eggs in a cool, dry place, away from direct sunlight and significant temperature changes. Aim for a temperature between 8-12°C (45-55°F).
Remember to store eggs pointy end down to maintain the air sac’s integrity. Gently turning the eggs daily helps prevent the yolk from sticking to the shell.
Handling Eggs Pre-Incubation: Dispelling Myths
Several misconceptions surround handling eggs before incubation. One common myth is the need to wash eggs before incubation. Washing removes the natural protective bloom, which shields the egg from bacteria. Avoid washing eggs unless absolutely necessary. For particularly dirty eggs, gentle dry brushing can remove debris without harming the bloom.
Transporting Eggs Safely
Even short journeys require care to protect the eggs’ fragile structure. Use padded containers designed for egg transport to minimize jostling and prevent cracking. Temperature control is also vital during transport. Avoid exposing the eggs to extreme temperatures, which can harm the developing embryo. This meticulous attention to detail during selection, storage, and handling significantly improves hatch rates and sets the stage for healthy chick development.
Mastering the Environmental Dance: Temperature and Humidity
Maintaining the correct temperature and humidity is crucial for successfully incubating quail eggs. It’s all about creating the ideal environment for these tiny embryos to flourish. While getting the basic settings right is important, understanding the nuances of this environmental balance is key to a successful hatch.
Why Temperature Stability Matters More Than Perfect Readings
Embryo development is a delicate process, sensitive to temperature fluctuations. Even short periods outside the ideal range can negatively impact development, leading to abnormalities or even death. This means temperature stability is more important than simply reaching a target temperature on your incubator.
For example, a quick drop in temperature, even briefly, can be more harmful than a slightly lower, but consistent, temperature. This is why a reliable thermometer and regular checks are essential. Concerned about temperature drops? Check out this helpful resource: Can hatching eggs get cold?
Humidity’s Role in Healthy Development
While temperature is often the focus, humidity plays an equally vital role, particularly in membrane development. Proper humidity prevents the membrane from drying out and sticking to the chick, which can hinder hatching.
The ideal humidity for quail eggs is around 45-55% for the first 14 days, rising to 65-70% in the final days before hatching. These higher levels mimic a mother hen, softening the membrane for easier hatching.
Practical Tips for Maintaining Optimal Conditions
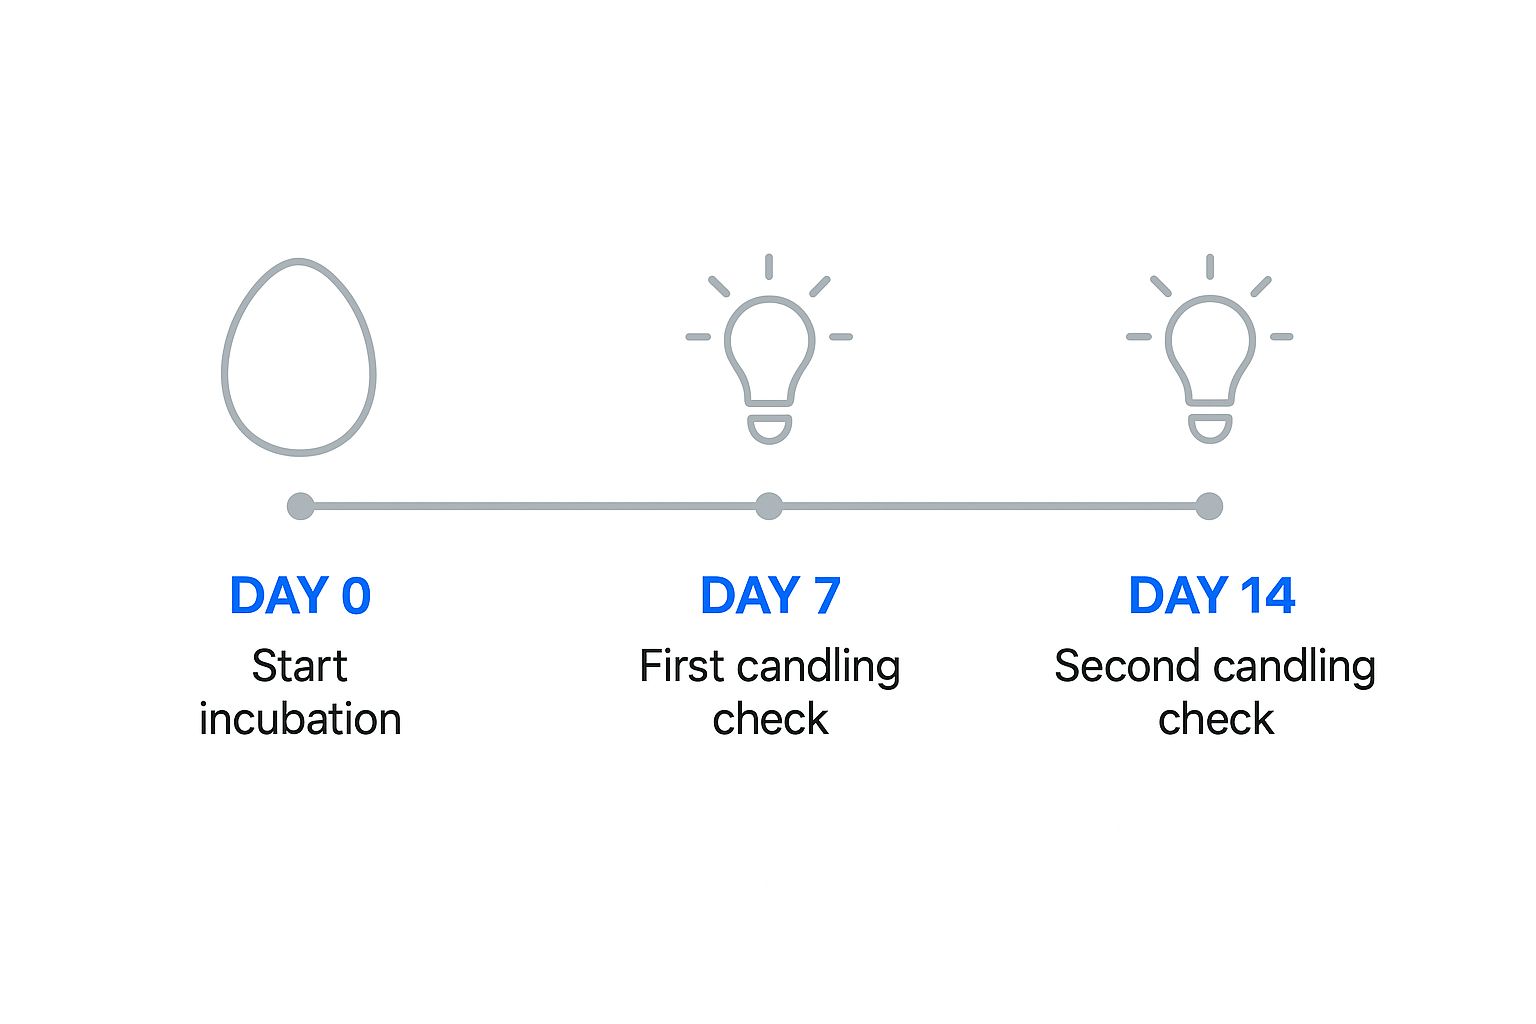
This infographic highlights key incubation milestones and candling check times. The first check on Day 7 provides an early look at embryo development, while the second check on Day 14 allows for closer monitoring before lockdown.
Maintaining these conditions can be tricky. Here are some helpful tips:
- Invest in a quality incubator: Look for good insulation and a reliable thermostat.
- Place your incubator in a stable environment: Avoid drafts and direct sunlight.
- Monitor temperature and humidity regularly: Check multiple times daily and adjust as needed.
- Use a separate thermometer and hygrometer: Double-check your incubator’s accuracy.
- Adjust humidity based on your location: Use a humidifier or dehumidifier if necessary.
To help you visualize the incubation process, we’ve compiled a detailed table outlining the necessary environmental parameters for each day:
Quail Egg Incubation Timeline and Environmental Requirements: A comprehensive day-by-day guide to temperature, humidity, and egg handling requirements throughout the entire incubation period
| Day | Temperature (°C) | Humidity (%) | Turning Requirements | Special Considerations |
|---|---|---|---|---|
| 1-14 | 37.5 | 45-55 | 4-6 times daily | Ensure consistent temperature and humidity |
| 15-17 | 37.5 | 65-70 | Stop turning | Prepare for hatch |
| 18-21 | 37.5 | 70-75 | None | Hatching period – minimize disturbances |
This table provides a day-by-day breakdown of temperature, humidity, and turning requirements for quail egg incubation. Remember to maintain stable conditions throughout the incubation period, and increase humidity during the hatching phase.
By understanding the interplay of temperature and humidity, and following these strategies, you’ll be well-equipped for successful hatches and healthy quail chicks.
Monitoring Development: From Egg to Embryo
Observing the transformation inside a quail egg during incubation is a fascinating process. Careful monitoring plays a vital role in a successful hatch. This section explores key techniques, focusing on the specific challenges of quail eggs, which are smaller and have speckled shells compared to chicken eggs.
Candling: A Window into the Egg
Candling is a fundamental technique used to monitor embryo development. It involves shining a bright light through the egg, allowing you to see the contents within. The smaller size and speckled shells of quail eggs can make candling more difficult than with chicken eggs. However, practice and appropriate tools will enable you to successfully monitor the progress.
- Days 7-10: You’ll observe developing blood vessels and the embryo’s shadow. This confirms fertility and indicates healthy early development.
- Days 14-16: The air cell, located at the larger end of the egg, becomes more visible. You may even see movement, indicating the chick is preparing to hatch.
Turning for Healthy Circulation
Regularly turning the eggs is essential for proper embryo development. Turning simulates the actions of a brooding hen, ensuring the yolk remains evenly distributed and prevents the embryo from sticking to the shell membrane. This promotes healthy circulation and prevents developmental issues.
- Manual Turning: For small batches of eggs, manual turning is a practical method. Turn the eggs 3-5 times per day, spacing the turns evenly.
- Automatic Turning: Automatic incubators streamline this process. Verify that the automatic turner is working properly and is appropriate for quail eggs.
Record Keeping: Tracking Progress and Troubleshooting
Keeping detailed records of your incubation process is invaluable for future success. Note the incubation start date, turning times (if turning manually), temperature and humidity readings, and candling observations. You might find this helpful: Can hatching eggs get wet? These records become a valuable tool for analyzing hatches and making adjustments for improvement.
Identifying Normal Variations and Potential Problems
Not all variations during incubation indicate a problem. Some differences are expected. For instance, slight variations in the size of the air cell or the rate of development are normal. However, some signs require attention.
- No Development: If there are no visible signs of development after 7-10 days of candling, the egg may be infertile.
- Blood Rings: A red ring seen during candling may indicate embryonic death.
- Stuck Embryo: If the embryo appears adhered to the shell membrane, insufficient turning may be the cause.
Troubleshooting Common Incubation Issues in the UK
The fluctuating environmental conditions in the UK can present challenges for incubation. In particular, maintaining consistent humidity can be difficult. Here are some UK-specific tips:
- Humidity Issues: Consider using a humidifier or dehumidifier depending on the local climate and season.
- Power Outages: Have a backup plan, such as a generator or a warm, insulated box, to maintain temperature during power interruptions.
By carefully monitoring development within each egg and addressing potential issues proactively, you can significantly improve your chances of a successful hatch and a healthy brood of quail chicks.
The Dramatic Finale: Hatching and Early Chick Care
After carefully monitoring your quail eggs throughout incubation, the exciting moment of hatching finally arrives. This is a critical period, and the right preparations are essential for success. Let’s explore how to ensure a smooth hatching process and give your new quail chicks the best possible start.
Recognizing Normal Hatching vs. Struggles
Hatching can be a messy and somewhat lengthy process. Knowing what’s normal, and when to step in, is key to helping your chicks thrive. Quail chicks typically pip (make a small hole) and then zip (crack the shell open) before fully emerging. This can take several hours, so patience is vital.
For instance, a chick might rest for several hours between pipping and zipping. This is perfectly natural, so avoid interfering unless the chick seems distressed or hasn’t made progress after a considerable amount of time.
When to Assist (and When Not To)
It’s tempting to help struggling chicks, but interfering too soon can be harmful. Only assist if the chick has been pipped for over 24 hours with no further progress or signs of distress. If you must assist, carefully create a small opening in the shell near the air cell, being careful to avoid any blood vessels. However, chicks that hatch on their own are generally stronger and healthier.
This means allowing natural hatching, whenever possible, results in more robust birds.
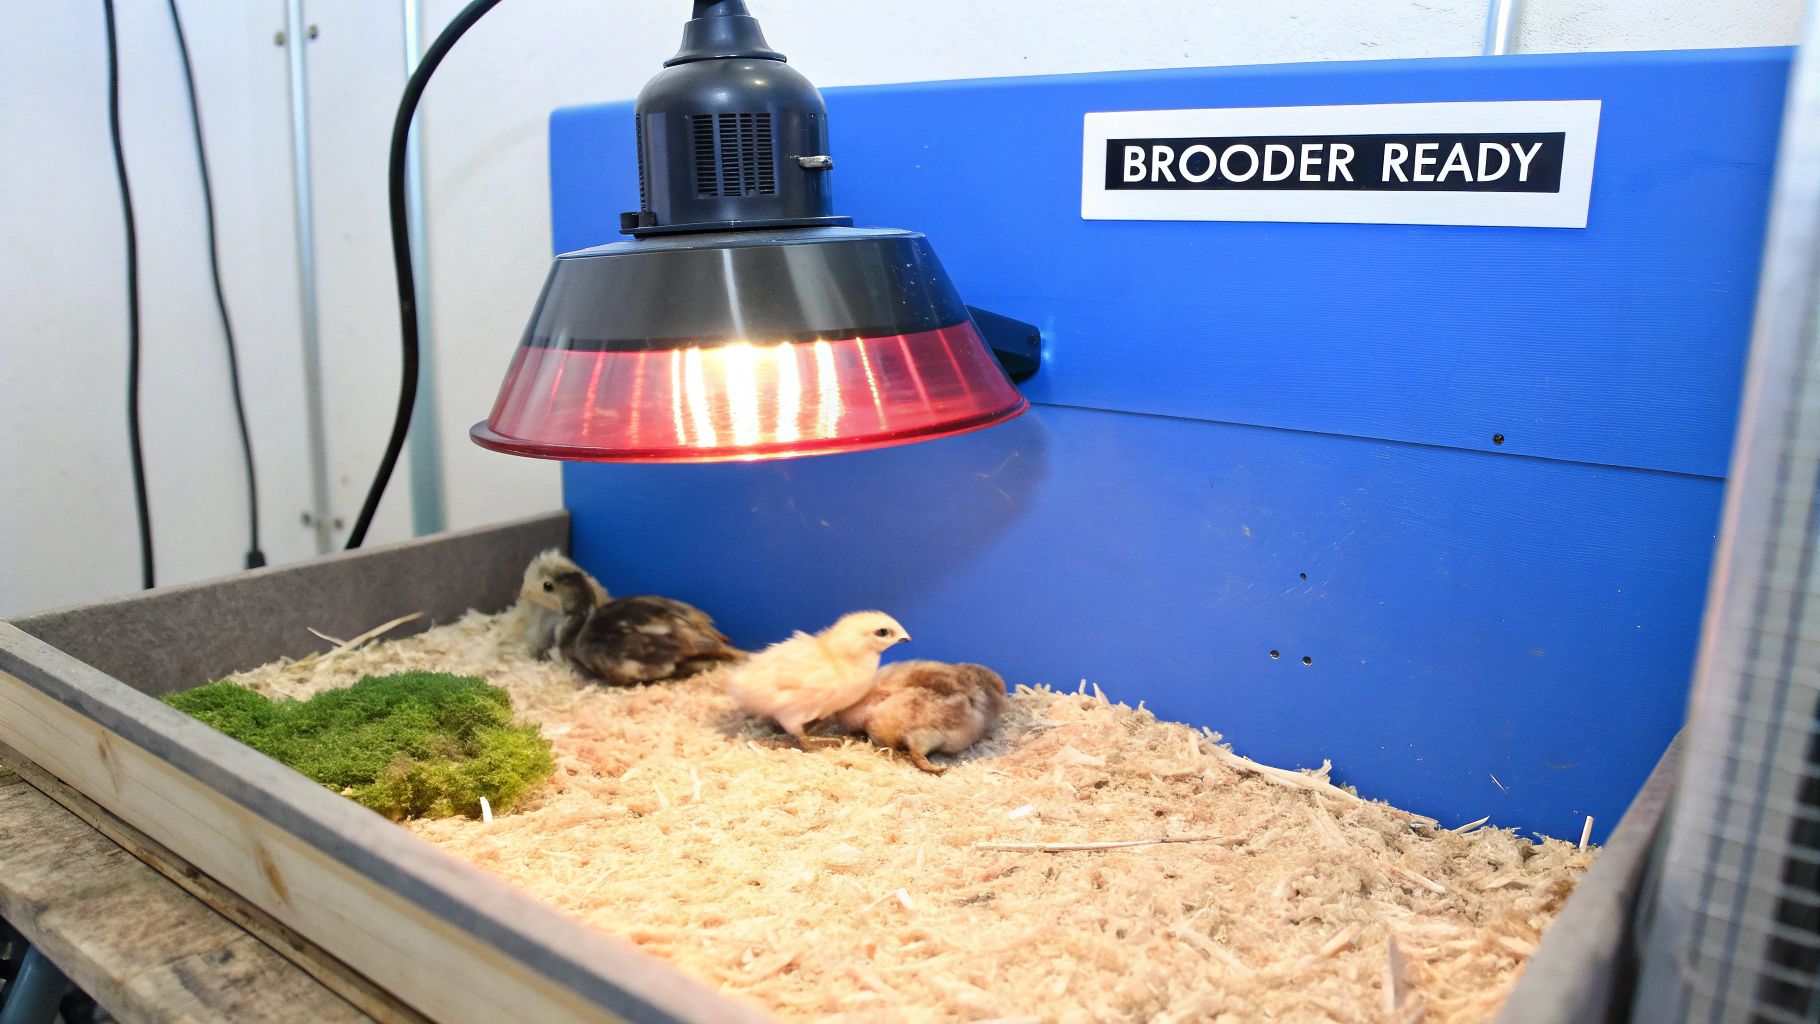
Preparing the Perfect Brooding Environment
Once hatched, the chicks need a warm, safe, and comfortable brooding area. This specialized setup should cater to the specific needs of quail chicks, which are different from other poultry. Temperature control is particularly important for these tiny, delicate birds.
A temperature gradient within the brooder allows chicks to regulate their own body temperature. A warmer area, around 35°C (95°F), provides a heat source, while a slightly cooler area allows them to move away if they get too warm. A heat lamp positioned at one end of the brooder can achieve this.
Bedding and Feeding Best Practices for Quail Chicks
Choosing the right bedding is crucial for chick health. Avoid slippery surfaces like newspaper, which can lead to spraddle leg, a condition that prevents chicks from walking properly.
Instead, choose absorbent bedding from UK suppliers like Aubiose Hemp Bedding or wood shavings. These provide good grip and absorb droppings, maintaining a hygienic environment.
Proper feeding is also essential for healthy growth. Start your chicks on a high-protein game bird starter crumble, available at most UK agricultural supply stores. Ensure fresh water is always available in shallow dishes, adding marbles or small stones to prevent drowning.
Common Health Challenges and Interventions
Newly hatched quail chicks are susceptible to certain health issues. Early identification allows for prompt intervention, increasing their survival rate.
Pasting up, where droppings stick to the chick’s vent, is a common problem and can be fatal. Gently cleaning the affected area with warm water usually resolves this.
Also, watch for signs of chilling, which can occur if the brooder temperature is too low. Chilled chicks appear huddled and lethargic. Increase the brooder temperature immediately and ensure they have access to the heat lamp.
By understanding the details of hatching and early chick care, you can give your quail chicks the best possible start, ensuring healthy development and a thriving flock.
Troubleshooting and Perfecting Your Process
Incubating quail eggs brings a unique sense of satisfaction, but it’s not always straightforward. Even experienced breeders in the UK face occasional hurdles. The real key to success is learning from each hatch, celebrating the victories and understanding the setbacks. This section explores common incubation problems and provides practical solutions to help you refine your process and boost those hatch rates.
Common Incubation Issues in the UK and How to Solve Them
Inconsistent humidity is a frequent challenge for UK quail breeders. Coastal areas often have high humidity, while inland regions can be quite dry. This makes maintaining the ideal humidity range for quail egg incubation – typically 45-55% for the first 14 days, rising to 65-70% during hatching – tricky.
This means relying solely on your incubator’s built-in humidity control may not be enough. Consider a humidifier during dry spells, or a dehumidifier in more humid climates. Regularly checking humidity with a separate hygrometer is vital for making necessary adjustments.
Another common issue is temperature fluctuation, particularly in older houses or poorly insulated outbuildings. Quail eggs are sensitive to these changes, so even small variations can affect development.
Investing in a quality incubator with good insulation can greatly reduce this problem. Positioning the incubator away from drafts, direct sunlight, and exterior walls helps stabilize the temperature. A stable surface, free from vibrations, is also recommended for consistent temperature distribution.
Hatch Analysis: Learning from Every Experience
A hatch analysis after each incubation cycle is a powerful tool for improvement. This involves examining both hatched and unhatched eggs to identify any recurring issues.
- Unhatched Eggs: Check unhatched eggs by candling or carefully cracking them open. Look for developmental signs like blood vessels or a partially formed embryo. This helps determine whether the issue was infertility, early embryonic death, or late-stage mortality.
- Hatched Chicks: Observe the health and vigor of the hatched chicks. Weak or deformed chicks can indicate problems with incubation temperature, humidity, or egg turning.
Keeping a detailed incubation logbook is incredibly helpful. Record essential data like temperature, humidity, turning frequency, and candling observations. This information can reveal trends and pinpoint problem areas.
Fine-Tuning Your Process for Exceptional Results
Successful quail incubation isn’t just about an “okay” hatch rate—it’s about striving for excellence. Often, small changes make a big difference.
- Egg Collection Practices: Collect eggs regularly, several times a day if possible, to minimize exposure to temperature changes and bacteria. Store collected eggs pointy end down in a cool, dry spot, ideally between 8-12°C (45-55°F).
- Incubator Placement: Think carefully about incubator location. Avoid areas with extreme temperatures, drafts, or vibrations. A stable environment is crucial for maintaining consistent conditions inside the incubator.
For instance, placing the incubator near a window might seem convenient, but direct sunlight can overheat the eggs. Similarly, a spot near a frequently used door can expose the eggs to drafts and temperature fluctuations.
By regularly analyzing your hatches, addressing potential issues, and making the necessary adjustments, you can steadily improve your hatch rates and ensure a healthy, thriving quail flock. Moving your success rate from “acceptable” to “exceptional” is an ongoing process of learning and refinement.
Ready to begin your quail-hatching journey? HatchingEggs.eu offers premium hatching eggs from various quail breeds, sourced from carefully selected breeding stock. Visit HatchingEggs.eu today and hatch your dreams with confidence.
Article created using Outrank