


Understanding Your Complete Chicken Egg Development Journey
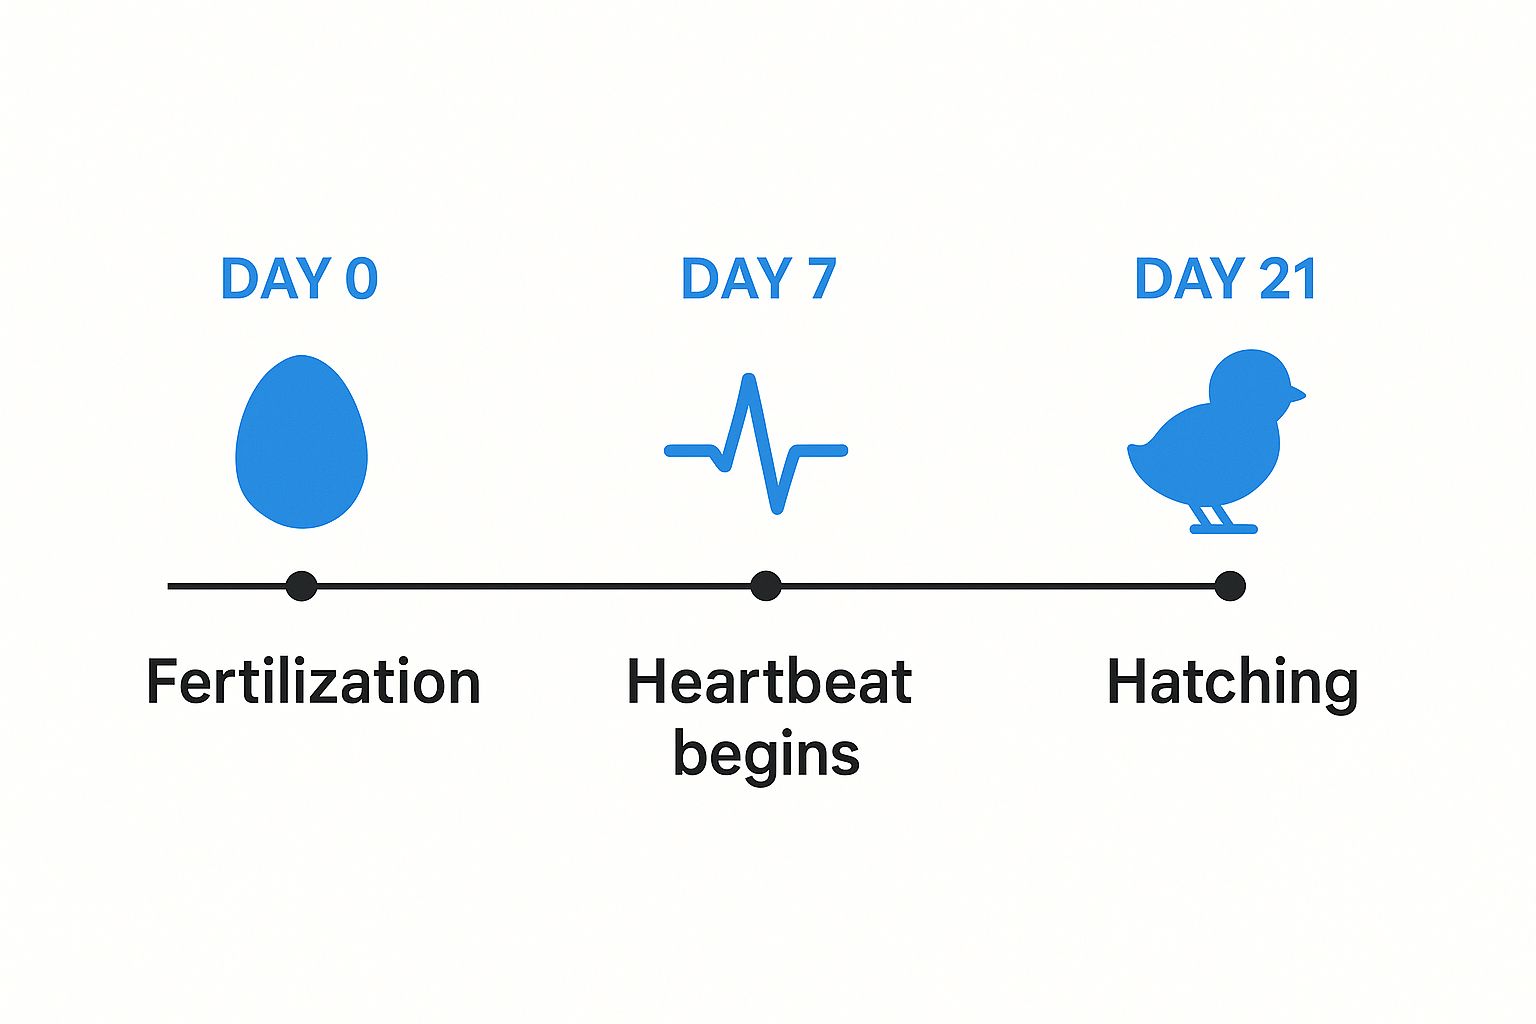
This infographic illustrates the key stages of a chicken egg’s development, from fertilization to hatching. The entire process takes just 21 days, a remarkably short time for a single cell to transform into a chick. Understanding each step in this rapid development is essential for successful hatching. For a deeper dive into hatching eggs, check out this resource: What are hatching eggs?
The journey begins inside the hen’s oviduct, where fertilization typically happens within 15 minutes of the yolk’s release. This moment marks Day 0 of development. The newly fertilized egg, called a zygote, begins dividing rapidly, setting the stage for the embryo’s growth.
The initial few hours are crucial. After about five hours, the zygote enters a period of rapid cell division. As the egg moves through the oviduct, the single cell multiplies exponentially. Just four hours later, upon reaching the uterus, the developing embryo has already grown to 256 cells. This rapid growth showcases the amazing biological processes at work.
From fertilization to laying takes approximately one day. The remaining 20 days of development happen during the incubation period, either under a hen or in a hatchery. This period and its precise biological timeline are critical aspects of chicken egg development, especially within the UK poultry industry. A hen’s egg requires about 21 days of incubation under optimal conditions. This timeframe serves as a crucial benchmark in UK hatcheries, allowing for careful monitoring and efficient production. For more detailed statistics, see: United Kingdom Poultry and Poultry Meat Statistics
The Importance of Understanding Chicken Egg Development
Understanding chicken egg development is vital for any poultry keeper, especially those managing hatcheries. This knowledge enables early identification of normal embryo growth and any potential abnormalities, which helps minimize mortality rates and maximize egg production. Recognizing the timing of each stage allows for early detection of potential problems, ensuring optimal chick health and viability.
Knowing the intricacies of each developmental stage empowers breeders to make informed decisions, ultimately improving hatch rates and contributing to the overall health of their flocks. This knowledge is essential whether you manage a large commercial operation or a small backyard flock.
The following table provides a more detailed look at the 21-day incubation period. It outlines the key developmental milestones and critical requirements for each day.
Chicken Egg Development Timeline by Day
A comprehensive breakdown of key developmental milestones throughout the 21-day incubation period
| Day | Developmental Stage | Key Changes | Critical Requirements |
|---|---|---|---|
| 1 | Early Embryo Development | Cell division and tissue differentiation begin | Consistent temperature and humidity |
| 4 | Blood Islands Form | Circulatory system begins to develop | Proper ventilation |
| 7 | Limb Buds Appear | Wings and legs start to form | Turning eggs regularly |
| 10 | Beak and Egg Tooth Develop | Embryo begins to take shape | Maintaining stable incubation environment |
| 14 | Feathers Start to Form | Embryo becomes more bird-like | Consistent temperature and humidity |
| 18 | Embryo Positions for Hatching | Chick prepares to break out of the shell | Increased humidity to soften shell |
| 21 | Hatching | Chick emerges from the shell | Minimal disturbance during hatching |
This table highlights the significant changes that occur throughout incubation. From the initial cell division to the development of vital organs and features, each day brings the embryo closer to hatching. Providing the proper environment is crucial for successful development during each of these stages.
Early Development: Days 1-7 Foundation Building

The first week of a chick’s development within the egg is truly remarkable. In just seven days, the embryo transforms from a single cell to a complex organism, complete with a beating heart. This period is crucial in the chicken egg development stages, establishing the foundation for all subsequent growth. It’s also the most sensitive time in the entire 21-day incubation process.
The First 24 Hours: From Zygote to Blastoderm
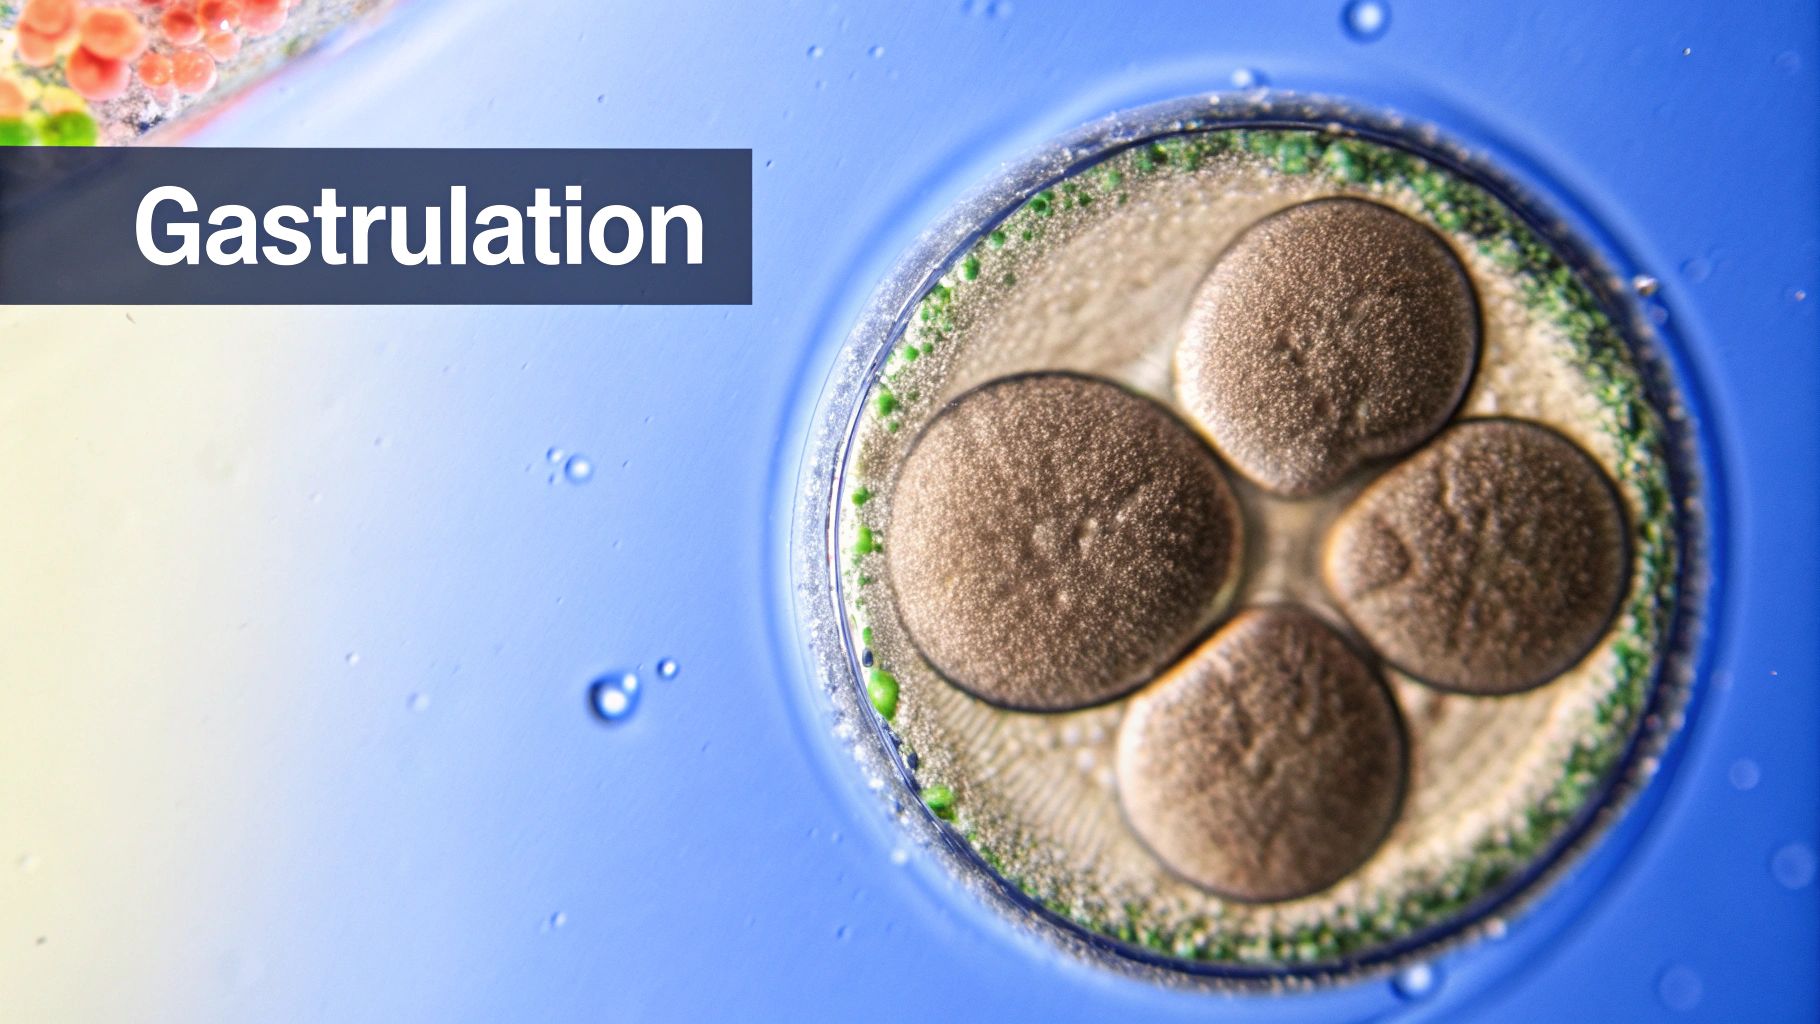
The first 24 hours are a flurry of activity. The fertilized egg, known as the zygote, undergoes rapid cell division. This process, called cleavage, creates a cluster of cells known as the blastoderm. This cluster rests atop the yolk, serving as the blueprint for the developing chick. Even at this early juncture, the chick’s basic body plan is being established.
Day 3: The Heart Takes Flight
By day three, a major milestone is reached: the heart begins to beat. This tiny organ signifies the start of the circulatory system, which will deliver vital nutrients and oxygen to the growing embryo. This early heart development highlights the rapid growth occurring during these initial chicken egg development stages.
Days 4-7: Neural Tube and Vital Organs
Between days four and seven, the primitive streak appears. This line of cells marks the beginning of the nervous system. The neural tube, which will eventually develop into the brain and spinal cord, forms from this primitive streak. It’s like building the foundation and then the walls of the chick’s central command center. Other vital organs also begin to form during this period, including the liver, kidneys, and digestive system, all essential for the chick’s survival.
Environmental Control: A Balancing Act
The first week is not just a time of rapid growth, but also a period of significant vulnerability. Even minor fluctuations in temperature and humidity can be detrimental. Maintaining the correct temperature, around 37.5°C, and humidity, around 45-50%, is vital. Consistent monitoring and precise incubator control are therefore essential. You might find helpful advice in this article: Getting Started with Hatching Eggs. These environmental factors play a key role in the delicate chicken egg development stages, ensuring optimal growth conditions.
Candling: An Early Glimpse Inside
Candling, the practice of shining a bright light through the egg, becomes especially useful during this first week. This allows experienced breeders to check for early development and identify potential issues. For example, a clear egg after several days could indicate infertility, while a dark ring around the yolk could suggest early embryonic death. Early detection allows breeders to address problems quickly and maximize their hatch rates. This first week sets the stage for the remaining stages of development, where the embryo continues its incredible journey toward hatching.
Mid-Development: Days 8-14 Rapid Growth Phase
The first week of a chick’s development sets the stage, but days 8-14 are truly remarkable. This phase, occurring within the egg, is a period of rapid transformation where the embryo begins to look like a chick. Witness incredible changes as wing and leg buds emerge, eyes begin to form, and essential internal organs rapidly develop.
The Embryo Takes Shape: Limb Development and Organ Growth
Between days 8 and 10, tiny limb buds appear, the precursors to wings and legs. Imagine, the beginnings of those future wings and drumsticks are already present! At the same time, the embryo’s eyes become more noticeable. This period is crucial for organogenesis, the process of organ formation, with the liver, kidneys, and digestive system beginning to develop. These organs will be vital for the chick’s survival after hatching.
The Yolk Sac: Fueling Rapid Growth
The yolk sac, attached to the embryo, provides crucial nutrients. It serves as the chick’s main food source throughout these middle stages of development. Think of the yolk sac as a self-contained lunchbox, providing everything the developing chick needs for its rapid growth spurt.
Stability and Continued Care
Days 8-14 are generally the most stable period of incubation. However, consistent care remains important. Proper egg turning is essential during this phase to prevent the embryo from sticking to the membrane. This ensures proper development and helps to avoid deformities. You might be interested in learning more about egg storage: Can hatching eggs be refrigerated?
Developmental Checkpoints and Future Health
Key developmental milestones occur during this period. Observing these markers offers valuable insights into the chick’s health. The development of feather follicles and continued limb growth are positive indicators. Any deviation from expected growth patterns could suggest potential issues.
Environmental Factors: Maintaining the Ideal Balance
Environmental factors, such as temperature and humidity, remain crucial. Maintaining the correct temperature, ideally around 37.5°C (99.5°F), and humidity levels between 50-55%, are essential. These conditions ensure healthy development and prevent problems like dehydration. The incubator acts like a carefully climate-controlled nursery, providing the optimal environment.
Identifying Signs of Healthy Progress
Careful monitoring reveals subtle signs of healthy progress. These include the appearance of feather tracts, the development of toes and claws, and the increasing visibility of the beak. These visual cues confirm that development is on track. Conversely, any signs of abnormal development, such as stunted growth or misshapen limbs, warrant further attention.
These middle stages of chicken egg development showcase the wonders of nature. The transformation from limb buds to functioning organs is remarkable. By understanding these processes and providing the ideal environment, we can support the continued healthy development of our future chicks, preparing them for the final stages of incubation and hatching.
Final Preparation: Days 15-21 Getting Ready To Hatch
The final week of a chicken egg’s incubation is a critical time. The developing chick undergoes significant transformations as it prepares for life outside the shell. These changes are essential for its survival and future thriving.
Yolk Absorption and Down Feather Development
Between days 15 and 18, the chick absorbs the remaining yolk sac. This yolk provides vital nutrients that power the last stages of development. It also gives the chick energy reserves for its first few days after hatching, similar to a hiker’s last snack before a challenging climb. Down feathers also start to grow, providing much-needed insulation and temperature regulation. This prepares the chick for a world outside the egg’s consistent environment.
Internal Pipping and Initial Breaths
Around day 19, the chick engages in internal pipping. This involves puncturing the inner membrane of the air cell, located at the blunt end of the egg. This action allows the chick to take its first breaths of air. It’s a monumental moment in the chick’s development, comparable to a diver surfacing for air after a long underwater expedition. This is the chick’s first experience with atmospheric oxygen.
Hormonal Shifts and Hatching Behavior
Intricate hormonal changes trigger the chick’s hatching behavior. These shifts signal the chick to start breaking free from the eggshell. The chick also positions itself for hatching, usually with its beak tucked under its right wing, facing the blunt end of the egg. This positioning, much like a runner poised in the starting blocks, is crucial for a successful emergence.
The Critical Role of Correct Positioning
Correct positioning is paramount for the chick’s survival. If improperly positioned, the chick may struggle to break through the shell and hatch. This can result in death inside the egg, a devastating outcome after 20 days of development. Research into chicken embryo development highlights the importance of incubation conditions. For example, studies have shown that eggs incubated under standard conditions have corticosterone levels around 8.19 ng/ml. Managing these physiological factors is essential for hatcheries to minimize embryo mortality. More information about this research is available: Learn more about embryo development and incubation conditions.
Environmental Influences and Hatching Success
Environmental factors during the final week of incubation significantly impact hatch rates. Maintaining the correct temperature and humidity is crucial. For instance, low humidity can toughen the eggshell membrane, making it difficult for the chick to pierce. Conversely, high humidity can result in “sticky chick syndrome,” where the chick adheres to the membrane.
Recognizing Signs of Impending Hatching
Experienced hatchery managers look for specific cues that hatching is near. These include increased chirping from inside the egg, slight egg movements, and even small cracks appearing on the shell. These are the telltale signs that the hatching day is approaching.
Intervention Techniques
If complications arise during hatching, intervention can sometimes save chicks. If a chick struggles with internal pipping, carefully creating a small opening in the air cell membrane can be helpful. However, only experienced individuals should attempt these interventions, as improper handling can harm the chick.
Understanding the complexities of these final stages is essential for optimal hatch rates and healthy chicks. By monitoring environmental factors and recognizing the subtle signs of imminent hatching, you can greatly improve your chances of success. This knowledge, combined with appropriate intervention techniques when necessary, can determine the difference between a successful hatch and a disappointing outcome.
Environmental Mastery For Successful Development
Creating the perfect environment is crucial for successfully hatching chicken eggs. Temperature, humidity, ventilation, and turning are essential elements for a healthy hatch. This section explores how these factors change throughout the 21-day incubation period and why precise control is so important.
Temperature: The Goldilocks Factor
Maintaining the correct temperature is critical during incubation. During the first week, aim for 37.5°C. Even small fluctuations can disrupt early development, potentially leading to abnormalities or embryonic death. This is the most sensitive period, making precise temperature control vital.
Think of the incubator as a very precise oven. Even a small temperature variation can significantly impact the final result. Precise temperature regulation is key to a successful hatch.
Humidity: Preventing Dehydration and Sticky Chick Syndrome
Humidity prevents the developing chick from dehydrating inside the egg. This is especially important in the final days. Too little humidity can make the membrane tough and difficult for the chick to pierce.
Too much humidity can cause “sticky chick syndrome”, where the chick adheres to the membrane and can’t break free. Aim for 50-55% humidity during the mid-stages of development. Increase this to 65-70% during the final days before hatching.
Ventilation: The Breath of Life
Ventilation provides essential oxygen for the growing embryo. Stagnant air restricts development and can be fatal. Ensuring adequate air circulation within the incubator is vital for a healthy supply of oxygen and removal of carbon dioxide.
Without fresh air, the embryo will effectively suffocate. Proper ventilation is paramount for successful development. It mimics the natural conditions a hen would provide.
Egg Turning: Simulating Nature’s Touch
In nature, a hen regularly turns her eggs. This distributes heat evenly and prevents the embryo from sticking to the membrane. Mimicking this behavior in an incubator is crucial. During the first 18 days, turn the eggs several times a day, either automatically or manually. This simple action promotes healthy development. Learn more in our article about whether hatching eggs can get cold.
Monitoring and Troubleshooting: The Keys to Success
Consistent monitoring is essential throughout the incubation process. Regularly check temperature and humidity levels to ensure they remain within the optimal range. Invest in reliable thermometers and hygrometers designed specifically for incubators.
Troubleshooting is a normal part of incubation. Identifying and resolving issues quickly is essential for a successful hatch. Accurate readings from quality instruments help you address any fluctuations promptly.
Equipment Recommendations: Ensuring Consistent Performance
Invest in a quality incubator with precise temperature and humidity control. Look for features like automatic turning and alarms that alert you to fluctuations. Regular maintenance, including cleaning and calibration, will ensure consistent and reliable performance.
The following table outlines the optimal incubation conditions for each development stage. Understanding these specific requirements helps ensure a successful hatch.
Optimal Incubation Conditions by Development Stage
| Development Stage | Temperature (°C) | Humidity (%) | Turning Frequency | Special Requirements |
|---|---|---|---|---|
| Days 1-7 | 37.5 | 50-55 | Several times daily | Maintain stable temperature |
| Days 8-14 | 37.5 | 50-55 | Several times daily | Monitor for proper air circulation |
| Days 15-18 | 37.5 | 55-60 | Several times daily | Begin increasing humidity |
| Days 19-21 | 37.2 | 65-70 | Stop turning on day 18 | Ensure adequate humidity for hatching |
This table summarizes the key environmental factors for each stage of chick development. Maintaining these conditions increases the likelihood of a healthy and successful hatch. By mastering these environmental factors, you create the ideal setting for your developing chicks, maximizing your chances of a successful hatch. Understanding these specific requirements transforms guesswork into a confident, scientific approach.
Troubleshooting When Things Go Wrong
Even with the utmost care, issues can arise during the chicken egg development stages. This troubleshooting guide covers common problems, their potential causes, and preventative measures to help you navigate the incubation period successfully.
Early Embryo Mortality
One of the most frustrating setbacks is early embryo mortality, often occurring within the first week. Several factors can contribute to this, including genetic defects, bacterial contamination, and incorrect incubator temperature. Regular temperature checks are vital, ensuring a consistent 37.5°C.
A sudden temperature drop can halt development, and conversely, a temperature spike can be just as damaging. Consistent monitoring is key to preventing early embryo mortality.
Malformations and Temperature Fluctuations
Temperature fluctuations can also lead to malformations in developing chicks, ranging from skeletal abnormalities to organ defects. Maintaining a stable incubator environment is crucial throughout the entire 21-day incubation period.
Think of it like baking: inconsistent oven temperatures can result in a poorly risen or burnt cake. Similarly, a stable temperature is essential for proper chick development.
Humidity-Related Issues: Sticky Chick Syndrome
Incorrect humidity levels present another set of challenges. Low humidity can create a tough membrane, hindering hatching, while high humidity can result in sticky chick syndrome, preventing the chick from breaking free. Maintaining correct humidity is particularly critical during the final days of incubation.
Excessive moisture can be just as harmful as insufficient moisture. For more information on humidity and hatching, check out this resource: Can hatching eggs get wet? Proper humidity control is paramount for healthy chick development.
Positioning Problems and Hatching Difficulties
Even with perfect development, improper positioning inside the egg can hinder hatching. Ideally, the chick’s head should be tucked under its right wing, facing the blunt end of the egg. Malpositioning can make it difficult for the chick to break through the shell.
This is akin to trying to exit a small space facing the wrong way – it’s much easier when facing the exit. Correct positioning is crucial for a successful hatch.
Record Keeping and Continuous Improvement
Meticulous record-keeping throughout the incubation process is invaluable. Document temperature, humidity, turning frequency, any encountered problems, and the solutions implemented. This data will reveal patterns and inform improvements over time.
Tracking successes and failures allows you to refine your incubation practices, leading to higher hatch rates and healthier chicks. Analyzing your records can pinpoint specific issues and guide you towards effective solutions. This data-driven approach is a characteristic of successful breeders.
Key Takeaways
This guide offers practical advice for mastering the stages of chicken egg development. We’ll cover actionable strategies for both commercial poultry farms and backyard breeders in the UK. These insights will help improve your hatch rates, chick quality, and overall breeding program success.
Understanding the 21-Day Journey: From Fertilization to Hatch
The chicken egg development process takes about 21 days. It begins with fertilization inside the hen. Rapid cell division transforms a single fertilized cell into a complex embryo within hours. This early development sets the stage for the incubation period.
Early Development (Days 1-7): This is the crucial foundation-building phase. The embryo’s heart begins to beat, vital organs start forming, and the neural tube develops, which later becomes the brain and spinal cord. Precise temperature and humidity control are essential during this period.
Mid-Development (Days 8-14): This stage is characterized by rapid growth. Limb buds appear, eyes develop, and internal organs take shape. The yolk sac provides essential nutrients, and regularly turning the eggs becomes critical.
Final Preparation (Days 15-21): The chick absorbs the remaining yolk sac, down feathers develop for temperature regulation, and internal pipping occurs, allowing the chick to breathe. Correct positioning within the shell is vital for a successful hatch.
Mastering Incubation Environment: Temperature, Humidity, and Ventilation
Environmental control is essential during incubation. Precise temperature and humidity levels are crucial for successful development.
Temperature: Maintain a consistent temperature of approximately 37.5°C during most of the incubation period. Even small fluctuations can have significant negative impacts.
Humidity: Proper humidity prevents dehydration and “sticky chick syndrome.” Adjust humidity throughout the incubation process, increasing it in the final days before hatching.
Ventilation: Ensure good air circulation within the incubator to provide enough oxygen for the developing embryos. Stagnant air can hinder development and increase mortality.
Egg Turning: Regular turning simulates a hen’s natural behavior, preventing the embryo from sticking to the membrane and promoting even heat distribution.
Troubleshooting and Problem Solving: Identifying and Addressing Issues
Even with careful planning, problems can occur. Understanding common issues can save your hatch.
Early Embryo Mortality: Causes can include genetic issues, bacterial contamination, or incorrect incubation temperatures. Regular monitoring is crucial for early detection and intervention.
Malformations: Temperature fluctuations during incubation can lead to developmental abnormalities. A stable incubator environment is key to preventing these issues.
Sticky Chick Syndrome: High humidity in the final days can cause the chick to stick to the membrane, hindering hatching. Careful humidity control is essential.
Positioning Problems: Incorrect positioning inside the egg can prevent the chick from hatching, even if development is otherwise normal.
Quality Control Measures: Monitoring for Success
Implementing quality control measures is vital throughout incubation.
Candling: Regularly candling eggs allows you to monitor development and identify potential problems early on.
Record Keeping: Detailed records of temperature, humidity, turning frequency, and any observed issues can help identify patterns and improve your process.
The Economic Benefits of Understanding Chicken Egg Development
By understanding chicken egg development, you can improve both hatch rates and chick quality. This directly impacts the success of backyard and commercial poultry operations, translating to higher chick yields and better economic returns.
Emerging Technologies and Traditional Methods
While traditional incubation methods are still effective, new technologies offer enhanced control and monitoring. These advancements can optimize hatch rates and contribute to more sustainable practices, particularly for larger operations.
Animal Welfare and Sustainable Practices
Understanding chicken egg development promotes better animal welfare. Optimal incubation conditions reduce embryonic mortality and promote healthy chick development, resulting in stronger chicks. Efficient incubation practices also contribute to sustainable poultry production.
Building Confidence in Your Poultry Breeding Program
Mastering the stages of chicken egg development empowers you to make informed decisions, troubleshoot problems effectively, and achieve consistent results. This builds confidence in your ability to produce healthy chicks, whether you’re an experienced breeder or just starting your backyard flock.
Are you ready to improve your hatching success? Explore our range of high-quality hatching eggs at HatchingEggs.eu and experience the difference quality and expertise can make in your poultry breeding journey.