


Understanding Incubation Humidity Fundamentals
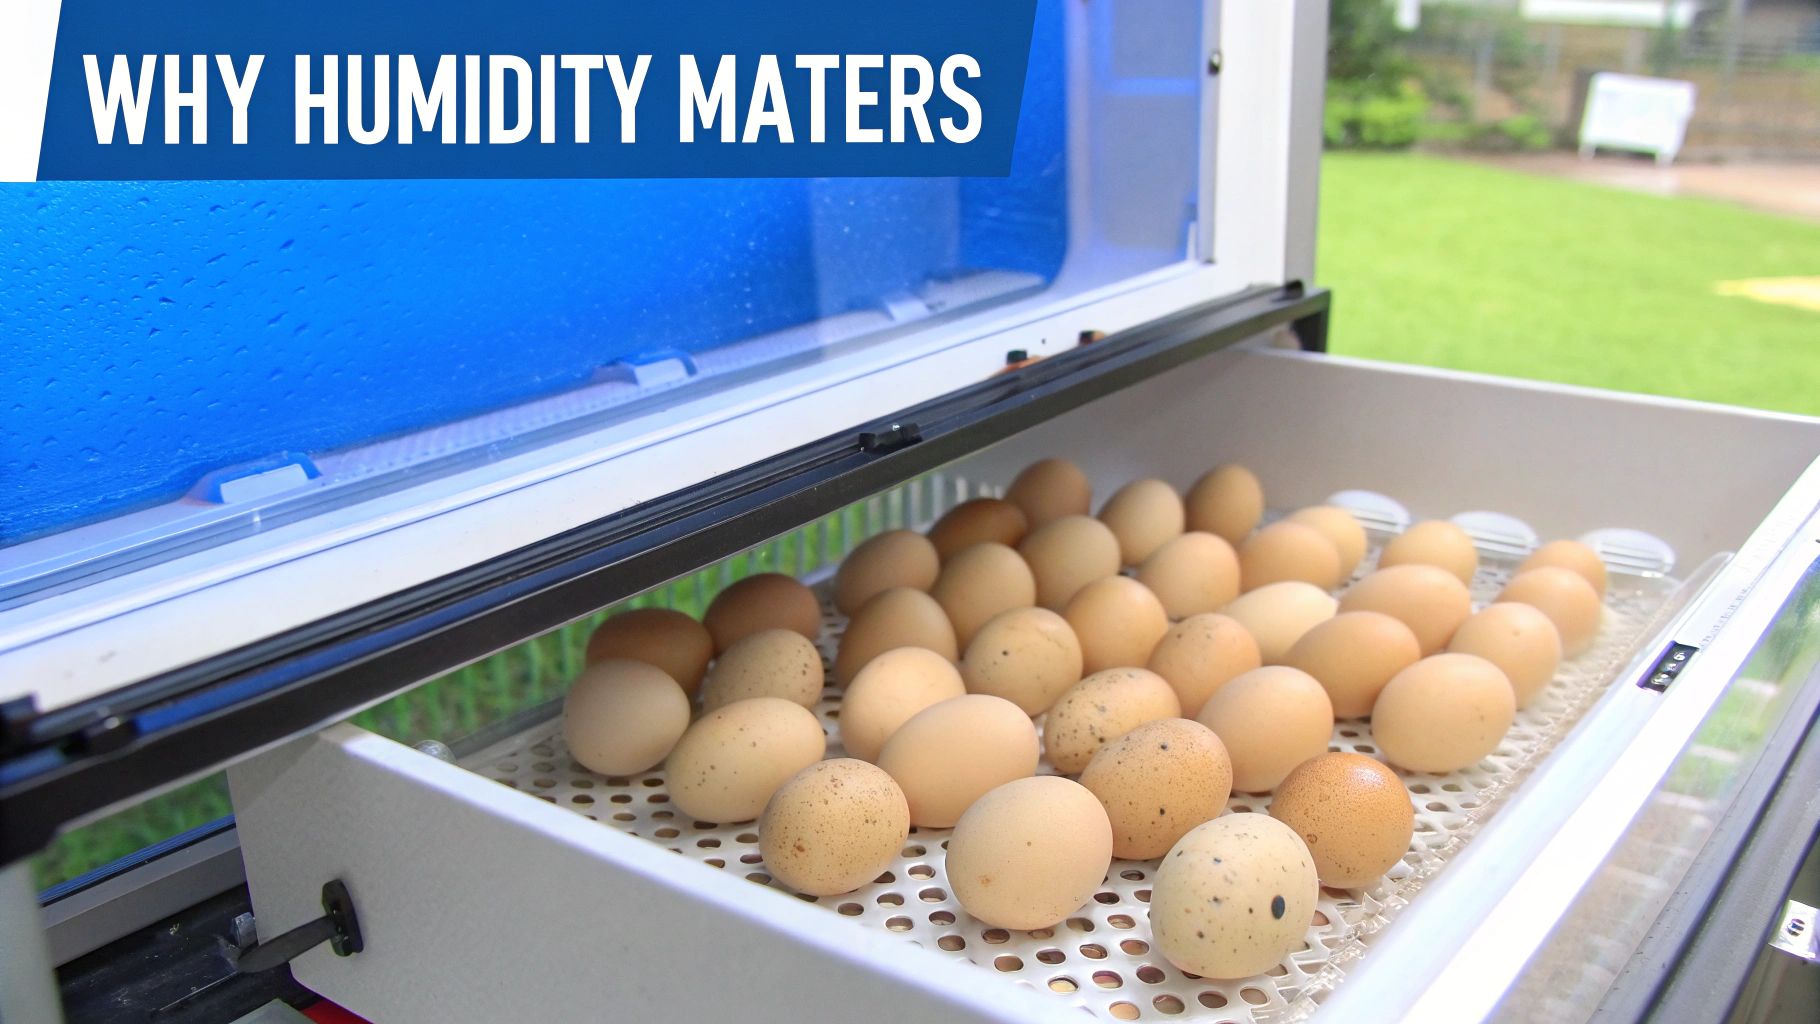
Let’s explore the vital role humidity plays in successfully incubating poultry eggs, particularly here in the UK. Proper humidity isn’t simply about adding water. It’s about achieving a precise balance that influences every stage of embryonic development, from initial cell division to the formation of vital organs. Understanding this delicate balance is key to maximizing your hatch rate.
The Science of Moisture and Eggshell Permeability
Think of an eggshell like a breathable barrier. It’s a semi-permeable membrane that allows the exchange of gases and water vapor, both essential for the developing chick inside. The incubation humidity within your incubator directly impacts this exchange. Higher humidity levels slow down moisture loss from the egg, while lower humidity accelerates it. Grasping the concept of eggshell permeability is crucial for successful incubation.
Water Vapor: The Engine of Embryonic Development
Water vapor does more than just prevent the egg from drying out. It’s a fundamental component of embryonic development, playing a crucial role in cell division and the transportation of nutrients within the growing embryo. Furthermore, it helps regulate the temperature inside the egg, shielding the developing chick from potentially harmful fluctuations. Incorrect humidity levels can lead to developmental issues and even embryonic death.
Working With Natural Processes
Successful incubation is about working with the natural processes of embryonic development, not against them. Eggs naturally lose moisture throughout incubation. This weight loss is essential for the proper development of the air cell, which provides the chick with its first breath after hatching. Maintaining the correct incubation humidity ensures this air cell develops at the optimal rate, whether you’re hatching chickens, ducks, or quail.
The Importance of Humidity Control
Imagine baking a cake without precise temperature control. The results would be less than ideal. Incubation humidity is just as crucial. It dictates the rate of moisture loss from the egg, directly influencing the development of the air cell and the overall health of the chick. For a successful hatch, you must control this process, providing the best possible environment for the developing embryo throughout the entire incubation period. Mastering incubation humidity is a critical step towards achieving consistently high hatch rates and healthy chicks for your UK flock.
Precision Humidity Levels That Actually Work
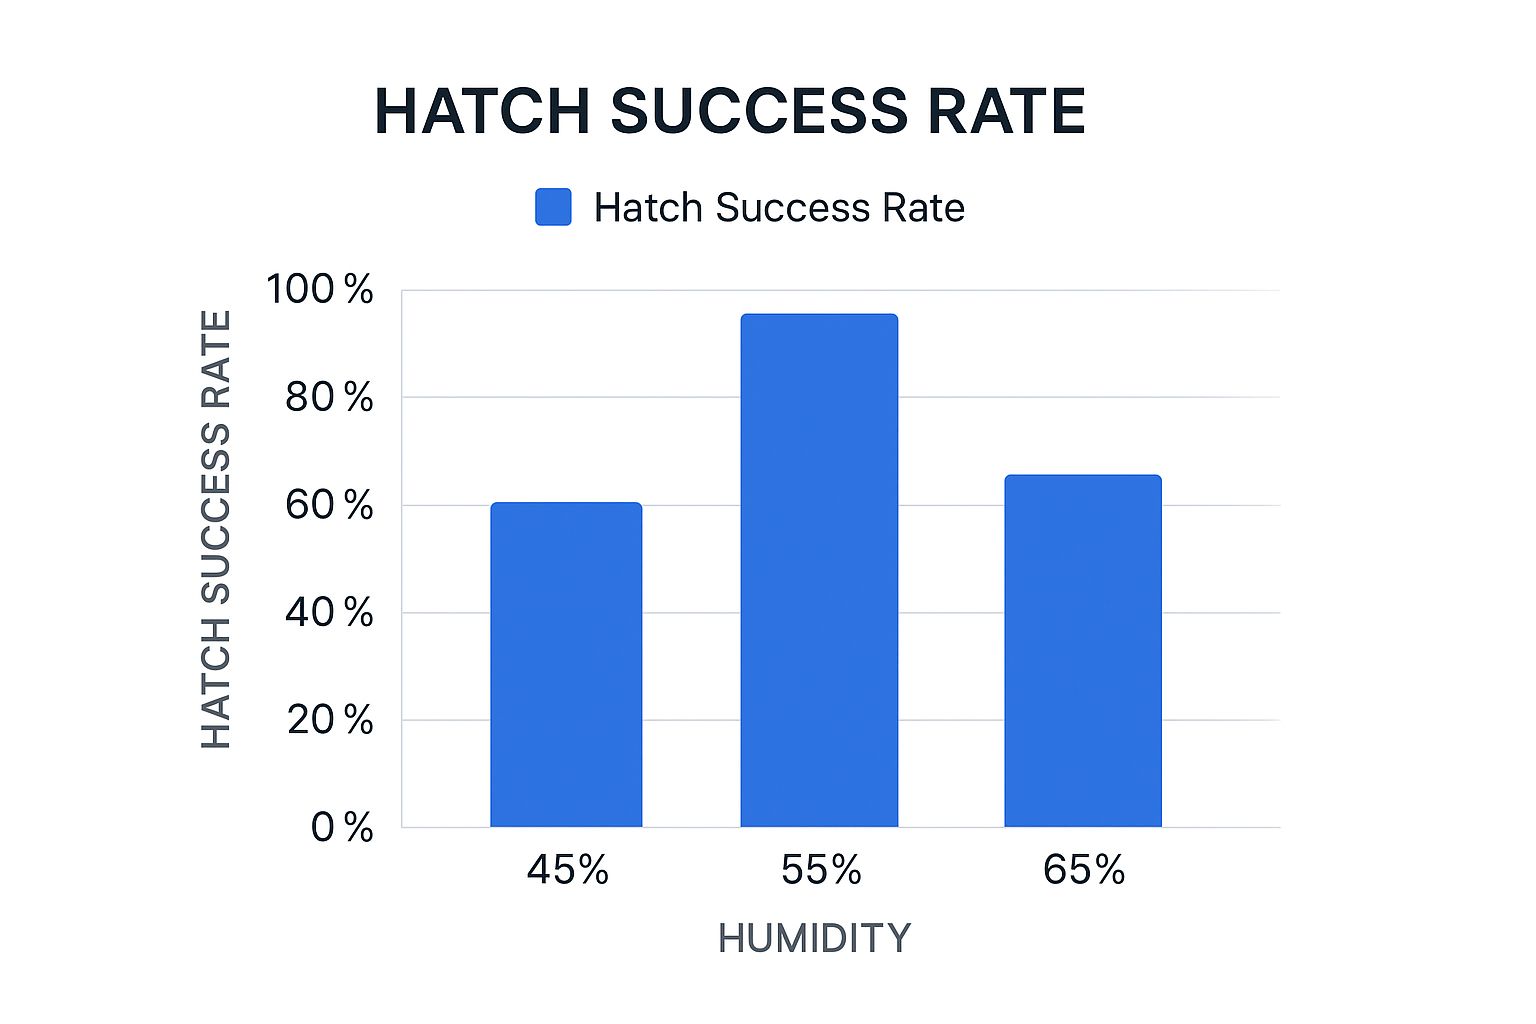
This infographic illustrates how humidity affects your hatch rate. Notice how 55% humidity yields significantly better results compared to 45% or 65%. Maintaining correct incubation humidity is essential for successful hatching—it’s all about finding the sweet spot.
Successfully hatching chicks in the UK depends on understanding humidity’s crucial role. We’ll explore the specific humidity levels needed at each stage of the process. Forget the guesswork; let’s focus on proven methods. Many experienced UK poultry keepers use a two-phase humidity approach, making careful adjustments for optimal results.
The Two-Phase Humidity Approach
This approach recognizes the embryo’s evolving needs. During the initial incubation period (the first 18 days), a relative humidity of 50% to 55% is recommended. This range helps maintain the proper moisture balance inside the egg, promoting healthy embryonic development. Correct humidity is vital for successful hatching in the UK.
Maintaining the recommended humidity during the first 18 days prevents the egg from losing too much water. This careful management is essential for healthy growth. For further reading on incubation humidity, check out this helpful resource: Learn more about incubation humidity here.
The Lockdown Humidity Boost
The second phase, called lockdown, covers the final three days. During lockdown, increase the humidity to 65% to 75%. This higher humidity prevents the membrane around the chick from drying out and sticking to the shell, a common hatching problem. It also softens the shell, making it easier for the chick to emerge. Think of it like moistening a dry sponge—it makes it more pliable.
Timing Your Humidity Adjustments
Proper timing is just as important as the humidity levels themselves. Adjusting the humidity too early or late can have a negative impact on hatch rates. Incorrect humidity in the initial period can affect air cell development, while insufficient humidity during lockdown can hinder hatching. For more information on timing, particularly with candling, this resource is helpful: When to Candle Chicken Eggs.
The table below provides a detailed humidity schedule to follow throughout the incubation process. It summarizes the recommended humidity levels and their purpose at each stage.
Incubation Humidity Schedule for UK Poultry Keepers
A detailed breakdown of optimal humidity levels throughout the 21-day incubation period
| Incubation Period | Days | Relative Humidity (%) | Purpose | Key Considerations |
|---|---|---|---|---|
| Initial Incubation | 1-18 | 50-55 | Promote healthy embryonic growth and prevent excessive water loss | Maintain consistent humidity levels within this range |
| Lockdown | 19-21 | 65-75 | Prevent membrane from drying and sticking, soften the shell for easier hatching | Increase humidity gradually to avoid stressing the chicks |
By following this schedule and carefully monitoring your incubator, you can greatly improve your hatch rates and contribute to a healthy and thriving flock.
The Hard Data Behind Humidity Success

Maintaining correct incubation humidity is vital for successful hatching. It’s not just a best practice; it’s a cornerstone of healthy chick development. Let’s explore the research that connects precise moisture management with better hatch rates. This information will empower you to make informed decisions and achieve consistent results.
The Impact of Humidity on Hatch Rates
Data from UK poultry hatcheries shows a strong link between incubation humidity and both hatchability and chick quality. Moderate humidity consistently produces the best results. This means finding the “sweet spot” for humidity is key to maximizing the number of healthy chicks.
For instance, studies show that maintaining a relative humidity around 55% during early incubation improves total and fertile hatch rates. Incubation at this level also correlates with higher chick weights at hatch, a sign of healthy development. For a deeper dive into these statistics, check out this article: Balancing CO2 and Humidity for Superior Hatch Rates and Chick Quality.
Why Moderate Humidity Wins
Both high and low humidity can negatively impact your hatch. Too much moisture hinders proper air cell development, which is crucial for the chick’s first breath. On the other hand, too little moisture can lead to dehydration and difficulty hatching. Chicks can even become stuck to the shell.
Moderate humidity provides the ideal balance, allowing for optimal moisture loss and air cell development. Learn more about chick development here: Chicken Egg Development Stages.
The Measurable Benefits of Data-Driven Incubation
By understanding the science behind humidity control, you can refine your incubation practices for greater success. This data-driven approach allows you to predict and control the incubation environment, leading to more consistent and predictable outcomes. This results in healthier chicks, higher hatch rates, and a more rewarding experience for both commercial and domestic poultry keepers in the UK.
Precise humidity control optimizes the entire process, from early embryonic development to hatching. It’s about understanding the reasons behind the methods and using that knowledge to create the perfect hatching environment.
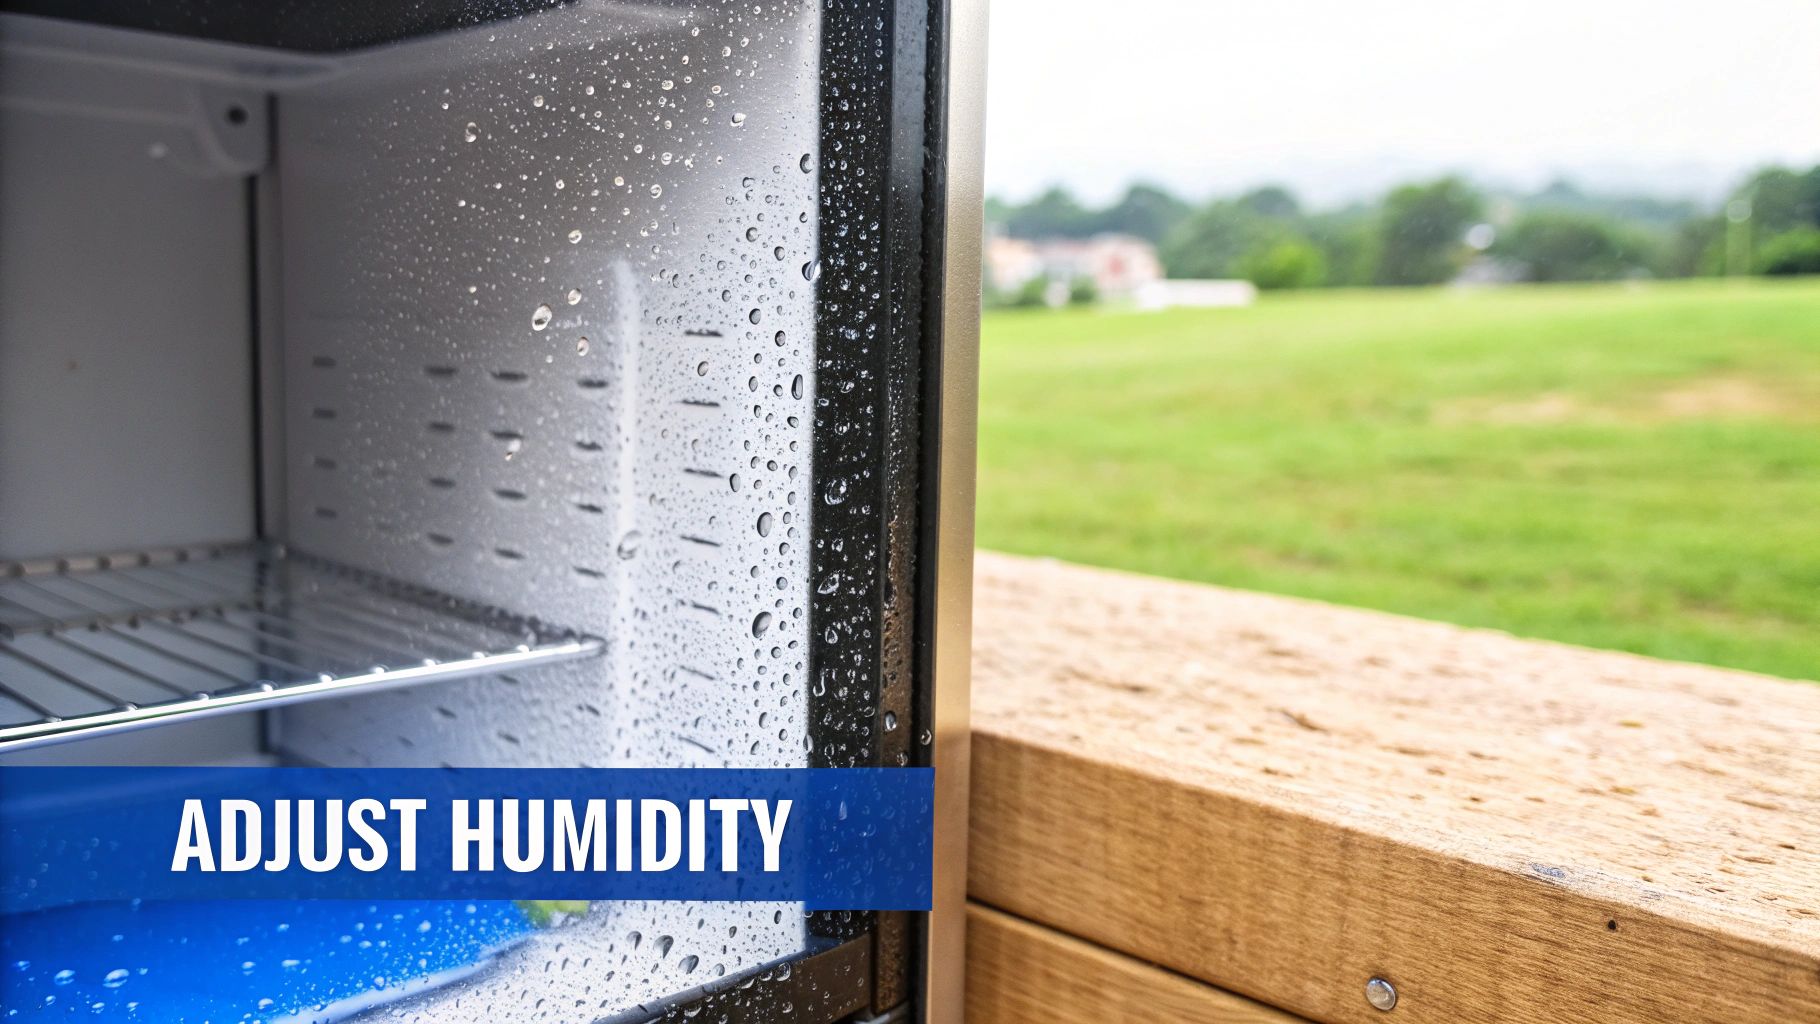
Practical Humidity Control That Works
Maintaining the right humidity inside your incubator is essential for a successful hatch, especially given the unpredictable UK climate. This section offers practical, actionable advice to help you achieve and maintain optimal humidity levels, no matter what type of incubator you use.
Humidity Control Techniques for Different Incubators
Whether you have a basic hobbyist incubator or a high-tech commercial model, consistent humidity is key. Here’s a breakdown of effective methods:
Water Pans: Most incubators include built-in water pans. The water’s surface area directly impacts humidity. Larger surface areas lead to higher humidity. Using several small pans or a single wider, shallower pan will increase humidity more effectively than a single deep one.
Wet Sponges/Towels: For a quick humidity boost, particularly during lockdown, try placing a wet sponge or towel inside the incubator. This is especially helpful in drier climates or during the colder UK months.
External Water Reservoirs: Some advanced incubators can connect to external water reservoirs, offering a continuous and automatically regulated humidity source. This avoids frequent manual refills and provides greater stability. You may want to consider an external reservoir if your incubator supports it.
Practical Tips for Increasing Humidity During Lockdown
The lockdown phase requires higher humidity. These proven methods help you achieve that crucial increase:
Water Pan Positioning: Moving water pans closer to the incubator’s heat source can increase evaporation and boost humidity. Be careful not to block airflow or create hot spots.
Adding Extra Water Pans: Adding extra small water pans during lockdown can significantly increase humidity without requiring major changes to your setup.
Wet Towel Technique: Placing a wet towel directly under (but not touching) the hatching eggs during lockdown provides a targeted humidity boost, assisting the hatching process.
You might be interested in: How to master pheasant egg incubation.
Troubleshooting Common Humidity Challenges
Here’s a quick guide to common humidity problems:
Low Humidity: Check water levels, increase the water pan surface area, or add a wet sponge or towel. Consider external factors like seasonal dryness in the UK, especially during winter, which may require extra humidification.
High Humidity: Reduce the water pan surface area, remove excess water, and ensure adequate ventilation inside the incubator. High ambient humidity, common during UK summers, can contribute to this.
Fluctuating Humidity: This can indicate unstable incubator temperature or an inadequate water supply. Maintain a stable temperature and ensure sufficient water in your pans.
Seasonal Adjustments for UK Climate
The UK’s varying climate necessitates adjustments throughout the year:
Winter: Indoor heating can cause dry conditions, requiring larger water pans or additional humidification methods.
Summer: High ambient humidity can raise incubator levels. Smaller water pans and increased ventilation may be needed.
By understanding the principles of incubation humidity and using these practical tips, you can ensure optimal conditions for your hatching eggs, maximizing your hatch rates and the health of your chicks. Consistent monitoring and small adjustments will significantly contribute to a successful and predictable hatching environment tailored to the UK’s climate.
Avoiding Costly Humidity Mistakes
Even experienced poultry breeders in the UK can encounter problems with humidity that significantly impact their hatch rates. This section explores some of the most frequent, and often expensive, mistakes in managing moisture levels during incubation and offers practical solutions to avoid them. By addressing these issues proactively, you can save money and the frustration of a disappointing hatch.
The Perils of Incorrect Incubation Humidity
Maintaining correct incubation humidity is crucial for a successful hatch. This delicate balance directly affects chick development and their ability to emerge from the egg. For instance, insufficient humidity in the early stages can disrupt the proper formation of the air cell, which is vital for the chick’s first breath. This underscores the importance of understanding the effects of both too much and too little moisture.
Inconsistent humidity throughout the incubation period can also lead to uneven chick development and a reduced hatch rate. The timing of your humidity adjustments is just as critical as the levels themselves. Excessive humidity during lockdown can drown the chicks, while insufficient humidity can cause the membranes to dry out and stick to the shell, preventing them from hatching.
Real-World Examples From UK Poultry Operations
A small poultry breeder in the UK recently experienced a substantial drop in their hatch rate. After careful investigation, inconsistent humidity, especially during lockdown, was identified as the primary cause. This breeder is not alone. Many UK poultry operations face similar challenges, often due to fluctuating ambient humidity and reliance on basic incubator equipment. For more information, read our article about whether hatching eggs can get wet.
Early Warning Signs and Corrective Measures
Recognizing early warning signs of humidity problems is essential for taking timely corrective action. Sticky chicks, chicks that pip but don’t hatch, and late-hatching chicks are all potential indicators of humidity issues.
Fortunately, practical solutions can often remedy these problems. Adjusting the water pan size, adding wet sponges, and closely monitoring humidity levels can make a big difference. Increasing the water surface area in the incubator can quickly raise humidity, while reducing it can lower humidity levels. These adjustments are particularly important in the UK’s variable climate, where dry winters and humid summers can both impact your incubator’s environment.
The following table provides a quick reference for troubleshooting common humidity issues:
Common Incubation Humidity Problems and Solutions: A troubleshooting guide for identifying and resolving humidity-related issues in poultry incubation
| Problem | Symptoms | Likely Cause | Solution | Prevention |
|---|---|---|---|---|
| Low Humidity | Sticky chicks, chicks dry out and die in shell | Insufficient water in incubator, dry environment | Increase water surface area, add wet sponges | Monitor humidity regularly, use a reliable hygrometer |
| High Humidity | Chicks drown in shell, late hatching | Excessive water in incubator, humid environment | Decrease water surface area, improve ventilation | Monitor humidity regularly, avoid overfilling water pans |
| Fluctuating Humidity | Uneven hatch rates, some chicks develop slower | Inconsistent incubator environment, poor temperature control | Stabilize incubator temperature, use a quality incubator | Invest in a reliable incubator with good temperature and humidity control |
This table summarizes common problems, their symptoms, potential causes, solutions, and preventative measures. Regular monitoring and proactive management are key to maintaining optimal humidity levels.
Preventing Costly Humidity Problems
Taking preventative steps can stop these issues before they even start. Investing in a quality hygrometer for accurate humidity readings is a worthwhile expense. Regularly calibrating your hygrometer and maintaining consistent water levels in your incubator can also help prevent fluctuations. Understanding the nuances of incubation humidity, combined with these proactive measures, creates a consistent hatching environment, maximizing your chances of success and contributing to a healthy flock.
Measuring Humidity Like A Professional
Accurate humidity measurement is crucial for successful incubation. It’s the key to making informed adjustments, moving beyond simple guesswork. This guide will walk you through selecting the right equipment, calibrating it correctly, and understanding the readings to achieve predictable hatching outcomes.
Choosing the Right Hygrometer
Choosing a reliable hygrometer is the first step. Don’t just opt for the cheapest one you can find. Consider these important factors:
Digital vs. Analog: Digital hygrometers offer greater precision. Analog models are simpler and often more affordable. For serious breeders, digital is the recommended choice.
Accuracy: Look for hygrometers with an accuracy of +/- 2% or better. This ensures your data is reliable.
Features: Some digital hygrometers provide additional features. These might include temperature readings, data logging, or alarms. Such features offer a more comprehensive monitoring solution.
Calibration and Placement for Accurate Readings
Even the best hygrometer requires regular calibration to maintain accuracy over time. A salt test provides an easy and effective calibration method. Place your hygrometer inside a sealed container with a saturated salt solution. After a few hours, the reading should be 75% relative humidity. Adjust your hygrometer accordingly if it’s off.
Proper sensor placement within your incubator is also vital. Avoid placing the sensor too close to the heat source or water pan. This can skew the readings. Aim for a central location to get a representative measurement of the overall humidity inside the incubator.
Maintaining Accuracy Over Time
Hygrometers can drift and lose accuracy over time. Recalibrate your hygrometer every few months to ensure precision. For fluctuating climates, such as humid summers and dry winters in the UK, regular calibration becomes even more critical. This ensures your readings reflect the incubator’s internal environment, not just the surrounding room.
Interpreting Humidity Readings and Making Adjustments
Understanding your hygrometer’s readings is essential. Incubation humidity is typically expressed as relative humidity (RH). This is the amount of moisture in the air compared to the maximum amount the air can hold at a given temperature. Use your humidity readings along with regular candling to assess air cell development. This combined approach allows you to make informed adjustments to your humidity levels, ensuring optimal conditions for your developing chicks. You can find more information on our website. By mastering these techniques, you’ll be well on your way to professional-level humidity control.
Mastering UK Climate Challenges
The UK’s unpredictable weather, from damp winters to surprisingly hot summers, presents unique challenges for maintaining optimal incubation humidity. The ambient conditions outside your incubator can significantly affect what’s happening inside. This section explores how these seasonal variations impact your incubation environment and offers practical strategies for year-round humidity control.
How UK Weather Affects Your Incubator
Ambient humidity plays a key role in incubator performance. During damp winters, when outside air is saturated with moisture, maintaining lower humidity levels inside the incubator can be challenging. Conversely, dry summer spells, especially with indoor heating or air conditioning, create the opposite problem. This is where regular monitoring with a reliable hygrometer becomes essential.
The UK’s frequent temperature fluctuations also affect your incubator’s internal temperature, indirectly impacting humidity. Consistent temperature is vital for stable humidity control. Sudden temperature drops, characteristic of British weather, can lead to condensation inside the incubator, potentially raising humidity. Conversely, heatwaves can cause excessive drying.
Read also: How to master the basics of hatching eggs
Adapting Your Incubation Strategy
Successful UK breeders adapt their techniques to account for these climate variations. Here are some key adjustments:
Winter Incubation: Combatting dry air from indoor heating is crucial. Consider using larger water pans, adding extra pans, or using the wet towel technique to boost humidity. Monitor closely and adjust based on your hygrometer readings.
Summer Incubation: High ambient humidity can be problematic. Use smaller water pans, increase incubator ventilation, and monitor regularly to prevent excess moisture. Be mindful of the temperature and adjust your cooling strategy accordingly.
Equipment Modifications: Simple modifications can greatly improve humidity control. Adding external water reservoirs can provide a consistent moisture source, especially during dry periods. Ensure adequate ventilation to prevent humidity buildup in damper conditions.
Management Adjustments: Regular monitoring and proactive adjustments are essential for success in a variable climate. Calibrate your hygrometer regularly, especially during seasonal changes, and keep detailed records of humidity levels. This helps fine-tune your approach for each hatching cycle.
Ensuring Consistent Hatching Success Year-Round
Mastering incubation humidity in the UK requires understanding how our climate interacts with your incubation environment. By implementing these climate-specific strategies and adapting your techniques to seasonal conditions, you can ensure consistent hatching success, regardless of the weather. For premium hatching eggs and expert advice, visit HatchingEggs.eu. We offer high-quality hatching eggs and resources to support your poultry breeding journey in the UK.