


Finding Your Perfect Automatic Egg Incubator Match
Picking an automatic egg incubator can feel like a daunting task. There are just so many models and features out there! It’s easy to get lost in all the marketing jargon. Here’s the thing I’ve learned after years of helping folks choose their incubators: the fanciest, most expensive model isn’t always the best fit. Your friend’s perfect incubator might not work for your hatching goals.
Why? Because everyone’s needs are different. Are you hatching a few eggs for your backyard chickens, or are you aiming for something bigger? This impacts your capacity needs. A small tabletop incubator is perfect for a dozen eggs, but if you’re hatching 50+ eggs regularly, you’ll outgrow it fast. Thinking about hatching ducklings? You might find this helpful: Check out our guide on duck incubation periods.
Another important factor is egg size. Some incubators are made for standard chicken eggs and struggle with larger duck or goose eggs. You might need adjustable dividers or a specialized incubator. And don’t forget about future plans! It’s always better to buy a slightly larger incubator than you think you’ll need, especially if you plan on expanding your flock.
Cabinet vs. Tabletop: More Than Just Size
The biggest difference you’ll encounter is between cabinet and tabletop models. Tabletop incubators are smaller, portable, and usually more affordable. They’re great for beginners or anyone with limited space. Cabinet incubators, on the other hand, are designed for larger hatches and have more advanced features. Things like separate hatching trays and better environmental control. They’re a bigger investment up front, but essential for serious breeders.
To help you visualize the differences, I’ve put together a handy comparison table:
To help you visualize the differences, I’ve put together a handy comparison table:
Incubator Type Comparison: Features and Best Uses
Compare cabinet-style vs tabletop incubators across key factors like capacity, features, price range, and ideal user types
| Incubator Type | Capacity Range | Key Features | Price Range | Best For |
|---|---|---|---|---|
| Tabletop | 12-70 eggs | Compact, portable, basic controls | £50-£200 | Beginners, small hatches |
| Cabinet | 50-500+ eggs | Separate hatching trays, advanced controls, better environmental stability | £200-£1000+ | Larger hatches, commercial use |
As an example, I know a breeder who started with a tabletop incubator for her quail eggs. She quickly upgraded to a cabinet model when she started hatching chicken and duck eggs. The larger capacity and improved humidity control made a huge difference in her hatch rates.
The Growing Incubator Market
Speaking of growth, the automatic egg incubator market is booming! Driven by the increasing demand for poultry and advances in technology, the industry is expanding rapidly. Some advanced models even use AI-powered hatch data analysis to optimize incubation strategies. Discover more insights on the growing incubator market. This constant innovation means there are always new and improved models hitting the market.
Finally, don’t forget about power consumption and maintenance. Some incubators are more energy-efficient, saving you money in the long run. Maintenance requirements also vary. Some models need regular cleaning and calibration, while others are much simpler to maintain. Choosing the right automatic egg incubator is a crucial first step towards hatching success. Carefully consider your specific needs and understand the differences between models to avoid costly mistakes and give your chicks the best possible start.
Setting Up Your Incubator Like A Seasoned Pro
So, you’ve picked out your automatic egg incubator. Fantastic! But hold on – before you fill it with those precious eggs, let me tell you about the biggest newbie mistake I see: neglecting the crucial setup. It’s like baking a cake; you wouldn’t throw it into a cold oven, would you? Your incubator needs a stable environment to work its magic. That convenient kitchen counter might seem tempting, but temperature fluctuations from cooking can seriously mess with your hatch.
Location, Location, Location
I learned this the hard way. My first incubator lived in the garage. Seemed perfect, until a sudden cold snap wiped out an entire batch of chicks. Now, my incubators reside in a spare room, away from drafts and direct sunlight, where the temperature stays pretty consistent. Find a spot in your house with similar stability. A solid surface is key, too. Avoid wobbly tables or shelves. Even tiny vibrations can disrupt those delicate developing embryos. Think about electrical needs as well. Make sure you have a reliable outlet and consider a surge protector to guard against power surges.
The Test Run: Your Secret Weapon
Running an empty test for 24-48 hours before adding eggs isn’t just a suggestion, it’s essential. This lets you fine-tune the temperature and humidity and catch any potential issues early on. I once found a faulty temperature sensor during a test run, saving me from a hatching disaster. Watch how your automatic egg incubator reacts to adjustments and take notes of any quirks. Some models take longer to stabilize than others. This preemptive step transforms your incubator from a potential doorstop into a reliable hatching machine. You might also want to check out my complete guide on incubating eggs.
Here’s a look at different types of incubators: This shows the variety out there, from basic still-air models to fancy automated systems. No matter the type, proper setup is paramount for success.
Calibration and Rituals
Some seasoned breeders have their own setup rituals. They calibrate their thermometers against a known accurate source, meticulously clean every part, and even have an “incubator blessing” (hey, no judgment!). While these might seem like superstitions, they underscore the importance of careful prep. Double-checking your equipment and creating a consistent routine can significantly impact your hatch rates. Troubleshooting is vital, too. Get to know your incubator’s manual and learn to recognize common problems like temperature or humidity swings. Being proactive will save you headaches later. By following these simple steps, you’re setting the stage for a successful hatch and avoiding the heartache of early failures. Your future chicks will be grateful!
Mastering Temperature and Humidity Without Obsessing
Temperature and humidity are essential for a successful hatch. These two factors can truly make or break your experience, determining whether you end up with fluffy chicks or a whole lot of frustration. But here’s a secret: perfect incubation isn’t about obsessively chasing specific numbers on your digital display. It’s about understanding stability and timing.
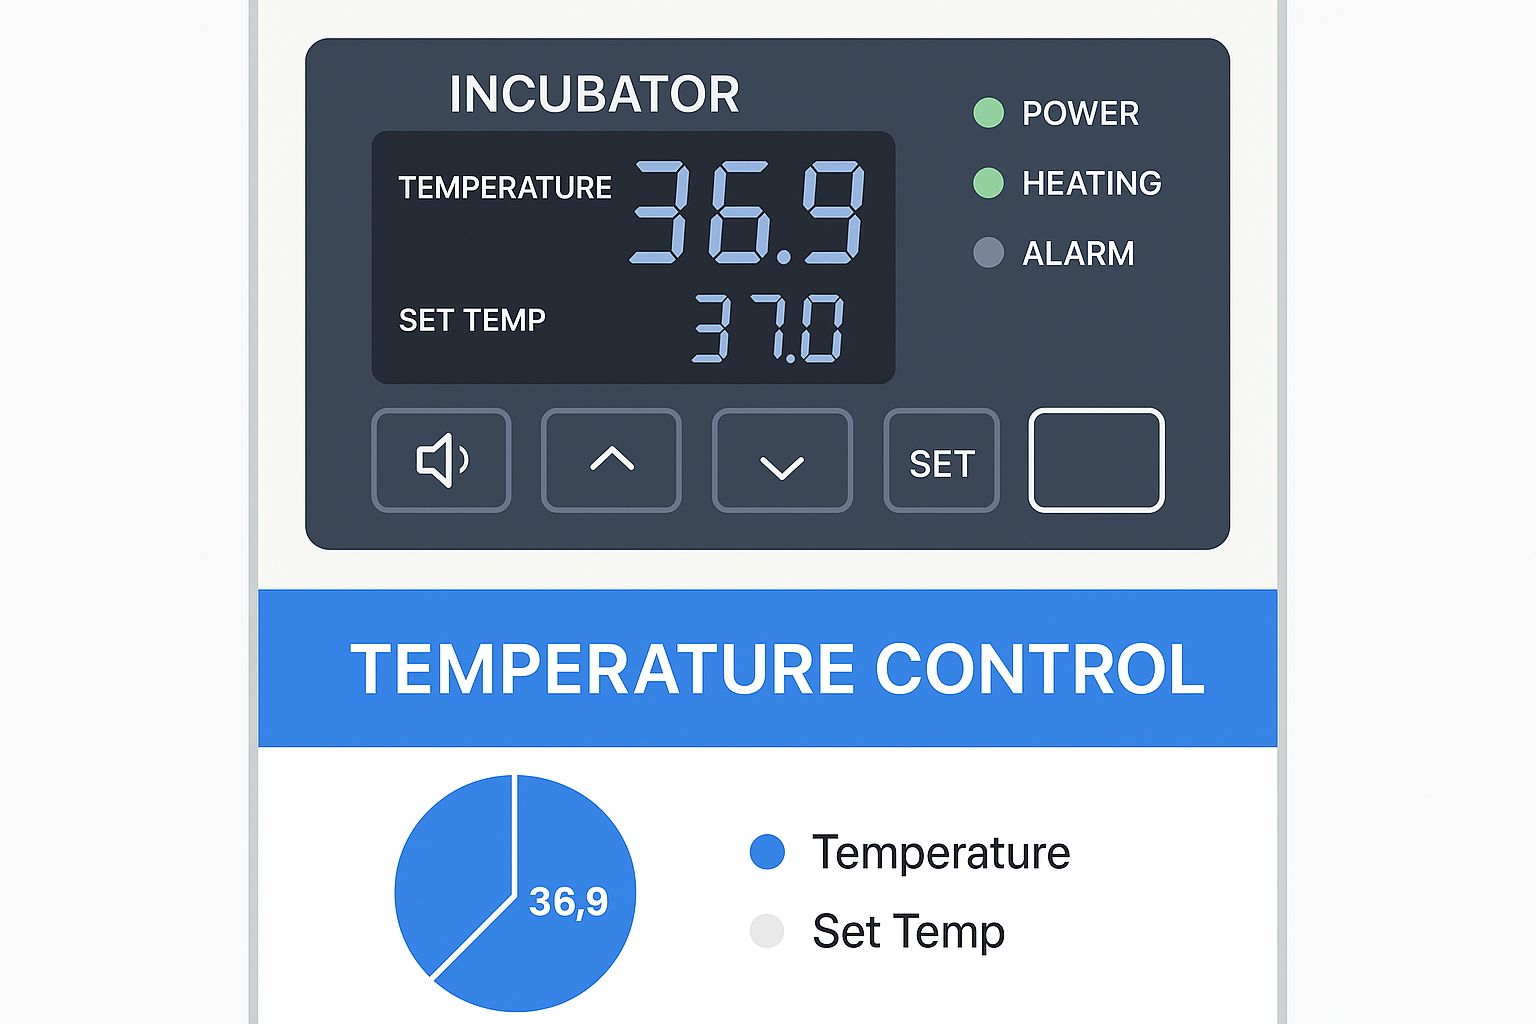
This image shows a typical incubator control panel, highlighting the importance of temperature regulation. The digital display provides precise readings, allowing for those fine-tuned adjustments. However, remember that maintaining a stable temperature range, rather than fixating on a single number, is key for a successful hatch.
For example, I live in a drafty old farmhouse in the UK. Maintaining a consistent temperature can be a real challenge, especially during those cold winter months. Through experience, I’ve learned how to manage these fluctuations and still achieve excellent results, even with the occasional temperature dip.
Altitude also plays a role. If you’re hatching at higher elevations, the lower air pressure can affect your incubator’s performance. You might need to tweak your settings slightly to compensate. Check out our article on incubation humidity for more information on managing this critical factor.
Seasonal Shifts and Minor Fluctuations
Seasonal changes can also impact your incubator’s environment. Summer heat waves can push the temperature higher than your target, while winter drafts can cause it to drop. Don’t panic about minor fluctuations. A degree or two here and there won’t ruin your hatch. The important thing is avoiding prolonged periods outside the ideal range. I’ve found that brief temperature dips are often less harmful than constantly fiddling with the controls and creating instability.
Understanding Environmental Impact
The relationship between environmental conditions and embryonic development is complex. Too much humidity can lead to sticky chicks, while too little can cause dehydration. Incorrect temperatures can impact growth rates and organ development. The global egg incubator market, valued at USD 88.67 million in 2023, is projected to reach USD 168.58 million by 2032. This growth reflects the increasing importance of automated systems for efficient and controlled incubation. Discover more insights on this growing market. This really underscores the importance of understanding how these systems function, especially when it comes to managing temperature and humidity.
Practical Tips for Consistency
Maintaining consistency is absolutely key. Here are a few practical tips from my own experience:
- Insulate your incubator: This helps stabilize the internal temperature, minimizing the impact of those external fluctuations. You can use a simple blanket or even a purpose-built incubator cover.
- Monitor regularly: Check your thermometer and hygrometer at least twice a day. Record your readings to track any trends or patterns. A simple notebook works wonders.
- Avoid overcrowding: Overcrowding can lead to uneven temperature distribution and reduced airflow, negatively impacting hatch rates. Give those eggs some space!
- Calibrate your equipment: Regularly calibrate your thermometer and hygrometer against a known accurate source to ensure you’re getting reliable readings.
I once had a hygrometer that consistently read 10% higher than the actual humidity. It wasn’t until I calibrated it that I realized the issue and could make the necessary adjustments. These small steps make a big difference in maintaining a stable environment and giving your eggs the best chance of hatching.
Recognizing When Adjustments Are Needed
Learning to read your incubator’s signals is crucial. Don’t panic about every little fluctuation. Instead, focus on identifying patterns. Are the temperature and humidity consistently outside the ideal range? Are your eggs showing signs of developmental problems during candling? These are indicators that adjustments might be needed.
Remember, perfect conditions aren’t always necessary. I’ve had successful hatches with slightly lower humidity than recommended. What matters most is stability and the overall health of the developing embryos. Trusting your instincts and learning to interpret the signs will build your confidence and transform you from a nervous beginner to a seasoned hatching pro.
Getting Egg Turning And Positioning Right Every Time
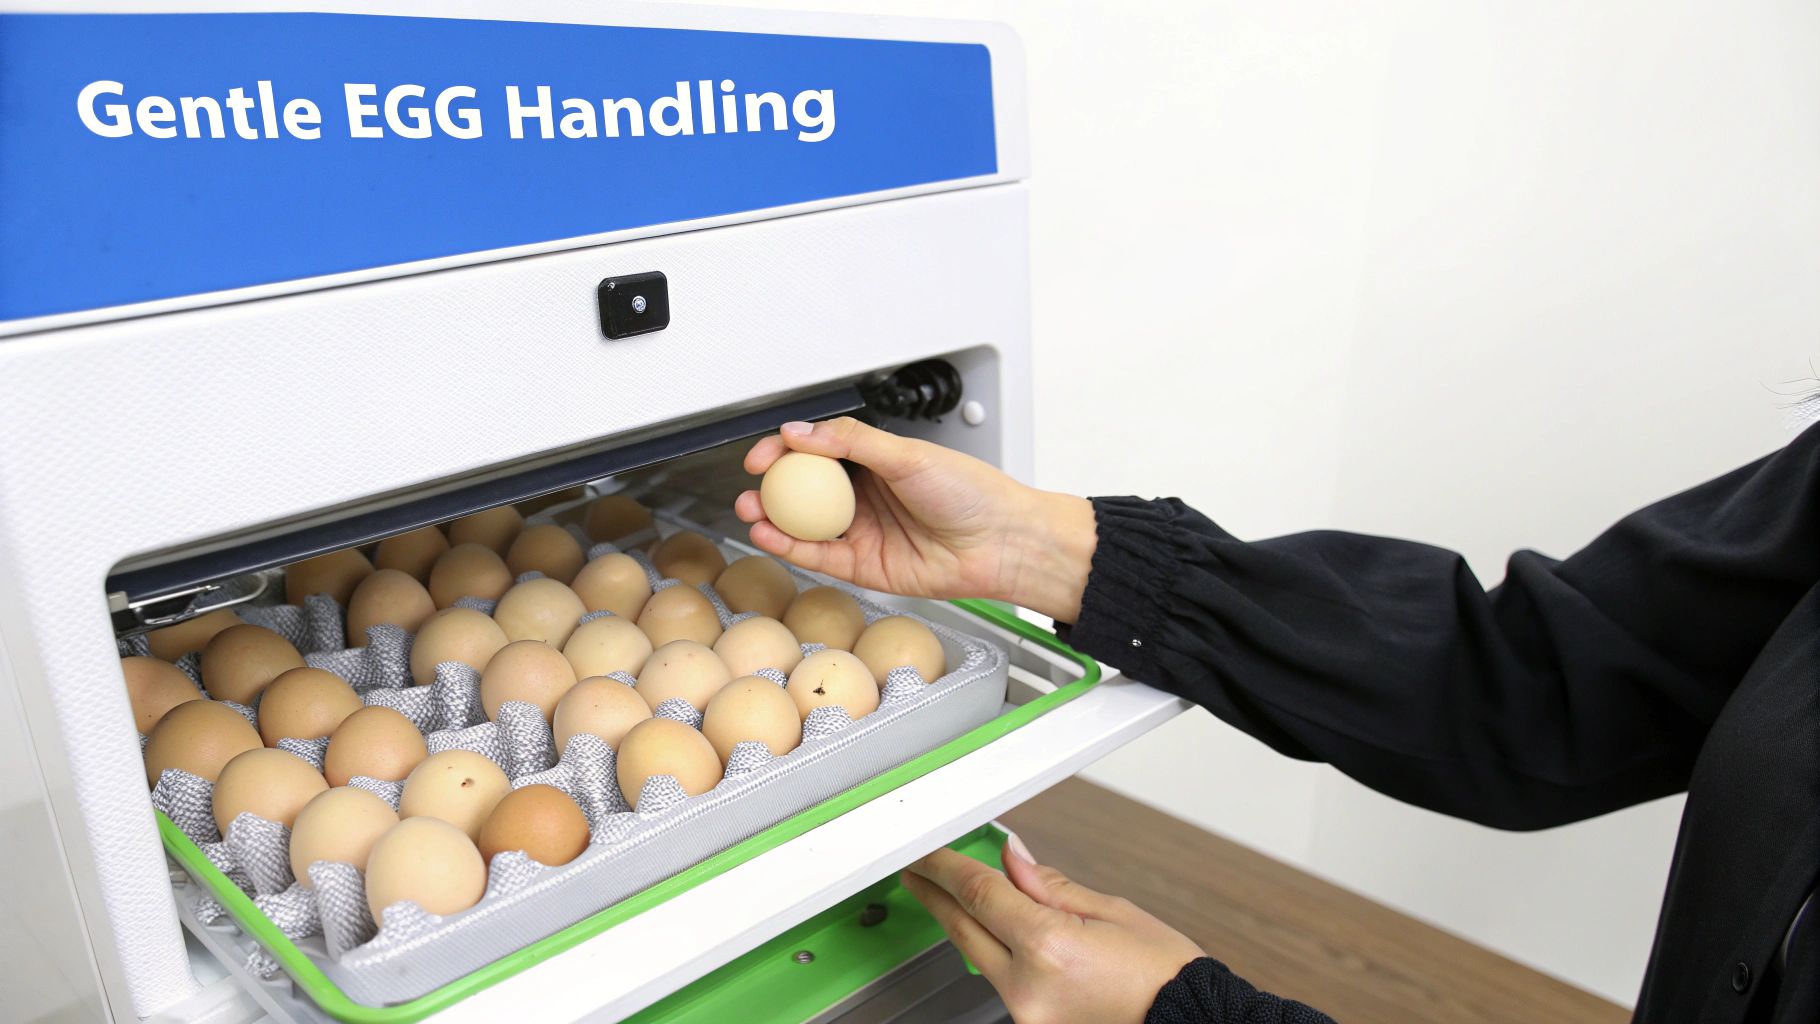
Having an automatic egg turner in your automatic egg incubator) is super convenient, but truly understanding egg positioning can make a huge difference in your hatch rates. It’s not enough to just turn them; the how matters. The angle and frequency are just as important as the turning itself. I’ve talked to so many people hatching eggs, from folks rescuing a failing automatic system to those tweaking theirs for peak performance. Everyone agrees: knowing how to spot bad positioning is half the battle.
Recognizing Positioning Problems
So, how can you tell if your eggs aren’t positioned right? Uneven heating is a big clue. If some eggs are always cooler, it might be because they’re not sitting right on the turner. Poor air circulation is another red flag. Eggs need to breathe! If they’re crammed together, they won’t get enough oxygen. This can lead to developmental issues and fewer chicks. I once had a turner that would jam sometimes, leaving some eggs totally still. I was lucky to catch it quickly and manually turned the affected eggs until I got the turner fixed.
Practical Placement and Handling
Here’s where experience really kicks in. Think of your eggs like picky guests. They all want their space and prefer things just so. Most automatic turners tilt the eggs back and forth. Aim for a 45-degree angle, and make sure they’re not bumping into each other. Leave a little space between them for air circulation. How you handle the eggs during incubation is vital too. Always wash your hands well before touching them to avoid introducing bacteria. And be gentle when adjusting their positions! Those little embryos are delicate.
Backup Strategies and Tracking
Even the best automatic incubators can act up. A backup plan is essential. I keep a simple hand turner around, just in case. Marking your eggs with a pencil helps you keep track of which ones you’ve turned, especially helpful if you’re doing some manual turning along with the automatic. Different sized eggs in the same batch can also be tricky. Some incubators have adjustable dividers, but if yours doesn’t, you can make your own with cardboard or foam.
Healthy Development vs. Positioning Problems
Learning to tell the difference between normal development and positioning problems is key. Candling will reveal different patterns inside the egg. A healthy embryo shows a network of blood vessels and a dark air sac. If you see uneven development or a lack of movement, it might be a positioning issue. For instance, if one side of the egg is always cooler, the embryo on that side might develop slower. This knowledge lets you step in and fix things, correcting positioning problems and giving your hatch the best chance of success. It’s about knowing your turner is doing its job, not just hoping. Every little adjustment counts toward a healthier, more successful hatch.
Candling Your Way To Better Hatch Rates
Candling. It’s like a window into the tiny world growing inside your eggs. More than just cool to look at, it’s a powerful tool for spotting potential problems early on and tracking development. But here’s the thing: I’ve noticed some folks either skip candling altogether or go overboard, constantly checking and stressing the developing chicks. Neither approach is ideal.
Let’s talk about finding that happy medium. Over the years, I’ve picked up a few tricks for effective candling, and I’m happy to share what works. You can also find more great information on when to candle chicken eggs.
Optimal Timing and Techniques
Your first candling session should happen around day seven. This early peek helps identify clear eggs—those without a developing embryo. Removing these right away frees up valuable space in your automatic egg incubator and prevents any issues with rotting. A second check around day 14 lets you monitor growth. You should start to see a network of blood vessels and a dark air sac.
For instance, during my last hatch with Silkie eggs, I candled on day seven and found two clear eggs. Out they went! By day 14, the remaining eggs showed healthy, developing embryos, confirming everything was progressing nicely.
Interpreting Shadows and Movement
Learning to interpret what you see during candling takes a bit of practice. A healthy embryo will move and have a clear, defined shape. Don’t be alarmed if you see slight variations in development – they don’t all grow at precisely the same rate. The key is to watch for red flags like a lack of blood vessels or a cloudy appearance. These could point to problems.
Also, experiment with different light sources. A bright LED torch is a good option, but some prefer specialized candling lamps. Find what gives you the clearest view without overheating the eggs.
Practical Setups and Informed Decisions
You don’t need fancy equipment. A dark room and a bright light are all you need. I actually use a cardboard box with a hole cut in one side. I put the light inside the box and hold the egg against the hole. This creates a perfect little candling chamber. It’s a DIY solution, but it works like a charm! The use of automatic egg incubators has become incredibly popular, not just commercially, but also among hobbyists and educational institutions. The market for small incubators (0-1000 eggs) is estimated at around 5 million units annually worldwide. Find out more about the automatic poultry egg incubator market.
This widespread use of incubation technology highlights how important it is to understand practices like candling. Candling empowers you to make informed decisions. Knowing which eggs are viable and which aren’t prevents wasted time and resources, ultimately leading to better hatch rates. It transforms the anxious waiting game into a valuable management tool.
Navigating Lockdown and Hatch Day Like a Veteran
Those last three days of incubation – lockdown – are a real test of patience. You’ve been actively managing your automatic egg incubator, tweaking and checking, and now suddenly, it’s all about hands-off waiting. And trust me, that’s way harder than it sounds!
The Art of Non-Interference
I’ve been there, staring at the incubator, wanting to peek inside every five minutes. The urge to fiddle is strong, but resist! Every time you open that incubator, you mess with the humidity and temperature, which are absolutely critical during this delicate phase. Think of it like a preemie baby in an incubator – you wouldn’t keep opening the door, right? Same principle applies here. Experienced hatchers know this. They’ve learned the art of letting nature do its thing.
Stopping the Turner: A Critical Step
Around day 18, it’s time to stop the automatic turner. This lets the chicks get into the optimal position for hatching – getting ready for that first little crack in the shell, called the “pip.” If they’re still turning at this point, they can get disoriented and have a harder time hatching. I learned this the hard way once. Forgot to stop the turner and had a few chicks hatch upside down! They were okay in the end, but it was a stressful experience for everyone involved.
Maintaining Optimal Humidity
Humidity is super important during lockdown. You’ll want to bump it up to around 65-70%. This keeps the membranes inside the egg from drying out and sticking to the chick. Dry membranes can make it almost impossible for them to break free. I always use a separate humidity gauge – just to double-check the incubator’s reading and ensure everything is perfect. It’s always better to have slightly higher humidity than to let things get too dry.
The First Pips and Healthy Hatching Progress
Hearing those first pips is pure magic! But fight the urge to help the chick out. The struggle is actually crucial for their development. A healthy hatch typically takes anywhere from 5-24 hours after the first pip. You’ll see them slowly chipping away at the shell, gradually making their grand entrance.
Knowing When to Intervene (and When Not To)
Sometimes, a chick might need a little assistance. If it’s been struggling for over 24 hours with little progress, you can carefully make a small opening in the eggshell. Be super gentle and avoid any blood vessels. But honestly, intervene only as a last resort. They’re usually much tougher than we give them credit for.
Preparing for Newly Hatched Chicks
Before hatch day arrives, make sure your brooder is set up and ready to go. This is where the chicks will spend their first few weeks. It should be warm, dry, and stocked with food and water. I use a heat lamp and a thermometer to keep the temperature just right – around 35°C (95°F) for the first week, then gradually reducing it each week.
Realistic Expectations and Supporting Struggling Chicks
It’s important to remember that not every egg will hatch. Even with the best incubator and the most attentive care, you might experience some losses. This is a natural part of the process. If a chick is struggling, you can offer some assistance, but sometimes, despite our best efforts, they don’t make it. It’s tough, but it’s a reality of hatching.
Lockdown and hatch day can be an emotional rollercoaster. There’s excitement, anticipation, and sometimes, a little heartbreak. But by understanding the process, resisting the urge to interfere too much, and being prepared, you’ll navigate this time with confidence and welcome your new fluffy chicks into the world.
Troubleshooting Problems And Protecting Your Investment
Incubator troubles? They happen. Trust me, I’ve been there. Whether you’re a seasoned pro or just starting out, every hatcher faces a hiccup now and then. The trick isn’t avoiding problems (impossible!), but knowing how to handle them. Let’s talk about some common incubator issues and how to fix them, drawing from my own experiences and those of others in the hatching community.
Temperature and Humidity Hiccups
Temperature swings are probably the most common headache. Maybe your incubator is near a drafty window, or the room temperature fluctuates. One simple fix I’ve used is adding insulation. A thick blanket or a purpose-made incubator cover can make a real difference. Humidity problems? Check your hygrometer. I learned this the hard way! Mine was way off until I calibrated it against a reliable source. It’s always a good idea to double-check with a second gauge.
Power Outages and Mechanical Failures
Power outages? A hatcher’s nightmare. A backup power supply can be a true lifesaver, especially during lockdown. Even a short outage can be devastating. Speaking of crucial stages, you might find this helpful: Chicken Egg Development Stages. Mechanical failures, like a broken turner, can also happen. Knowing how to manually turn eggs is a valuable skill. Keep a simple hand turner around, just in case. I once had a turner motor give out mid-hatch! Luckily, I was prepared to manually turn the eggs until I could get the incubator fixed.
Preventive Maintenance: A Stitch in Time
Regular maintenance prevents so many problems. Think of it like car maintenance—a little care goes a long way. Clean your incubator after each hatch, focusing on the fan and vents. Dust buildup can mess with temperature and humidity. I also lubricate moving parts (like the turner motor) with food-grade lubricant. And proper storage during the off-season helps extend the incubator’s life. Clean it well, dry it completely, and store it in a cool, dry place away from sunlight.
Recognizing Early Warning Signs
Being observant is key. Learn to spot the little signs that something’s off. Unusual noises, odd smells, or inconsistent readings on your thermometer or hygrometer are all red flags. Addressing these early can prevent small issues from becoming big disasters. I once noticed a faint burning smell from my incubator. Turns out, a loose wire was overheating. Catching it early prevented a potential fire!
Building Relationships and Backup Plans
A good relationship with your incubator supplier is invaluable. They can offer troubleshooting tips, provide parts, and even recommend repair technicians. Having a backup plan is also crucial. What if your incubator fails at a critical moment? A spare incubator, or knowing someone you can borrow one from, brings peace of mind. A breeder friend of mine keeps a small backup incubator just in case. It’s a real stress reliever, especially during big hatches.
By being proactive and tackling problems head-on, you’ll go from dreading incubator issues to handling them with confidence. This protects your investment and sets you up for successful hatching for years to come.
Ready to start your hatching journey? HatchingEggs.eu offers premium hatching eggs from carefully chosen breeding stock, perfect for beginners and experienced breeders alike. Explore our diverse selection of hatching eggs at HatchingEggs.eu.