


Creating Your Perfect Hatching Environment
Picking the right spot for your incubator is way more important than you might think. It’s not just about finding a flat surface; it’s about creating the ideal environment for those little eggs to thrive. Forget the kitchen table – I learned that lesson the hard way! After talking to other UK hatchers, I realized how crucial location truly is, especially with our unpredictable British weather. Room temperatures can fluctuate wildly, and let’s not even talk about curious pets or kids!
Finding the perfect incubation spot is a bit like Goldilocks and the Three Bears. A spare room might seem peaceful, but is it too quiet? Good airflow is essential to prevent humidity problems. A stagnant room can get sticky and humid faster than you can say “cheep cheep!”
A garden shed is popular among experienced hatchers I know, offering more stable temperatures and better ventilation. But think about power outages! A mid-incubation power cut is a nightmare scenario. If you’re using a shed, consider a reliable power source or a backup power supply. Trust me, the peace of mind is worth it.
Humidity control is another critical factor. Your incubator is like a mini-ecosystem that needs the perfect balance of moisture and fresh air. Too much humidity, and the chicks might drown in their shells. Too little, and the membranes can dry out, preventing them from hatching. Simple ventilation tricks, like cracking a window or using a small fan, can make a world of difference. A fellow hatcher shared a brilliant tip: placing water trays strategically around the incubator can help regulate humidity naturally. It’s been a game-changer for me.
It’s fascinating to consider the scale of the UK’s poultry industry compared to home incubation. Did you know that in January 2022 alone, 123.9 million broiler and layer chicks were hatched and shipped across the UK? Discover more insights into the UK poultry industry. While we’re not hatching millions at home, understanding industry trends can be helpful for sourcing equipment and supplies.
Ultimately, creating the ideal hatching environment means balancing practicality with the needs of your developing chicks. Think about your daily routine, too. Putting your incubator somewhere visible helps you monitor temperature and humidity and reminds you to turn those eggs. It’s all about finding a setup that works for both you and your future fluffy friends.
Finding the Right Incubator Without Breaking the Bank
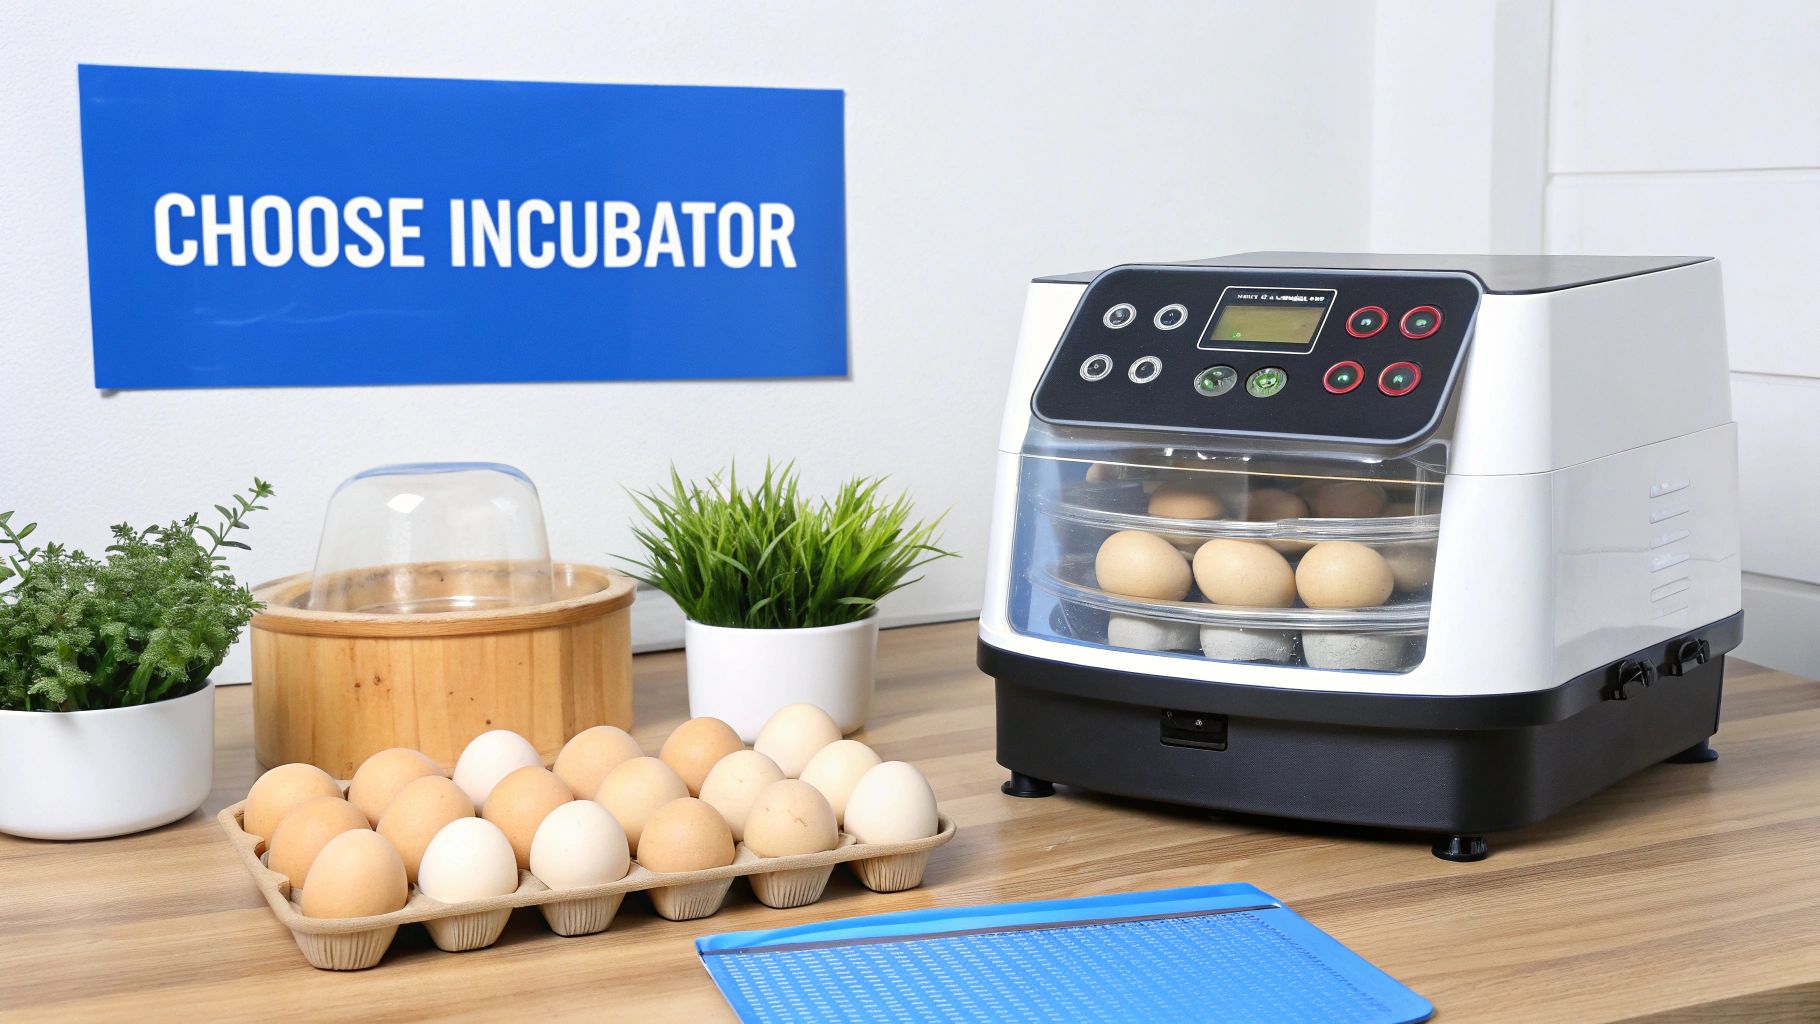
Let’s be honest, hatching eggs at home can seem daunting, and the price of incubators can be a real shocker! But here’s a secret: the most expensive incubator isn’t always the best. I’ve seen folks with top-of-the-line digital incubators scratching their heads in confusion while others hatch chicks like pros with simple, budget-friendly models. Choosing the right incubator for your needs is key, especially here in the UK.
Choosing Your First Incubator: Features vs. Fluff
If you’re just starting out, a still-air incubator can be a surprisingly good choice. These basic models, often made of styrofoam, use natural convection for heat distribution. They’re typically under £50 and incredibly effective when used correctly. Think of them as the training wheels of incubation – a great way to learn the basics without getting bogged down by fancy features.
My first successful hatch came from a simple still-air incubator. It taught me the crucial importance of consistently monitoring temperature and humidity, skills that are valuable regardless of what incubator you eventually use. Plus, troubleshooting is much easier with a simpler design – a definite bonus for beginners.
Automatic Incubators: Worth the Investment?
If you’re planning to hatch regularly or have a larger flock in mind, an automatic incubator might be a good investment. You might be interested in checking out some examples: automatic egg incubators. These often include automatic egg turning, digital temperature and humidity control, and even alarms. Expect to pay anywhere from £80 to £200 or more.
While these automatic features can be convenient, they add complexity. If you’re a beginner, this can feel overwhelming. Relying too much on automation can also mean you miss subtle signs that something’s not quite right, like small temperature or humidity fluctuations. You’d likely notice these changes sooner with a simpler setup.
The Surprising Incubator Secret for Beginners
Many UK hatchers, myself included, find that manual turning incubators strike the perfect balance. These models usually have a crank or handle that you operate a few times a day. This gives you more control over the turning process than a still-air incubator, without the complexity of a fully automatic model. They’re a great compromise, usually costing between £50 and £100.
Besides, manually turning the eggs helps you connect with the process, which is incredibly rewarding. In the end, the best incubator depends on your budget, your hatching goals, and what you’re comfortable with.
Let’s take a closer look at the options with this comparison table:
Incubator Types Comparison for UK Home Hatchers
This table breaks down the main differences between incubator types to help you decide which is best for your needs.
| Incubator Type | Capacity | Temperature Control | Humidity Management | Average Price (£) | Best For |
|---|---|---|---|---|---|
| Still-Air | Small (e.g., 6-12 eggs) | Manual adjustment | Manual adjustment | Under £50 | Beginners, small batches, budget-conscious |
| Manual Turning | Small to Medium (e.g., 12-48 eggs) | Manual adjustment | Manual adjustment | £50-£100 | Regular hatching, hands-on approach |
| Automatic | Medium to Large (e.g., 24-100+ eggs) | Digital thermostat, automatic adjustments | Automatic or semi-automatic control | £80-£200+ | Larger batches, frequent hatching, convenience |
As you can see, each incubator type has its pros and cons. Still-air is perfect for learning the ropes, manual turning offers a balance of control and affordability, and automatic is the way to go for larger scale hatching and convenience. Consider your individual circumstances and choose the best fit!
Mastering the Temperature and Humidity Dance
This is where things get tricky for folks new to hatching chicks at home. Truth be told, it still makes me a little nervous every time! You see those “perfect” temperature and humidity numbers online? They’re a decent starting point, but real success means understanding how our UK climate affects your specific incubator.
Think about it: a sunny day can make your incubator run hot, while those damp, chilly UK spells can make it struggle to stay warm. This section shares some seasoned hatcher tricks, including a water tray tip that changed everything for me.
Water Tray Positioning: A Game Changer
For instance, moving your water trays closer to the heat source can bump up humidity more effectively than just adding more water. Too humid? Move the trays further away. This gives you more control, especially in still-air incubators. It’s not just about hitting the right numbers, it’s about creating a consistently stable environment inside.
Power Outages: Be Prepared
Imagine: you’re mid-hatch in February, and the power cuts out. Nightmare! A backup power source, even a power bank, can be a lifesaver. For serious peace of mind, consider a small generator designed for electronics. Resourcefulness is key when dealing with British weather!
You’ll also learn how to tackle those annoying temperature swings and discover a candling schedule that lets you peek without chilling the eggs. For even more humidity tips, check out this helpful guide: Incubation Humidity.
Here in the UK, our large poultry industry influences how we approach home incubation. You need precise conditions: temperatures between 37.5°C and 38.5°C, around 50-60% humidity, and a good turning mechanism. Discover more.
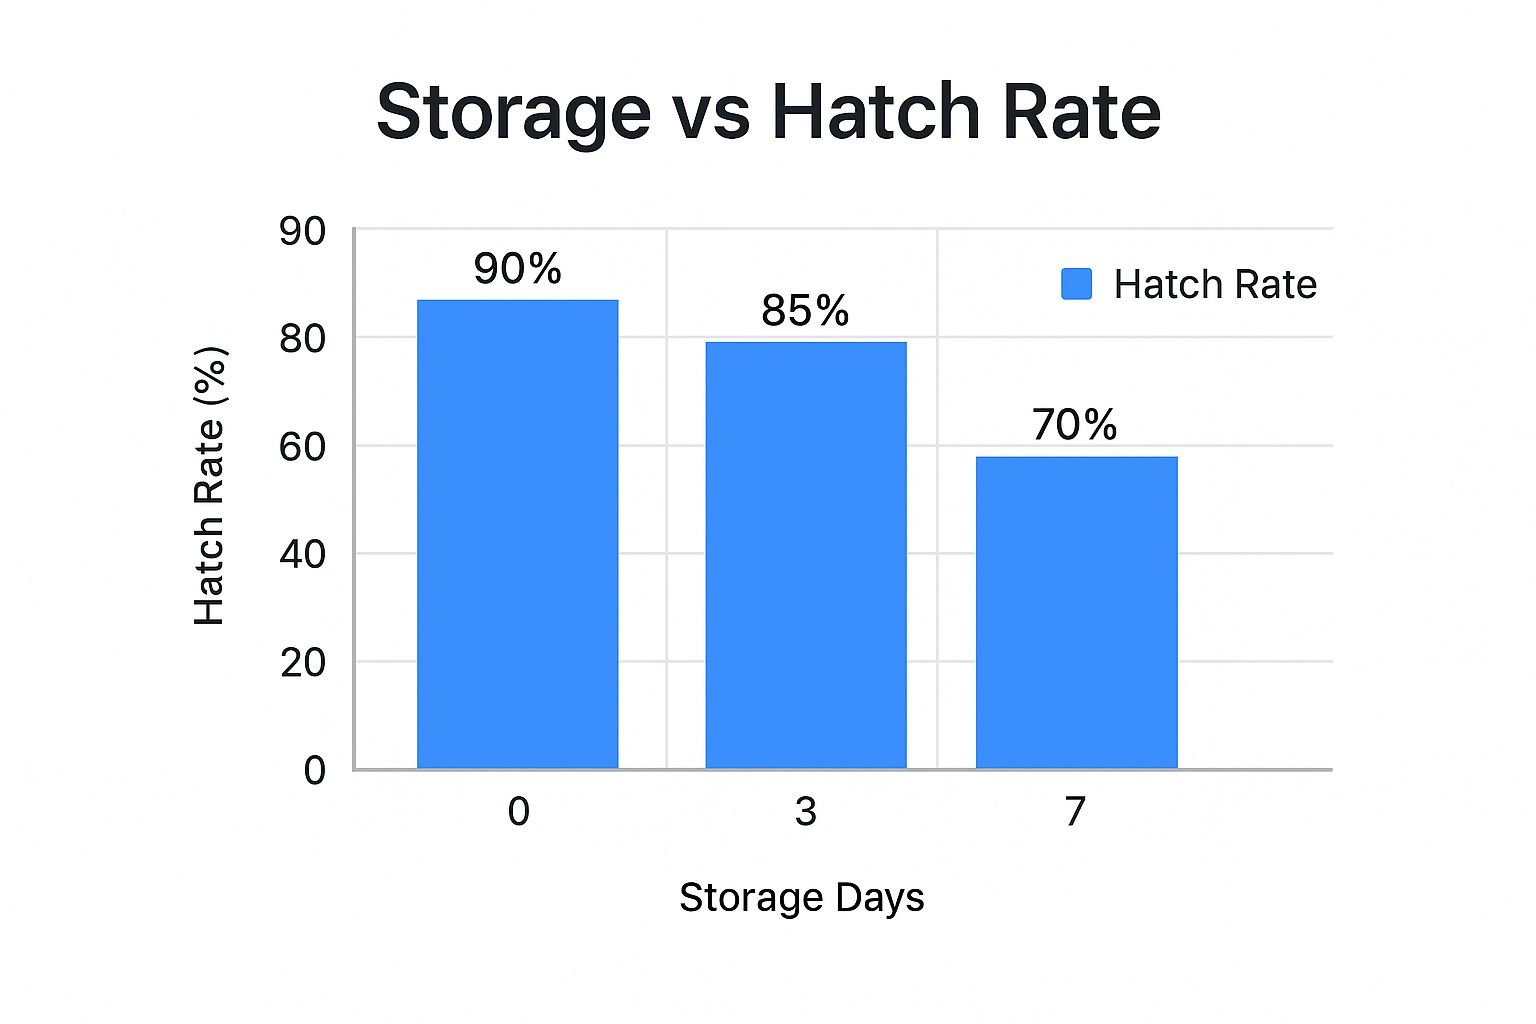
The infographic above shows how egg storage affects hatch rate. Even a few days can make a difference. Fresh is best! A 90% hatch rate is possible with fresh eggs, dropping to 85% after three days and 70% after a week. Fresh eggs give your chicks the best start. It’s not about hitting 100%, it’s about understanding the factors at play and making smart choices.
Temperature and Humidity Schedule
The following table provides a day-by-day guide for temperature and humidity during the 21-day incubation period. It also includes specific notes for adjustments you might need to make based on the UK climate.
| Incubation Period | Temperature (°C) | Humidity (%) | Turning Frequency | Special Notes |
|---|---|---|---|---|
| Days 1-18 | 37.5 – 38 | 50-55 | 5 times per day | Monitor closely for fluctuations due to external temperature changes. Increase humidity slightly during particularly dry periods. |
| Days 19-21 (Lockdown) | 37.2 – 37.5 | 65-70 | Stop turning | Increase humidity significantly. Ensure adequate ventilation while maintaining higher humidity levels. Watch for signs of pipping. |
Maintaining the right temperature and humidity can feel like a balancing act, especially in the UK. But with careful monitoring and these tips, you’ll be well on your way to a successful hatch. Now, let’s talk about turning those eggs!
The Turning Ritual That Makes All the Difference

Forget those fancy automatic egg turners for a second. When you’re first figuring out how to hatch eggs at home, think like a hen. She doesn’t have a digital incubator, but millions of years of instinct have taught her a thing or two! Trust me, those instincts are worth considering. You often hear advice to turn eggs “X times a day,” but that might not be enough.
Mimicking Mother Nature: Why It Matters
A mother hen doesn’t just flip her eggs on a schedule. She’s constantly nudging, rolling, and adjusting them throughout the day. This isn’t random; it keeps the yolk from sticking to the shell and helps the chick develop properly. Mimicking this natural movement is especially important in those early days of incubation.
For instance, I used to turn my eggs precisely five times a day, like clockwork. My hatch rates were decent, but nothing special. Then, a friend who’s been hatching for years told me about her “little and often” method. She just gives the eggs little nudges throughout the day whenever she walks by the incubator. I gave it a try, and the difference was remarkable!
Marking Systems and Timing Strategies
Now, don’t worry, you don’t need to spend all day by your incubator! A simple marking system can save you a lot of stress. I use an “X” on one side of my eggs and an “O” on the other. That way, I can easily see if they’ve been turned.
The key is to find a turning routine that works for your life. If you’ve got a busy schedule, a good morning and evening turn, plus a few quick nudges during the day, can be really effective. For more timing tips, you might find this article about candling helpful: Candling Chicken Eggs.
Gentle Handling and Candling Checks
When handling eggs, remember to be gentle. Think of those tiny blood vessels developing inside! Warm hands are crucial, especially in the early stages. Candling is amazing for seeing the chicks grow, but too much can chill the eggs. A quick peek every few days is plenty. You’ll soon learn to spot the growing chick’s shadow and even see the air sac moving later on.
It’s interesting how many experienced hatchers I know still prefer turning by hand, even if they have automatic turners. They say it lets them feel the weight and balance of each egg, giving them a better feel for what’s going on inside. There’s something really special about that hands-on connection to the hatching process. It changes incubating from a technical chore into a nurturing ritual.
Surviving Lockdown and the Hatching Marathon
The last three days of incubation – what we call lockdown – are a real test of patience. It’s the culmination of everything you’ve learned about incubating eggs at home, and it can be nerve-wracking! Resist the urge to constantly peek. I’ve picked up some great advice from experienced UK hatchers: sometimes, the best thing to do is absolutely nothing.
Stop Turning, Increase Humidity
On day 18, stop turning the eggs. This lets the chicks get into the right position for hatching. Now it’s time to bump up the humidity to around 65-70%. Avoid opening the incubator unless absolutely necessary, because that can cause the humidity to plummet. Think of it like a sauna – you wouldn’t want to keep opening the door! Usually, small tweaks to your water source are enough to keep the humidity stable during lockdown.
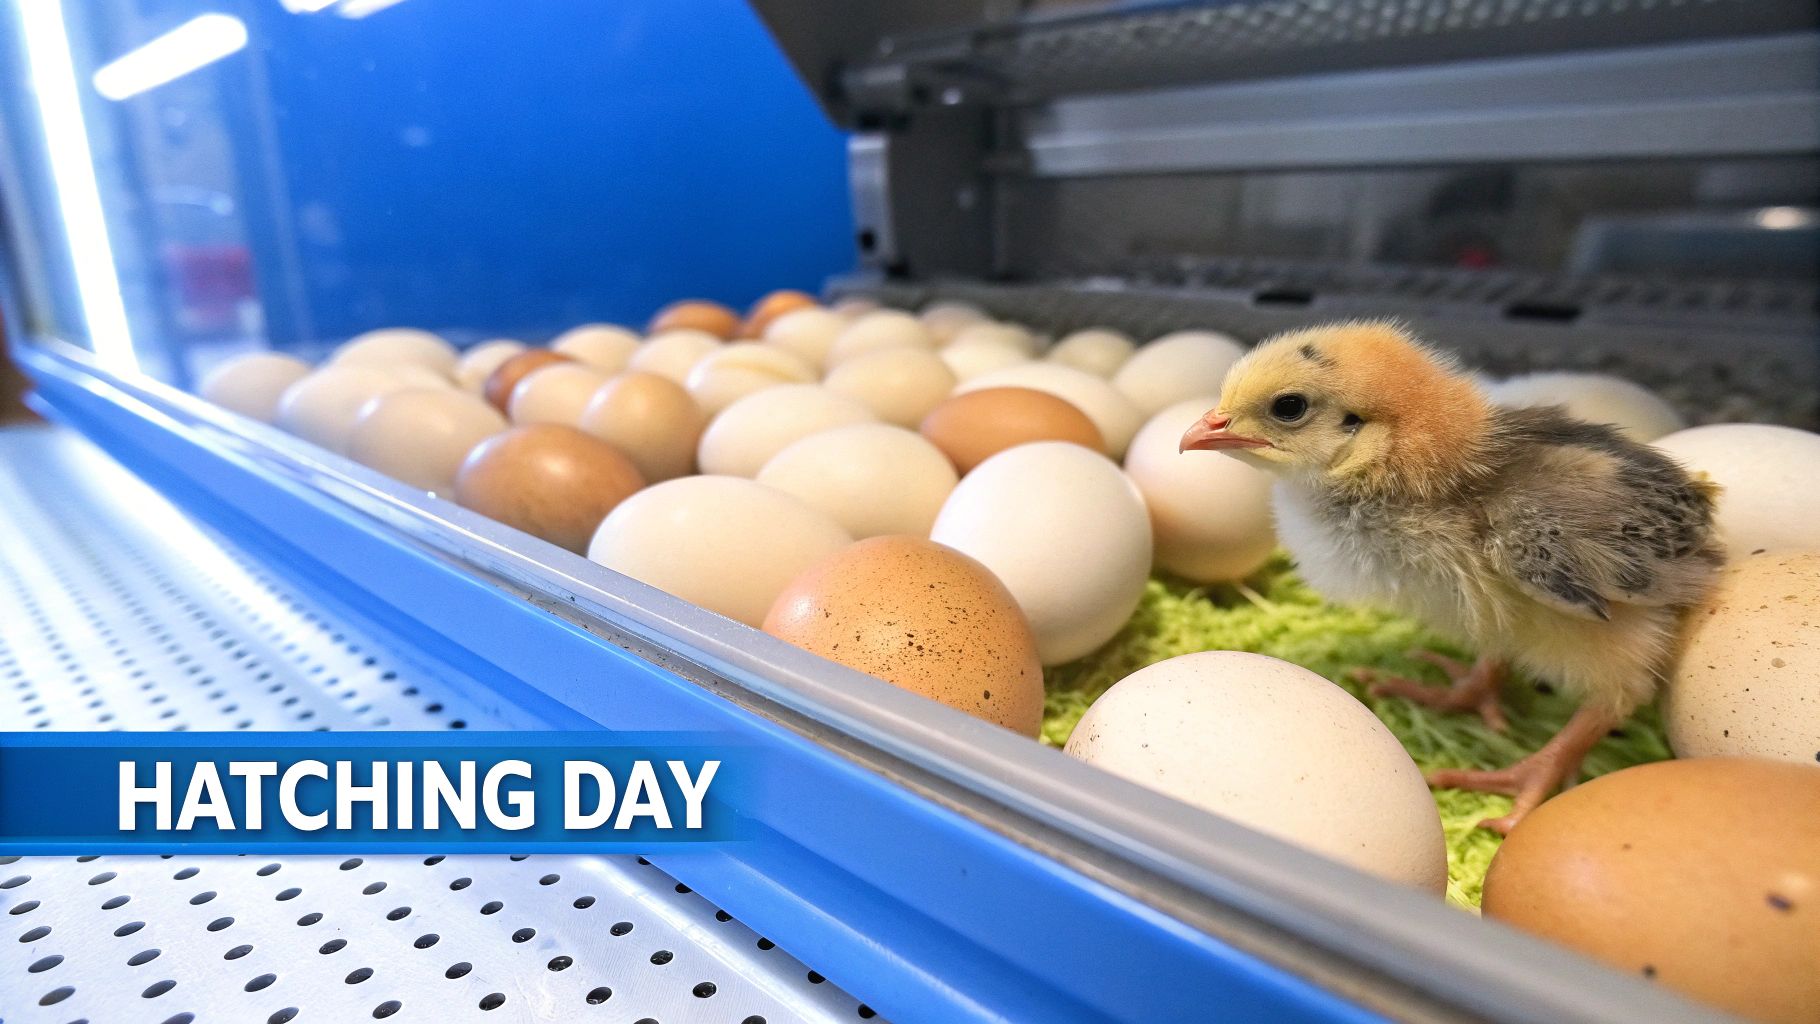
The Sounds of Hatching: Normal vs. Distress
You’ll likely begin to hear peeping and tapping – perfectly normal sounds of chicks working their way out. If you’re interested in other poultry, duck incubation might be for you: Check out our guide on duck incubation. What you don’t want to hear are constant, distressed chirps. This could mean a chick is struggling. Even then, try not to jump in right away. Chicks are tougher than you think and often manage to hatch on their own.
When to Intervene (and When Not To)
Knowing when to help and when to hold back is tricky. A small tear in the shell after several hours with no further progress might be a sign that careful assistance is needed. But “helping” too soon can actually cause harm by interrupting the natural hatching process. It’s a bit like childbirth – sometimes, nature just needs a bit more time. Backyard chickens are becoming increasingly popular in the UK, which recent studies confirm. Learn more about this trend here: Read the full research. Surveys show most flocks are small, kept for eggs and companionship, suggesting a real boom in home incubation and chick rearing.
Hatching is a marathon, not a sprint. Those final three days are all about trust, patience, and letting nature take its course. The reward? Fluffy, chirping chicks, eager to begin their lives.
When Things Go Wrong (And They Sometimes Will)
Let’s be honest, even the most experienced hatchers have bumps in the road. Incubation isn’t always predictable. I’ve certainly had my share of hiccups, and every UK hatcher I know has a story or two (or ten!). It’s not about avoiding problems, it’s about knowing how to handle them when they inevitably crop up. After all, we’re working with living, breathing embryos, unpredictable British weather, and sometimes, equipment with a mind of its own!
Power Cuts and Equipment Failures: Emergency Plans
Here in the UK, winter storms can mean power outages. Picture this: a freezing February night, mid-incubation, and suddenly, everything goes dark. Not a fun scenario. A dedicated generator for your incubator can be a real lifesaver in this situation. Even a power bank can give you precious hours to figure out a solution.
Equipment can also fail even on a beautiful summer day. Imagine your incubator fan dying on the hottest day of the year. A quick response is crucial. Keeping a spare thermometer and hygrometer allows you to double-check your readings and adjust as needed. Having a simpler backup incubator is another great strategy.
Humidity Emergencies: Troubleshooting Tips
Humidity is a constant balancing act, especially in the UK climate. Too dry, too damp – it can be a real headache! Learning how to tweak humidity without panicking is a must. A slightly damp cloth draped over the incubator (make sure it doesn’t block airflow!) can add a bit of moisture during a dry spell. On the flip side, opening a small vent can help if things get too humid.
Check out this guide on chick development: Read also: Chicken Egg Development Stages. Knowing the different stages can help you troubleshoot. For example, if development seems stalled, understanding the normal timeline can tell you if there’s a real problem.
Salvaging a Hatch: Knowing When to Persist
Sometimes, despite your best efforts, a hatch just doesn’t go to plan. Knowing when to keep going and when to call it a day is tough. There’s no magic answer, but honest evaluation is key. If you’ve followed all the best practices and you’re still seeing a lot of early deaths or deformities, it might be that the eggs just weren’t viable.
A few less-than-perfect eggs shouldn’t discourage you, though. I’ve had hatches that started out looking disastrous and ended up with surprisingly healthy chicks. Nature has its own ways! Keep your expectations realistic. A 100% hatch rate is incredibly rare, even for the pros. Aiming for 70-80% is a much more achievable and less stressful goal.
Your Journey to Confident Home Hatching
So, you’ve got the basics of incubating chicken eggs down. That’s fantastic! But honestly, that’s just the first step. It’s like baking your first loaf of bread – edible, sure, but you’re not quite ready to open a bakery. Mastering home hatching takes practice, a few inevitable mishaps, and a whole lot of learning. This isn’t just about hatching one batch; it’s about becoming a confident hatching pro.
Building Your Hatching Roadmap: Milestones and Next Steps
Seeing your skills improve with each hatch is incredibly rewarding. Don’t aim for perfection right away; start small and be realistic. A successful hatch, even if it’s not picture-perfect, is a huge win. Every experience, from setting up your incubator) to candling the eggs, adds to your knowledge.
A pre-hatch checklist is your secret weapon, like a trusted recipe. Include checks for incubator temperature and humidity, making sure your egg turner is spinning happily, and having a backup plan for power outages. These seemingly small things can make or break a hatch. I learned this the hard way when a storm nearly wiped out an entire batch because I hadn’t checked my generator’s fuel. Trust me, learn from my mistakes!
Learning from Failures and Connecting with the UK Poultry Community
Let’s be real, hatching doesn’t always go as planned. Even seasoned hatchers have their share of setbacks. The trick is to see these not as failures, but as valuable lessons. Ask yourself: what happened, and what can you adjust next time? The UK has a wonderful poultry community brimming with helpful people ready to share their wisdom. Online forums, local poultry clubs, or even a quick chat at your local feed store can be goldmines of information.
Developing Your Hatcher’s Intuition
With experience, you’ll develop a sixth sense for hatching. You’ll start to notice the subtle cues – a slight shift in humidity, the way the chicks move during candling – that tell you everything is on track. This intuition is what separates the confident hatchers from the rest.
Turning Your Skills into a Rewarding Hobby
Incubating eggs is so much more than just getting chicks; it’s a deeply fulfilling hobby. It’s a chance to connect with nature, witness the miracle of life, and add some feathered friends to your garden. And that feeling of seeing fluffy chicks peck their way out of their shells? Knowing you played a part in that? There’s nothing quite like it.
Ready to level up your hatching game? HatchingEggs.eu offers premium hatching eggs from a wide variety of poultry breeds. It’s the perfect place to expand your flock and hone your skills. Hatch your dreams today!