


Understanding What Makes a Brooder Actually Work
Before you splash out on fancy equipment or start building a custom brooder, let’s talk about what a brooder really does. At its heart, a chick brooder setup is just a safe, warm, and clean space that takes the place of a mother hen. It’s a temporary home meant to guide your chicks from tiny, fragile fluffballs to fully-feathered youngsters ready for the big coop. The aim isn’t merely to keep them alive; it’s to help them flourish.
It’s easy to get sidetracked by photos of elaborate brooders online, but the best setup is the one that fits your situation. The core principles of a good brooder are always the same: it must provide consistent warmth, easy access to food and water, safety from drafts and predators, and enough room for them to grow. How you deliver on these essentials is entirely up to you.
Thinking Like a Chicken Keeper
Experienced keepers don’t just tick boxes on a list; they think about the practicalities of their day-to-day life. For instance, if you’re raising three chicks in a spare room, your needs are quite different from someone raising thirty in a garage. The spare-room keeper will likely prioritise a silent heat plate and a low-dust bedding like hemp to keep the house clean. Their brooder could be a simple, large plastic tote that’s easy to manage indoors.
On the other hand, the keeper with a larger flock in their garage has more flexibility. They might choose a 100-gallon stock tank, which gives the chicks plenty of space to grow for several weeks without needing an upgrade. Since it’s in a garage, a bit of dust from pine shavings isn’t a major issue, and they can safely secure a heat lamp well away from anything flammable. Both are fantastic examples of a chick brooder setup, but each is tailored to a different reality.
Why Space Really Matters
One of the most common mistakes is underestimating just how fast chicks grow and how much space they need. A crowded brooder quickly leads to stress, mess, and health issues. As a starting point, you should provide at least 0.5 square feet per chick, but you absolutely must have a plan for expansion. A crucial part of a good setup is giving chicks enough room to move away from the heat source to cool down, a natural behaviour essential for regulating their body temperature.
This focus on space isn’t just a tip for backyard keepers; it reflects bigger changes in poultry welfare. For example, evolving standards in UK poultry production have prompted retail-led initiatives to reduce stocking densities by over 20%. This push for more space and enrichment in commercial farms tells us something vital: more room means healthier, happier chicks. You can read more about these industry shifts on PoultryWorld.net.
Thinking about these principles from the get-go, well before your chicks arrive, is the first step. If you’re hatching your own, it’s a great idea to plan your brooder while the eggs are still in the incubator. For those just starting out, our guide on how to incubate chicken eggs at home might be just what you need.
Choosing Equipment That Actually Works for Your Situation
Walking into the world of brooder equipment can feel like a maze, with every product claiming to be the absolute best. The real secret isn’t about finding one magical item, but about piecing together a system that works for your home, your budget, and the number of chicks you plan to raise. A good chick brooder setup should make your life easier, not add more chores to your day.
Brooder Containers: From Totes to Tanks
The brooder itself is your starting point, and you really don’t need to break the bank. Many keepers have great success using large plastic storage totes; they’re cheap, easy to find, and a breeze to clean. A 40-gallon tote is fine for a few chicks for the first couple of weeks, but they grow at an astonishing rate. For a small flock, a 100-gallon metal stock tank is a more long-term solution. It’s a bigger investment upfront, but it gives your chicks enough room to thrive for 7-8 weeks before they need moving, plus it’s incredibly durable and simple to sanitise.
Don’t be afraid to get creative. Large cardboard boxes from deliveries can be used, or you can set up a portable pet pen and line the inside with cardboard to act as a draught shield. What matters most is that it’s secure, free from draughts, and spacious enough for chicks to move about and, importantly, get away from the heat source if they need to.
The Great Heat Debate: Lamps vs. Plates
Choosing your heat source is one of the biggest decisions you’ll make for your chicks, directly affecting their safety and how they behave.
- Heat Lamps: The classic, budget-friendly option. A heat lamp uses a powerful bulb, often a 250-watt red bulb, to heat a wide area. The downside is the significant fire risk if it gets knocked over or falls into the bedding. If you go this route, you must secure it with multiple, redundant fastenings.
- Heating Plates: The modern, and much safer, alternative is a brooder heating plate. It’s designed to mimic a mother hen, providing warmth from above. Chicks huddle underneath when they’re cold and come out to explore when they’re warm enough, which allows them to regulate their own temperature naturally. They use far less electricity and completely remove the fire hazard of a lamp. A pro tip: get a model with an anti-roost cone on top, because chicks will quickly figure out how to jump on it and make a huge mess!
To help you decide what’s right for your situation, here’s a quick comparison of the common equipment you’ll need.
Brooder Equipment Comparison Guide
This table breaks down the heating options, containers, and accessories to help you compare the pros, cons, and best use cases for each.
| Equipment Type | Cost Range | Pros | Cons | Best For |
|---|---|---|---|---|
| Heat Lamp | £15 – £30 | Inexpensive; widely available; heats a large area. | High fire risk; difficult for chicks to self-regulate temperature; high energy use. | Budget-conscious keepers with a secure, monitored setup. |
| Heating Plate | £40 – £70 | Very safe; low energy use; mimics natural mothering; allows self-regulation. | Higher initial cost; limited to a specific number of chicks. | Keepers prioritising safety and natural chick behaviour. |
| Plastic Tote | £10 – £20 | Cheap and easy to clean. | Quickly outgrown; can crack over time. | Brooding a very small number of chicks (1-6) for a short period. |
| Metal Stock Tank | £80 – £150 | Durable; spacious; long-lasting; easy to sanitise. | Expensive; heavy and bulky to move. | Raising a small flock (6-20 chicks) for the full 7-8 week brooding period. |
| Nipple Waterer | £5 – £15 | Keeps water perfectly clean; reduces bedding dampness. | Chicks need to be taught how to use it initially. | Keepers who want to minimise daily cleaning and ensure hygiene. |
| Hemp Bedding | £20 – £35 (per bale) | Highly absorbent; very low dust; compostable. | More expensive than other options. | Indoor brooders where air quality is a top priority. |
This comparison highlights the trade-offs between cost, safety, and convenience. While a heat lamp and plastic tote is the cheapest way to start, a heating plate and stock tank offer a safer and less labour-intensive setup in the long run.
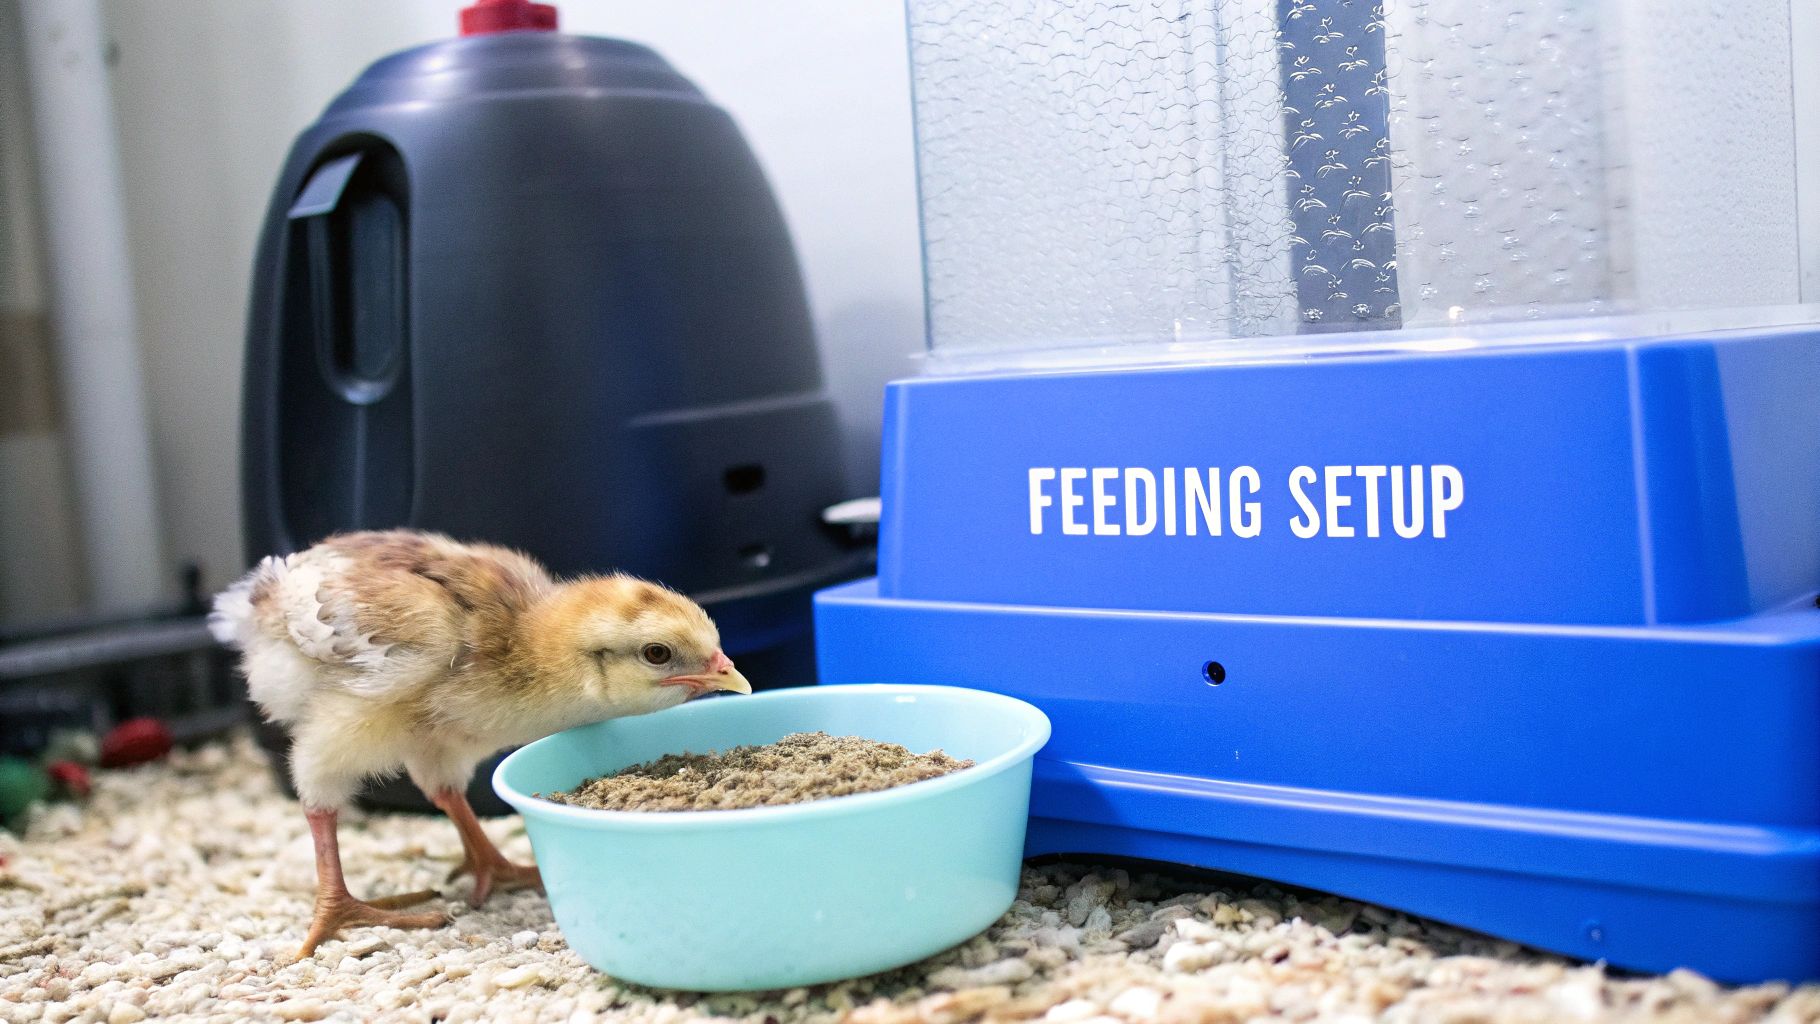
Feeders, Waterers, and Bedding
Where you place your feeder and waterer is key to keeping things clean. I always raise them up on a small block of wood or a couple of bricks. This simple trick stops the chicks from constantly scratching their bedding into their food and water. Nipple waterers are a fantastic invention because they keep the water supply pristine, but remember to tap the nipple a few times on the first day to show your new arrivals how it works.
When it comes to bedding, pine shavings are a popular and absorbent choice, but they can be surprisingly dusty, which isn’t great for the chicks’ delicate respiratory systems. If your budget allows, hemp bedding is a superior alternative. It’s incredibly absorbent and virtually dust-free, making it the best option for brooders kept inside your home. If you’re fascinated by the entire process, you can find more information by raising chickens from eggs in our comprehensive guide.
Finally, managing the temperature is non-negotiable. This chart shows the ideal temperature schedule for your chicks’ first three weeks.
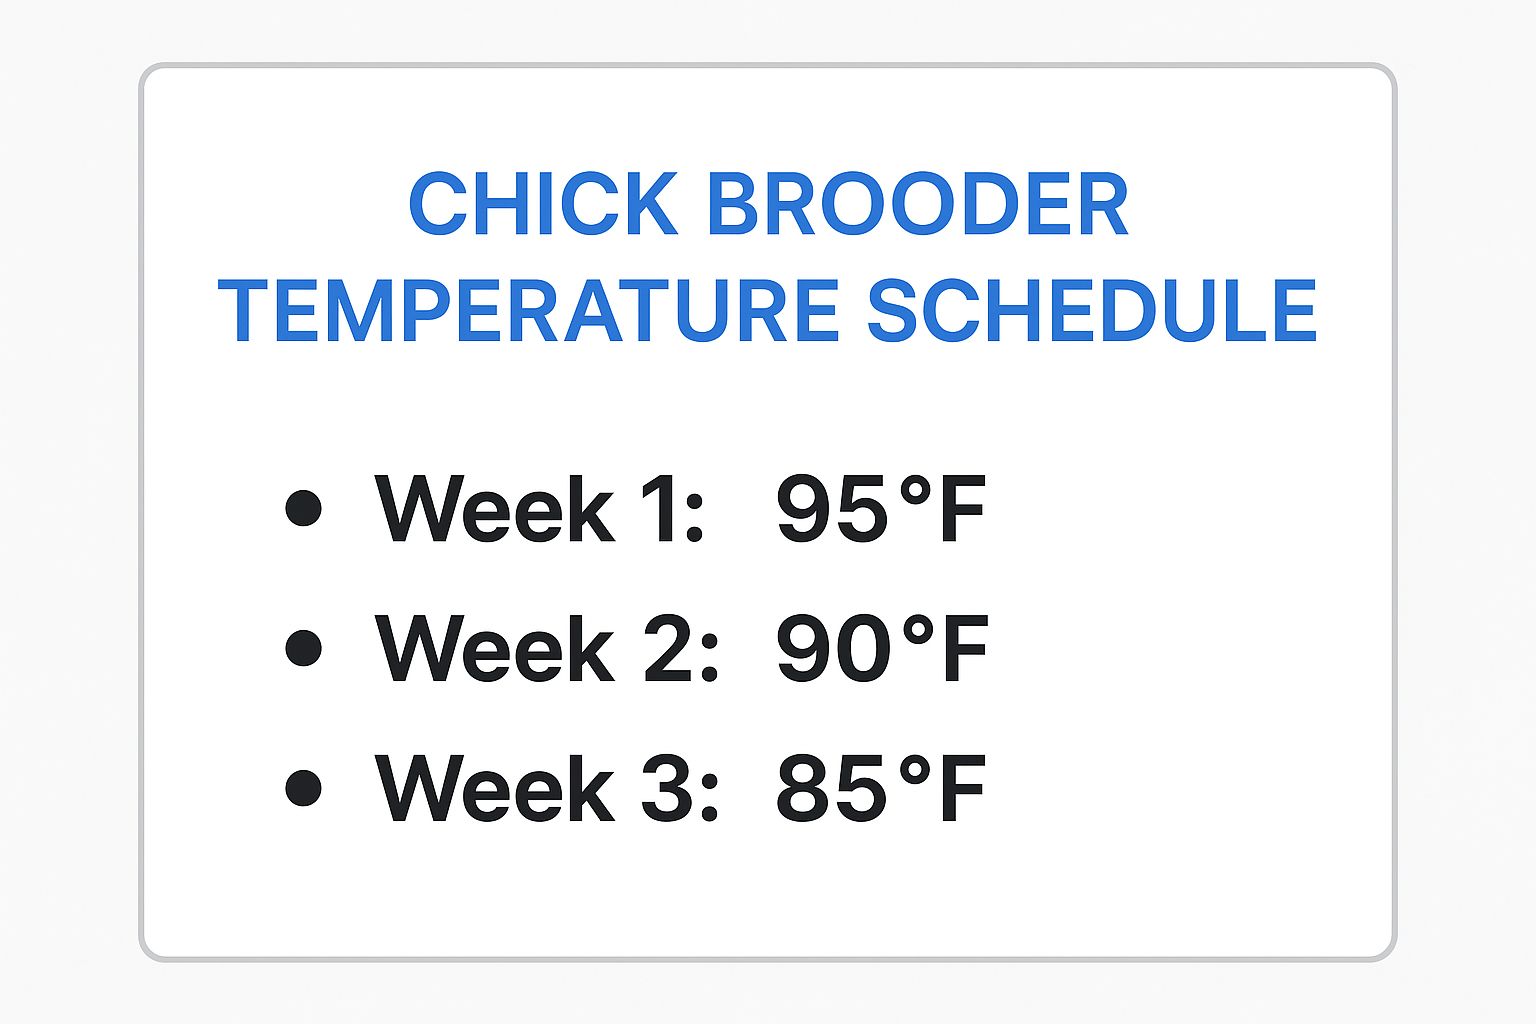
As you can see, the heat needs to be reduced gradually each week as the chicks grow their feathers and get better at keeping themselves warm.
Reading Your Chicks Better Than Your Thermometer

While a thermometer gives you a number, it doesn’t really tell you how your chicks are feeling. The true secret to a successful chick brooder setup is learning to understand the subtle cues your little flock gives you. Ask any seasoned keeper, and they’ll tell you that chick behaviour is a far more reliable guide than any digital display. Paying close attention lets you fix problems with their environment long before they become serious health issues.
Your chicks are always telling you what they need; you just have to learn their language. Think of them as tiny, chirping barometers. If they’re spread out evenly, cheeping contentedly, and pottering about to eat and drink, you’ve nailed it. This is the goal: they feel warm, safe, and comfortable enough to explore.
Decoding Chick Behaviour
Learning to read your chicks is a bit like learning a new dialect. Once you know the basics, a quick glance is all it takes to know if they’re comfortable.
- Chicks huddled tightly under the heat source: This is the classic sign they’re too cold. They’re piling on top of each other to share body heat. If you spot this, it’s time to lower your heat lamp or turn up the temperature on your brooder plate.
- Chicks scattered far from the heat source: This means the opposite—it’s too hot in there. They’re actively trying to get away from the heat. You’ll need to raise the lamp or dial down the plate’s temperature. Overheating is serious as it can lead to dehydration and stress very quickly.
- Chicks chirping loudly and frantically: A constant, high-pitched peeping isn’t a happy sound; it’s a distress call. It usually means they’re too cold, hungry, or thirsty. First, check the temperature, then make sure their feeder is full and they can easily reach their waterer.
- Quiet, lethargic chicks: A peaceful brooder might seem like a good thing, but unusual silence combined with sluggishness can be a major red flag. It could signal illness or that they’ve become chilled. Healthy chicks are active and make soft, happy chirps.
A good chick brooder setup should create a temperature gradient. This means the entire space shouldn’t be the same temperature. The area directly under your heat source will be the warmest spot, with cooler zones further away. This allows the chicks to manage their own body temperature, moving closer to the heat when they feel a bit cool and wandering off when they’re warm enough—just as they would with a mother hen.
Beyond Temperature: Humidity and Ventilation
While getting the heat right is vital, don’t forget about humidity and ventilation. Stale, damp air mixed with droppings is a perfect recipe for ammonia build-up and respiratory infections. You need good airflow, but it must be draught-free. A draught is a steady stream of cool air that can chill chicks in an instant, even if the thermometer shows the correct ambient temperature.
To check for draughts, put your hand down at chick-level inside the brooder. If you feel a distinct cool breeze, you need to block it. Covering part of the brooder top with a towel or a piece of cardboard can work, but always leave plenty of space for fresh air to circulate. It’s all about finding that balance between warmth and fresh air.
This kind of precise monitoring is becoming more common in the industry. The UK poultry brooder market is growing and expected to represent nearly 10% of the global market by 2025. This expansion is partly thanks to new technologies like IoT-powered monitors that track temperature and humidity in real-time. You can learn more by reading a full report on the future of the poultry brooder market.
Ultimately, your own eyes and ears are the best tools you have. Always trust what you see. If the thermometer reads 33°C but the chicks are all huddled in a pile, believe the chicks and adjust the heat. Daily checks are essential, and popping your head in for a quick look whenever you pass by will help you catch any problems before they start.
Building Safety and Cleanliness Into Your Daily Routine
A good chick brooder setup is more than just a warm box; it’s a small world where safety and hygiene are part of the design. When you think about these things from the very beginning, you’re not just preventing accidents—you’re making your daily tasks easier and setting your chicks up for a healthy start. It’s all about being practical, not perfect.
The aim is to keep the brooder clean enough to ward off illness without creating a sterile bubble that’s a nightmare to maintain. A realistic routine is your best friend here. Instead of a massive deep clean every day, which can be quite stressful for the little ones, focus on spot cleaning. Just a couple of minutes each morning and evening to scoop out soiled bedding and give the feeder and waterer a quick wipe makes a huge difference. This simple habit stops droppings from building up and keeps things smelling fresh.
Crafting a Proactive Cleaning Schedule
A cleaning schedule you can actually stick to is far more effective than an ambitious one you can’t. There’s no need to scrub the entire brooder from top to bottom every single day. A better method is to do partial bedding changes every few days and a full refresh once a week.
- Daily Checks: A quick look-in twice a day is a must. Top up their food and water, check for any chicks that seem a bit off, and remove any wet or particularly messy patches of bedding.
- Partial Clean (Every 2-3 Days): Scrape out the top layer of dirty bedding, especially under the heat source where they all huddle, and top it up with fresh material.
- Full Clean (Weekly): Pop the chicks into a secure temporary box. Take out all the old bedding, give the brooder a good scrub with a simple mix of vinegar and water, and let it dry completely before adding a fresh, deep layer of bedding.
This tiered approach keeps their home consistently clean without causing too much disruption for you or your flock. Always keep an eye on the droppings, as they’re a great indicator of health. If you notice persistently runny droppings, it could be a sign of trouble. You can find out more by reading our guide on what causes diarrhoea in chicks.
Integrating Safety from the Ground Up
Safety is one area where you can’t cut corners, and it all begins with your equipment. If you’re using a heat lamp, make it a daily habit to double-check its security. Is it clamped on tightly? Is it also secured with a secondary chain or wire? This prevents it from falling into the flammable bedding. Tuck all electrical cables safely away, out of the reach of curious pets or small children.
A secure lid is another vital safety feature. You’d be surprised how quickly chicks start to test their wings, and a simple mesh or wire cover stops any early escapees while protecting them from the family cat or dog. The lid must allow for good airflow but be sturdy enough to keep unwanted visitors out.
This focus on careful management is mirrored in the commercial poultry world. UK hatchery data shows that consistent chick placements are vital for meeting demand, which reached 92.9 million broiler slaughterings in March 2025 alone—a 2.3% increase from previous periods. The sophisticated brooder systems used on this scale depend on precise temperature and ventilation, principles that are just as crucial for your setup at home. You can delve into these industry figures through the UK government’s monthly poultry reports. By making these checks part of your routine, you create a safe haven where your chicks can truly flourish.
Making the Move From Brooder to Real World
Knowing when to move your little flock from the cosy, controlled world of their chick brooder setup to the great outdoors is one of those key moments in chicken keeping. It feels like a big step, and honestly, it’s more of an art guided by observation than a hard-and-fast rule on a calendar. The aim is to make the transition so smooth that your chicks hardly notice, ensuring they carry on thriving without any stress. This isn’t just about flinging open the coop door; it’s a careful process of acclimatisation.
The most reliable sign that your chicks are ready for their next adventure is their feathering. Once they’ve traded most of their fluffy down for proper feathers, they’ve got the insulation they need to manage their own body temperature. This usually happens around 6 to 8 weeks old, but remember, different breeds feather out at different speeds. Don’t just watch the calendar; watch the birds. Are they fully feathered? Are they starting to look like miniature versions of adult chickens? These are your real clues.
Staging the Introduction to the Outdoors
Moving chicks from a consistently warm brooder straight into a coop where temperatures can swing wildly can be a real shock to their systems. The best way to handle it is with a gradual introduction, letting them dip their toes in, so to speak.
A few days before the big move, try turning off their heat lamp during the day, as long as the brooder temperature stays above a comfortable 21°C. This helps them get used to natural temperature changes. After that, it’s time for some field trips to their new coop and run for short, supervised visits on warm, dry days.
- First Forays: Start with just an hour or two in their new home. Make sure the space is secure and that they can easily find food and water. This gives them a chance to explore their new surroundings without feeling overwhelmed.
- Building Confidence: Over the next week or so, slowly increase the time they spend outside each day. This gentle introduction helps them get used to the new sights, sounds, and sensations of the outdoors.
- The Final Move: Once they seem relaxed and are happily spending most of the day outside, you can make the move permanent. Try to pick a mild night for their first proper sleepover in the coop.
This gradual approach is all about minimising stress, which is vital for keeping them healthy and avoiding any growth setbacks.
Preparing the Coop and Ensuring Health
Before you even consider moving them, their new home needs to be ready to welcome them. Give the coop a thorough clean, make sure it’s completely secure from predators, and check for any draughts. The new setup should feel like a safe, logical next step from the excellent start you gave them in the brooder.
To help you visualise this entire process, here’s a week-by-week guide that ties together their development with the care they need as they prepare for the move.
| Week | Temperature Range | Development Milestones | Transition Signs | Care Notes |
|---|---|---|---|---|
| 1 | 32-35°C | Fluffy down, dependent on heat source. | N/A – Still fully dependent on the brooder. | Focus on clean bedding, constant food, and water. Monitor for pasting up. |
| 2 | 29-32°C | First wing feathers start to appear. | More active, starting to flutter and test wings. | Lower temperature slightly. Introduce a small roosting perch. |
| 3 | 26-29°C | Feathers developing on back and tail. | Getting more adventurous, scratching and pecking. | Continue lowering the heat. Ensure they have enough space. |
| 4 | 23-26°C | More body feathers, less downy appearance. | Showing interest in the world outside the brooder. | Consider turning off the heat lamp on very warm days, with supervision. |
| 5 | 21-23°C | Nearing full feathering, but some down remains. | Actively trying to fly, quite noisy. | Start short, supervised trips outside on warm, sunny days (1-2 hours). |
| 6 | Room Temp (21°C+) | Fully feathered, look like mini chickens. | Ready for the move. Confident during outdoor time. | Turn off the heat lamp permanently. Lengthen outdoor time. Move to the coop. |
| 7+ | Ambient Outdoor Temp | Adapting to coop life, establishing pecking order. | Foraging, roosting, and behaving like adult birds. | Monitor their first few nights. Ensure they’re finding food/water and roosting. |
This timeline gives you a solid framework, but always let the birds’ own progress be your ultimate guide. Once they are fully feathered and confident outdoors, you know you’ve done your job well.
Consistency is really important. Moving into the great outdoors also means they will be exposed to new things, including parasites they might pick up while foraging. It’s a good time to get ahead of this. For a proactive approach, you can learn more about how to worm chickens in our comprehensive article. By taking these measured steps, you’re setting your flock up for a long, healthy, and happy life beyond the brooder.
Solving Problems Before They Become Disasters
Even with the most perfectly organised chick brooder setup, things can and will go wrong. It could be a sudden power cut on a chilly night, an unexpected cold snap, or one chick deciding to be a bit of a bully. The real knack to chick rearing isn’t about creating a world where nothing ever goes amiss—that’s just not realistic. It’s about spotting the signs of trouble early and knowing how to react calmly and decisively. A quick, well-judged response can truly be the difference between a small hiccup and a major catastrophe.
From my own years of raising chicks, I’ve learned that some issues are simply part of the experience. The important thing is to tell the difference between normal chick behaviour and something that needs your attention. For example, a bit of a scrum around the feeder is perfectly normal; one chick relentlessly attacking another is a red flag. You’ll pick up on these subtleties by spending time just watching your new flock.
Common Crises and Quick Solutions
Let’s run through a few real-life situations that might crop up and how you can handle them. These are the moments that can make your stomach drop, but having a plan ready makes all the difference.
- Sudden Power Cut: This is a classic nightmare for any chick keeper, especially during a cold spell. Your number one priority is warmth. If you’re using a brooder heating plate, it will hold onto some heat, so quickly gather the chicks underneath it. Drape thick blankets over the brooder (making sure there’s still ventilation) to trap as much warmth as you can. For a longer outage, a hot water bottle securely wrapped in a towel can serve as a temporary radiator. It’s a low-tech fix, but it works.
- Aggressive Pecking: Occasionally, one chick turns into a tyrant. This can be triggered by stress, boredom, or feeling overcrowded. If you see persistent pecking that draws blood, you need to step in immediately. The best course of action is to remove the bully and put it in a small “timeout” area within the brooder. A simple wire mesh divider works well. It can still see and hear the others, which helps with reintroduction, but it can’t do any more harm. This often disrupts the behaviour enough to reset the pecking order. Giving the chicks more space or adding distractions like a hanging cabbage leaf can also help channel their energy more productively.
- Pasty Butt: This is a frequent and potentially fatal problem where droppings stick to a chick’s vent, effectively sealing it. It’s often brought on by the stress of shipping or slight overheating in the brooder. You’ll want to check your chicks’ bottoms daily for the first week. If you find it, gently hold the chick’s rear end under a trickle of warm water to soften the blockage, then carefully wipe it away with a soft cloth or cotton bud. Their skin is incredibly delicate, so be extremely gentle.
When to Monitor and When to Act
Not every odd behaviour is a five-alarm fire. Sometimes, the best thing to do is simply to watch and wait. For instance, if your chicks seem a bit sluggish right after you’ve changed their bedding, they might just be unsettled by the change. Give them an hour or so to adjust before you start to worry. Similarly, a single chick sleeping apart from the group isn’t always sick; it might have just found a comfy spot.
Understanding what they’ve been through inside the egg gives you a real appreciation for how fragile they are in these early days. Their journey from yolk to chick is incredibly complex. You can learn more about this amazing process in our article on the various chicken egg development stages. Building this deeper knowledge helps you develop an instinct for what’s normal and what’s not. Your most powerful tool will always be careful observation. Get to know the normal sights and sounds of your flock, and you’ll spot any problems in a flash.
Your Practical Path to Brooder Success
Let’s tie all this together into a practical plan you can put into action. A successful chick brooder setup isn’t just about having the right bits of kit; it’s about what you do every single day. The goal isn’t perfection, but a realistic routine that works for you and helps your chicks thrive. Whether you’re working with a small space or a tight budget, the fundamental principles of good care don’t change. The real reward is watching those little fluffballs grow into strong, healthy birds.
Your Daily and Weekly Brooder Checklist
Consistency is your best friend when raising chicks. Having a simple checklist helps you stay on track, especially when life gets hectic. Think of this less as a strict set of rules and more as a framework for building good habits.
Daily Routine (5-10 minutes):
- Morning Check: First thing in the morning, pop in to see the chicks. Are they active and spread out comfortably? It’s the perfect time to top up their food and provide fresh, clean water. I always give the rim of the waterer a quick wipe to stop any gunk from building up.
- Behaviour Scan: Take a moment to just watch them. You want to hear happy, gentle chirping, not panicked cheeping. Keep an eye out for any chicks that seem lethargic or are huddled away from the others.
- Spot Clean: Quickly scoop out any particularly soiled or wet bits of bedding. This one small action makes a huge difference to the air quality and overall hygiene in the brooder.
- Evening Check: Before calling it a night, do one last check. Make sure the heat source is working as it should and the chicks look settled and comfortable.
Weekly Routine (15-20 minutes):
- The Full Refresh: Once a week, it’s time for a deep clean. I usually pop the chicks into a secure cardboard box with a bit of bedding while I work. Empty out all the old bedding, give the brooder a good scrub with a simple solution of white vinegar and water, and let it air dry completely.
- Deep Clean Feeders/Waterers: Take the feeders and waterers out and give them a proper wash with soap and water. This gets rid of any hidden bacteria and ensures your chicks have the freshest possible start each week.
- Add Fresh Bedding: Once the brooder is dry, lay down a deep, fresh layer of bedding. A good 3-4 inches gives them great insulation and plenty of material to scratch and forage in, which they love to do.
Measuring Your Brooder’s Success
So, how do you know if you’re doing a good job? It’s more than just keeping them alive. Look for these clear signs that your flock is thriving:
- Steady Growth: You should be able to see them growing bigger almost daily, with their proper feathers gradually replacing their fluffy down.
- Active and Curious Behaviour: Healthy chicks are busy little creatures! They should be scratching about, pecking at their food, exploring every corner of their space, and chirping to each other.
- Healthy Appetites: You’ll notice them eating and drinking regularly throughout the day. A full crop is a happy crop!
- Clean Bottoms: After the first few days, problems like ‘pasty butt’ should be very rare. Clean vents are a fantastic sign of good digestive health, which is often linked to the brooder temperature being just right.
If you are consistently seeing these positive signs, you can feel confident that your chick brooder setup is giving your new flock the very best start in life.
For those ready to hatch their own dreams, starting with the highest quality stock is crucial. At HatchingEggs.eu, we offer premium hatching eggs from meticulously selected breeds, providing you with the best foundation for a healthy, vibrant flock. You can explore our diverse selection and find expert resources at HatchingEggs.eu to begin your poultry journey with confidence.