


Why Building Your Own DIY Egg Incubator Makes Perfect Sense
Commercial incubators can be expensive, often costing hundreds of pounds. However, building your own incubator can be a cost-effective alternative, sometimes even resulting in a superior product. Across the UK, more and more people are embracing the homemade approach and enjoying the benefits.
Building a DIY egg incubator offers unparalleled control over the hatching process. You dictate every aspect, from temperature regulation to capacity customization. For example, a small incubator is perfect for hatching a few rare breed chicks, while a larger one accommodates expanding flocks. This level of customization is rarely possible with store-bought models.
This increased control directly translates to cost savings. You avoid paying for unnecessary features or branding, focusing instead on essential components for successful hatching. The process also allows you to develop valuable skills and gain a deeper understanding of incubation.
Understanding the UK Egg Market and its Impact on DIY Incubation
Considering market trends is crucial for any hatching endeavor. Understanding the egg market is particularly important for DIY incubator enthusiasts in the UK. The UK’s egg production has seen recent fluctuations, with the average farm-gate egg price increasing by 3.5% between Q1 2024 and Q1 2025, reaching 148 pence per dozen. This rise reflects broader economic shifts and changes in demand, potentially influencing the appeal of DIY incubators as more people consider producing their own eggs. Find more detailed statistics here. This makes DIY incubation an attractive option for budget-conscious poultry keepers.
The Satisfaction of Hatching Your Own
Beyond the financial advantages, building a DIY incubator offers the immense satisfaction of creating something with your own two hands. It’s not just about hatching chicks; it’s about the pride of engineering a successful hatching environment. This sense of accomplishment is magnified when the chicks finally emerge, deepening your appreciation for the miracle of life.
Performance and Reliability
Many DIY enthusiasts find that their homemade incubators often outperform commercial models. This is partly due to the ability to customize and fine-tune the environment for specific eggs. With regular maintenance and careful component selection, a DIY incubator can provide years of reliable service. This longevity speaks to the builder’s ingenuity and dedication. A DIY incubator offers a rewarding experience that combines practicality, affordability, and the joy of witnessing new life. This project is ideal for any UK enthusiast eager to take control of their hatching experience.
Essential Components That Make Or Break Your DIY Incubator
Building a successful DIY egg incubator isn’t about spending a fortune, but about choosing the right components. Let’s explore the essential elements, from heating and humidity to turning and ventilation, that will help you achieve consistent hatching success.
The Heart of the Matter: Heating Elements
The heating element is crucial, maintaining the precise temperature needed for embryonic development. A simple incandescent bulb works for small projects, but temperature can fluctuate. For better temperature regulation and even heat distribution, consider a thermostat-controlled heating pad, like those used for reptile terrariums.
For larger incubators, a ceramic heat emitter combined with a thermostat offers excellent temperature stability and energy efficiency. This combination allows for precise temperature control and minimizes electricity waste. Maintaining the correct temperature is vital for healthy chick development.
Humidity: The Unsung Hero
Humidity is as critical as temperature. Low humidity can dehydrate the eggs, while high humidity can drown the developing embryos. A water pan inside the incubator provides basic humidity, but its effectiveness can vary.
For more consistent humidity, consider a humidity sensor paired with a small ultrasonic humidifier. This setup creates a stable environment, closely replicating natural incubation conditions. This precise control is essential for healthy embryo development.
Turning Mechanisms: Mimicking Nature
A hen regularly turns her eggs to prevent the embryo from sticking to the membrane. You can manually turn eggs several times daily, but for larger batches or added convenience, an automatic egg turner is a worthwhile investment. These devices gently rotate the eggs at set intervals, mimicking a hen’s actions and boosting hatch rates. This automated approach reduces the risk of manual errors and ensures consistent turning.
Ventilation: Ensuring Fresh Air
Proper ventilation provides a constant supply of fresh air and removes carbon dioxide. Incorporate small holes or vents in the incubator walls, strategically placed for air circulation without creating drafts. This balance ensures fresh air while maintaining a stable temperature.
The Importance of Backups and Monitoring
Backup systems are crucial in case of power outages or equipment malfunctions. A UPS (Uninterruptible Power Supply) can provide temporary power, while a secondary heating source offers added security. Accurate monitoring is equally important. Digital thermometers and hygrometers provide precise readings, enabling necessary adjustments to maintain optimal conditions inside the incubator.
To help you choose the right components for your DIY incubator, we’ve created a comparison table:
DIY Egg Incubator Component Comparison: This table compares essential incubator components, offering budget and premium options with UK suppliers and estimated costs.
| Component | Budget Option | Premium Option | UK Supplier (Example) | Estimated Cost |
|---|---|---|---|---|
| Heating Element | Incandescent Bulb | Ceramic Heat Emitter | Amazon UK | £5 – £20 |
| Thermostat | Basic Thermostat | Digital Thermostat | RS Components | £10 – £30 |
| Humidity Control | Water Pan | Ultrasonic Humidifier | Argos | £15 – £50 |
| Egg Turner | Manual Turning | Automatic Egg Turner | Brinsea | £20 – £100 |
| Thermometer | Analog Thermometer | Digital Thermometer | Maplin | £5 – £20 |
| Hygrometer | Analog Hygrometer | Digital Hygrometer | Maplin | £5 – £20 |
This table provides a starting point for budgeting and sourcing components. Remember, choosing higher-quality components often translates to better performance and higher hatch rates.
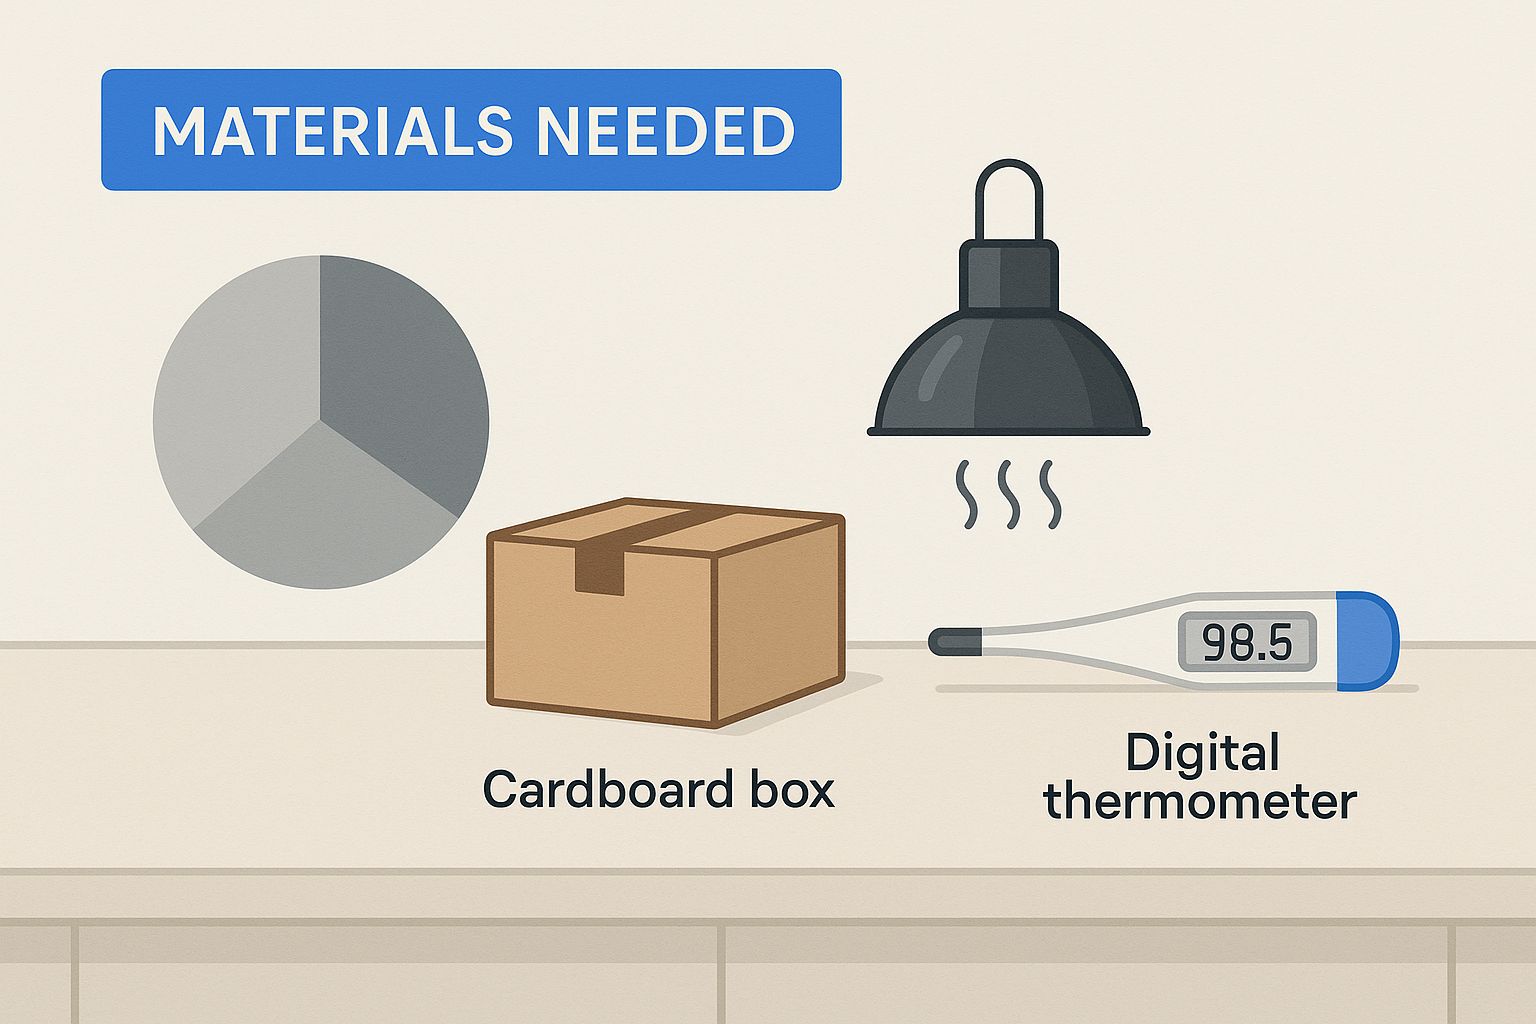
The infographic above illustrates a simple DIY incubator setup using readily available materials like a cardboard box, heat lamp, and digital thermometer. It emphasizes the accessibility of DIY incubation, highlighting the importance of temperature monitoring even with basic setups.
Learn more in our article about How to master the different stages of chicken egg development. Selecting the right components is key to a successful DIY incubator, helping you achieve consistently high hatch rates and the joy of expanding your flock.
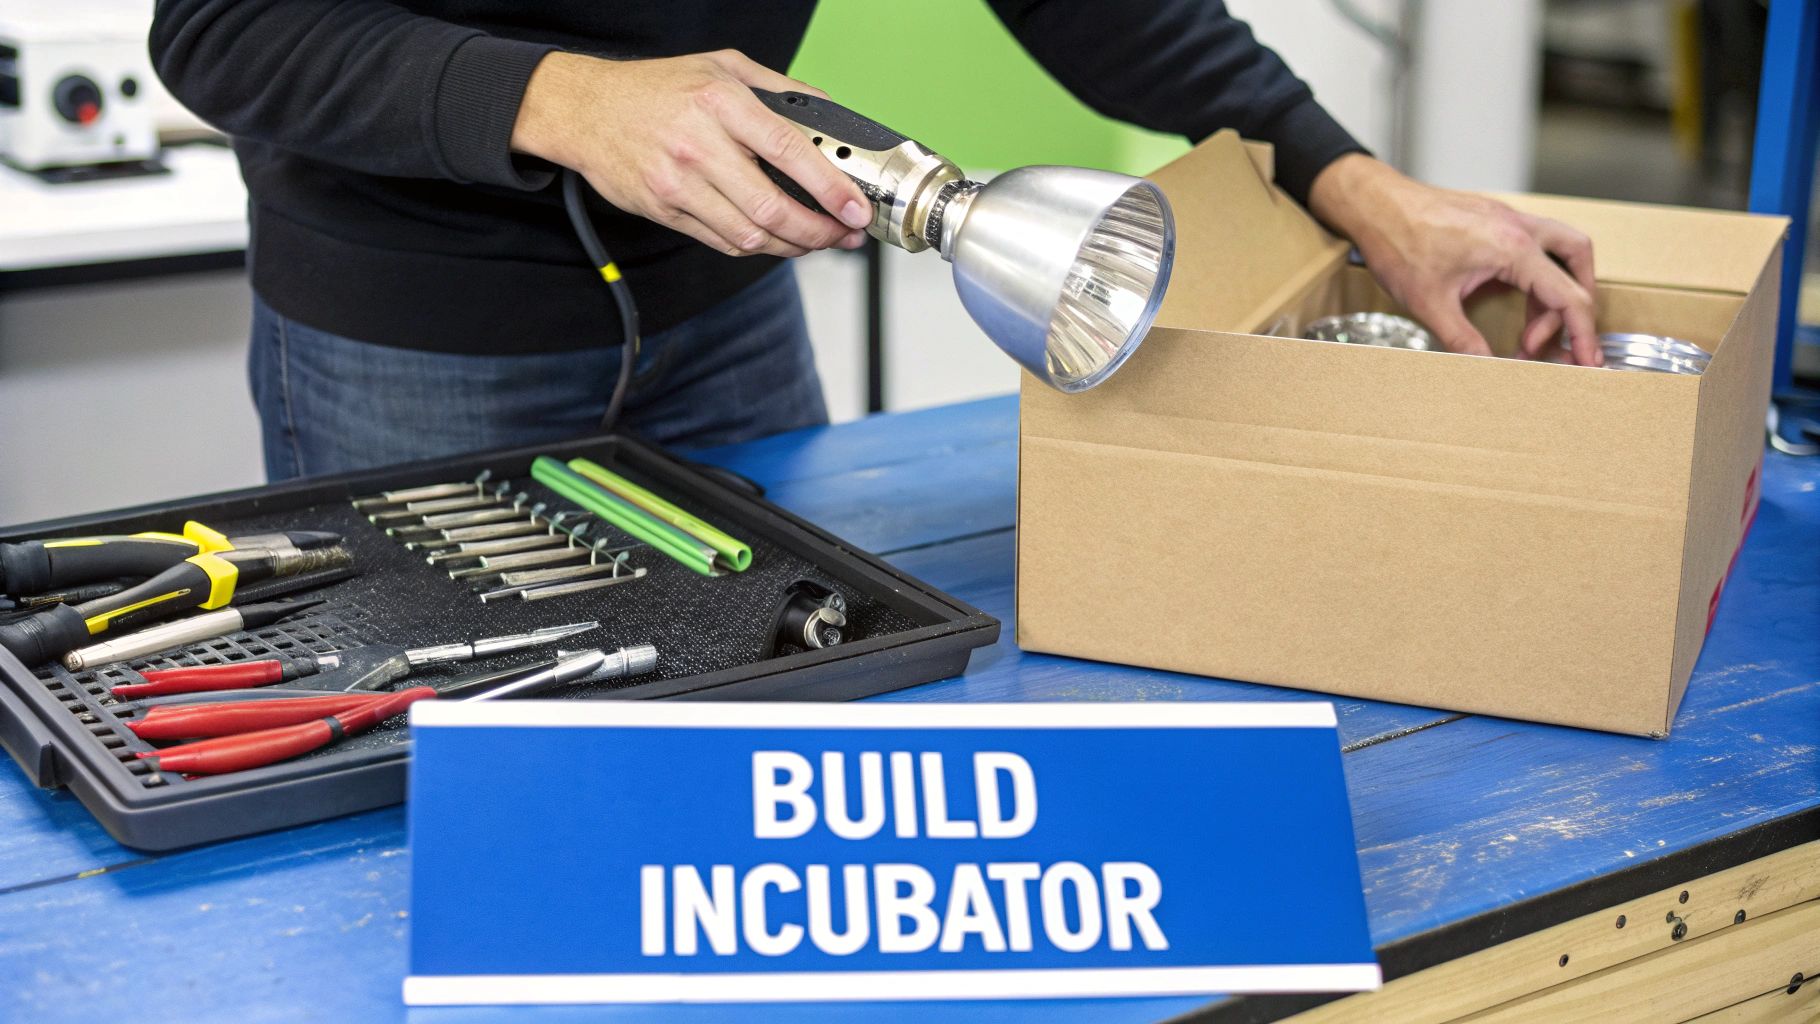
Building Your DIY Egg Incubator Step By Step
This guide will walk you through creating your own egg incubator, from choosing the right container to ensuring successful hatching. We’ll focus on avoiding common pitfalls along the way.
Choosing the Right Container
First, you’ll need a suitable container. A styrofoam cooler offers excellent insulation, essential for maintaining a stable temperature. Its lightweight design also makes it easy to move and adapt.
Alternatively, a sturdy cardboard box lined with insulating materials like bubble wrap or old towels provides a cost-effective option. The container size depends on the number of eggs you plan to incubate.
Remember to factor in space for the heating element, water pan, and turning mechanism.
Installing the Heating System
Next, install your heating element. Securely place an incandescent bulb or heating pad at the top of the incubator, making sure it doesn’t touch any flammable materials.
For precise temperature regulation, connect the heating element to a thermostat. This will automatically control the temperature inside the incubator. Ensure proper wiring and follow all safety precautions to prevent fire hazards.
Ventilation and Humidity Control
Proper ventilation is key for healthy embryo development. Create small holes on opposite sides of the container for air circulation.
A water pan placed beneath the heating element increases humidity. The pan size should correspond to the incubator size – a larger incubator needs a larger pan for sufficient humidity. You might find this helpful: How to master candling chicken eggs.
The Egg Turning Mechanism
For effective turning, build a simple rolling tray or use an automatic egg turner. A rolling tray, made from mesh or dowels, allows for manual egg rotation.
An automatic turner, while pricier, reduces manual work and ensures consistent turning. Regardless of your method, regular turning is vital for successful hatching.
Testing and Fine-Tuning
Once assembled, test your incubator for at least 24 hours before adding eggs. This lets you fine-tune the temperature and humidity for a stable incubation environment.
Monitor the readings closely, adjusting the thermostat or water pan as needed for optimal levels. The global automatic egg incubators market offers insights into broader trends. Driven by technological advancements and growing demand, the market, valued in 2023, is projected to expand. Explore this topic further.
Building a DIY incubator provides a rewarding and economical way to hatch your own chicks. With careful planning and construction, you can create a reliable system.
Mastering Temperature And Humidity For Perfect Results
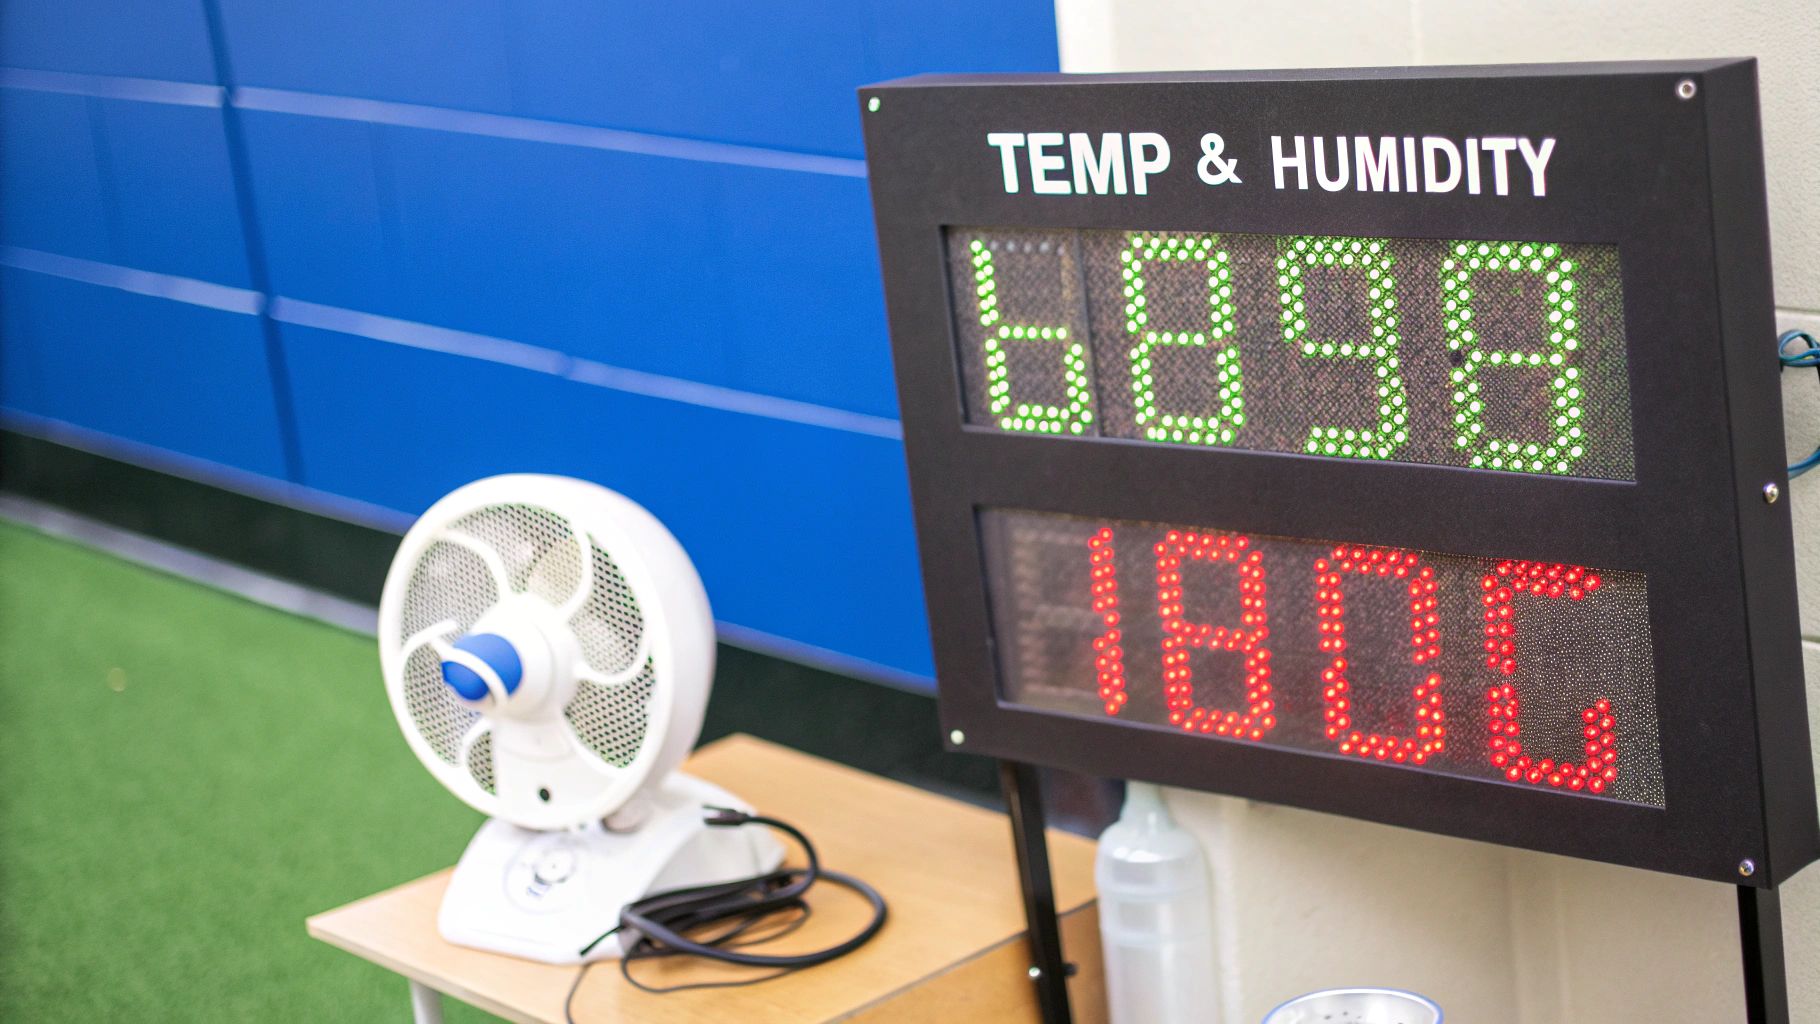
Creating the ideal environment inside your DIY incubator is crucial for hatching healthy chicks. This means maintaining precise temperature and humidity levels throughout the incubation process. Let’s explore how to achieve this delicate balance.
The Importance of 37.5°C
Maintaining a steady temperature of 37.5°C is essential. This replicates the natural warmth a hen provides. Even small variations can negatively impact development, potentially reducing hatch rates or producing less healthy chicks. Temperatures exceeding 39°C can be fatal to the developing embryos.
Humidity: The Balancing Act
Humidity plays a vital role too. Correct humidity levels prevent the eggs from drying out and ensure the chicks don’t drown in their shells. The ideal humidity changes throughout incubation. Initially, around 60-65% is generally recommended. During lockdown (the final days before hatching), increase humidity to around 70-75%. This prevents the membranes from drying, making it easier for chicks to emerge.
Fine-Tuning for Different Eggs and Seasons
Different egg types have slightly different incubation needs. For instance, duck eggs often require slightly higher humidity than chicken eggs. How to master temperature in your DIY incubator provides further information. Seasonal changes can also affect temperature and humidity inside your incubator. You might need extra heat during colder months.
Monitoring and Backup Systems
Regular monitoring is key to catching any temperature or humidity fluctuations early. Invest in a reliable digital thermometer and hygrometer for accurate readings. Consider backup systems like a UPS for temporary power during outages and a secondary heat source to maintain temperature stability in emergencies.
The UK hatchery industry provides interesting context. In 2025, UK hatcheries reported a 5.2% year-on-year increase in eggs set for commercial layer production in April. Discover more insights about UK poultry statistics. This commercial stability might influence demand for DIY incubators as more people explore self-sufficiency.
Ventilation and Moisture Retention
Proper ventilation is vital for air quality within the incubator. It ensures fresh air and removes carbon dioxide, which promotes healthy development. However, excessive ventilation can lower humidity. Balancing ventilation and moisture retention is crucial. This involves ensuring enough airflow without excessive drafts or drying out the eggs.
Mastering temperature and humidity is an ongoing process of observation and adjustment. By diligently monitoring your DIY incubator and applying these techniques, you’ll greatly improve your chances of hatching healthy chicks.
DIY Versus Commercial: Making The Right Choice For You
Choosing the right incubator is a crucial step for any aspiring poultry keeper. Whether you opt for a DIY incubator or a commercial model depends on several factors, from your budget and technical skills to the scale of your hatching ambitions. This guide provides a clear comparison to help you determine the best approach for your needs.
Cost Considerations: Balancing Investment and Returns
Building a DIY incubator is undeniably more affordable upfront. Using readily available materials, you can often construct a functional incubator for under £50. However, remember to factor in your time investment and potential troubleshooting costs. Commercial incubators offer convenience but come with a higher price tag, typically ranging from £100 to £500 or more. This can be a substantial investment, especially for beginners.
Features and Functionality: Flexibility Versus Convenience
DIY incubators offer unparalleled flexibility. You have complete control over the size, features, and even the aesthetics of your incubator. However, this customization requires a degree of technical skill and a willingness to learn. You’re responsible for designing and building everything, from the heating element to the turning mechanism. Commercial incubators, on the other hand, offer plug-and-play convenience with features like automatic turning, humidity control, and digital displays.
Real-World Performance: Tailored Results Versus Reliable Operation
A well-designed DIY incubator can perform just as well as a commercial model, sometimes even better. This is because you can tailor the environment precisely to your needs. However, achieving consistent results may require ongoing adjustments and refinements. Commercial incubators offer reliable, out-of-the-box performance, often backed by manufacturer warranties and customer support. This reliability is particularly valuable for beginners or those incubating valuable eggs. You might be interested in: How to master incubating quail eggs.
Reliability and Maintenance: Long-Term Factors
DIY incubators require ongoing maintenance and occasional repairs. You’ll need to diagnose and fix any issues, which requires some technical knowledge. Commercial incubators, particularly those built with high-quality components, generally require less maintenance. They also come with warranties and customer support for troubleshooting and repairs.
The Learning Curve: Hands-On Education Versus Simplicity
Building a DIY incubator is a rewarding learning experience. You’ll gain valuable insights into incubation principles and develop problem-solving skills. However, be prepared to invest time and patience, and embrace the learning process through trial and error. Commercial incubators prioritize ease of use, allowing you to focus on the hatching process itself.
Capacity and Scalability: Expanding Your Flock
DIY incubators offer flexibility in capacity, allowing you to build small or large incubators depending on your flock size. However, scaling up a DIY operation can require substantial effort. Commercial incubators are available in various sizes, making it easier to choose a model that suits your current and future needs. This scalability makes commercial models a good choice for those anticipating growth in their hatching operations.
Making the right choice depends on your individual circumstances. Consider your budget, technical abilities, the scale of your hatching goals, and your desired level of involvement. Both DIY and commercial incubators have their own advantages and disadvantages. Carefully weigh these factors to make an informed decision and enjoy the rewarding experience of hatching your own chicks.
Your Blueprint For DIY Incubator Success
Turning your knowledge into a steady supply of hatched chicks requires a structured approach. This blueprint provides checklists for building, testing, and running your DIY incubator, along with benchmarks to measure your progress. Consider it your roadmap to hatching success.
Building Checklist: Ensuring a Solid Foundation
Container: Make sure your container is properly insulated and large enough for the number of eggs you plan to incubate. Maintaining a stable temperature is critical for successful hatching.
Heating Element: Double-check that the heating element is securely installed and correctly connected to the thermostat for precise temperature control. This will prevent overheating and ensure consistent warmth.
Humidity System: Verify the water pan is appropriately sized and functional, or ensure your humidifier and sensor are correctly set up. Consistent humidity is just as important as temperature.
Turning Mechanism: Test your automatic turner to ensure it’s working correctly, or create a schedule for manual turning. Regular turning keeps the embryo from sticking to the membrane.
Ventilation: Ensure adequate airflow without creating drafts. This balance maintains a fresh environment and prevents temperature fluctuations.
Testing Phase: Fine-Tuning for Optimal Performance
Before adding eggs, run your incubator for at least 24 hours. This test run helps identify and fix any issues before they impact your hatch.
Temperature Stability: Keep an eye on the temperature readings and adjust the thermostat as needed to maintain 37.5°C, the ideal temperature for most poultry eggs.
Humidity Levels: Observe humidity fluctuations and adjust the water pan size or humidifier settings to reach the target range. Aim for 60-65% initially, then increase to 70-75% during lockdown.
Turning Mechanism: Confirm your automatic turner rotates eggs smoothly or practice your manual turning technique. Consistency is crucial for proper development.
Ventilation Effectiveness: Check the airflow and adjust vent placement if necessary. Proper ventilation is key for healthy embryos.
Check out our guide on How to master duck egg incubation temperature.
Operation and Monitoring: Maintaining Consistent Success
Once your incubator is running smoothly, consistent monitoring and proactive maintenance are essential for continued success.
Daily Temperature and Humidity Checks: Log your readings and adjust as needed. Regular checks help catch potential problems early.
Regular Turning: Ensure eggs are turned regularly, whether manually or automatically, throughout the incubation period. This mimics a hen’s natural turning behavior.
Water Replenishment: Refill the water pan or humidifier reservoir as needed to maintain optimal humidity levels. Don’t let it run dry, especially during lockdown.
Candling: Candle eggs periodically to monitor embryo development and identify any infertile or non-viable eggs. This provides valuable insight into the hatching process.
Record Keeping: Maintain detailed records of temperature, humidity, turning frequency, and candling results. This helps you fine-tune your process over time.
Troubleshooting: Addressing Common Issues
Even with meticulous planning, problems can occur. Recognizing early warning signs is important. The following table outlines common issues and solutions.
To help you troubleshoot, we’ve put together a table summarizing key metrics, their target ranges, monitoring methods, and troubleshooting actions.
DIY Incubator Success Metrics: Key performance indicators and target ranges for monitoring your DIY incubator’s effectiveness
| Metric | Target Range | Monitoring Method | Troubleshooting Action |
|---|---|---|---|
| Temperature Fluctuations | 37.5°C ± 0.5°C | Digital Thermometer | Adjust thermostat, check heating element, improve insulation |
| Low Humidity | 60-75% | Digital Hygrometer | Increase water pan size, adjust humidifier settings |
| High Humidity | 60-75% | Digital Hygrometer | Reduce water pan size, adjust humidifier settings |
| Uneven Turning | Consistent rotation | Visual Inspection | Adjust turner mechanism, improve manual turning technique |
This table provides a quick reference for identifying and addressing common incubator issues, helping you maintain optimal conditions for your hatching eggs.
Continuous Improvement: Refining Your Hatching Process
DIY incubation is a continuous learning process. Regularly review your records to identify areas for improvement. Don’t be afraid to try different techniques or upgrade your equipment. With each hatch, you’ll gain experience and refine your skills, leading to better hatch rates and consistent results. This constant learning makes DIY incubation a rewarding experience.
Ready to hatch your dreams? HatchingEggs.eu offers premium hatching eggs from carefully selected breeding stock, providing everything you need for a successful hatching journey. Visit us today and discover the possibilities!