


Why Hatching Eggs at Home Became Britain’s Obsession
There’s a special kind of magic in hearing that first tentative “cheep” coming from an egg you’ve cared for over three long weeks. All across Britain, people are transforming spare corners of their homes into small-scale hatcheries, discovering a process that’s both a science project and a deeply rewarding experience. The trend of hatching eggs at home is no longer just for dedicated poultry keepers; it’s about reconnecting with nature’s cycles, something modern life often keeps us from seeing.
This is more than just a passing hobby. It’s a real movement, fuelled by a growing desire for self-sufficiency and a better connection to where our food comes from. The appeal is spreading fast, and it’s not hard to understand why. This reflects a wider shift in how we think about our gardens and our place in the food chain. For many, what begins as a fun activity for the kids quickly grows into a genuine passion.
The Rise of the Backyard Flock
The numbers really show this growing fascination. In the last ten years, the number of UK households with chickens has jumped from around 750,000 in 2013 to over 1.3 million by early 2024. This increase was especially noticeable in recent years, as more people looked for dependable and sustainable food options. Naturally, this boom in backyard poultry keeping includes the fulfilling practice of hatching and raising chicks from the very beginning. You can find more data on the rise of backyard chickens in the UK to see just how popular it has become.
More Than Just Fresh Eggs
While the promise of fresh eggs is certainly a fantastic benefit, the reasons people start often go much deeper. When you talk to those who have tried hatching eggs at home, a common feeling is the immense sense of achievement. Guiding a batch of eggs through a 21-day incubation and seeing healthy chicks emerge gives you a unique feeling of pride. It’s a hobby that pays you back for your patience and careful attention.
For families, it’s a brilliant educational experience. Children get to learn about:
- Life cycles in a direct, hands-on way
- The importance of responsibility and gentle handling
- Patience, as they eagerly await the big “hatch day”
The process also has surprising therapeutic qualities. The quiet routine of checking temperatures, turning eggs, and candling to watch the embryos grow can be incredibly calming. It offers a welcome break from the digital rush of daily life, connecting you to a simple, natural process that has been going on for millennia. Choosing to hatch your own chicks also means you can pick specific breeds that suit your garden, whether you fancy colourful egg layers like Marans or gentle, family-friendly Orpingtons. You just can’t get that level of control and personal connection when buying chicks from a supplier.
Setting Up Your Home Hatchery Like a Pro
The journey of hatching eggs at home doesn’t start the moment you switch on the incubator. It actually begins much earlier, with thoughtful planning and choosing the right gear. Many beginners fixate on the 21-day incubation period, but the groundwork you lay beforehand is what separates a disappointing outcome from a brooder full of happy, peeping chicks. It all comes down to finding the best eggs and creating a perfect, stable environment for them.
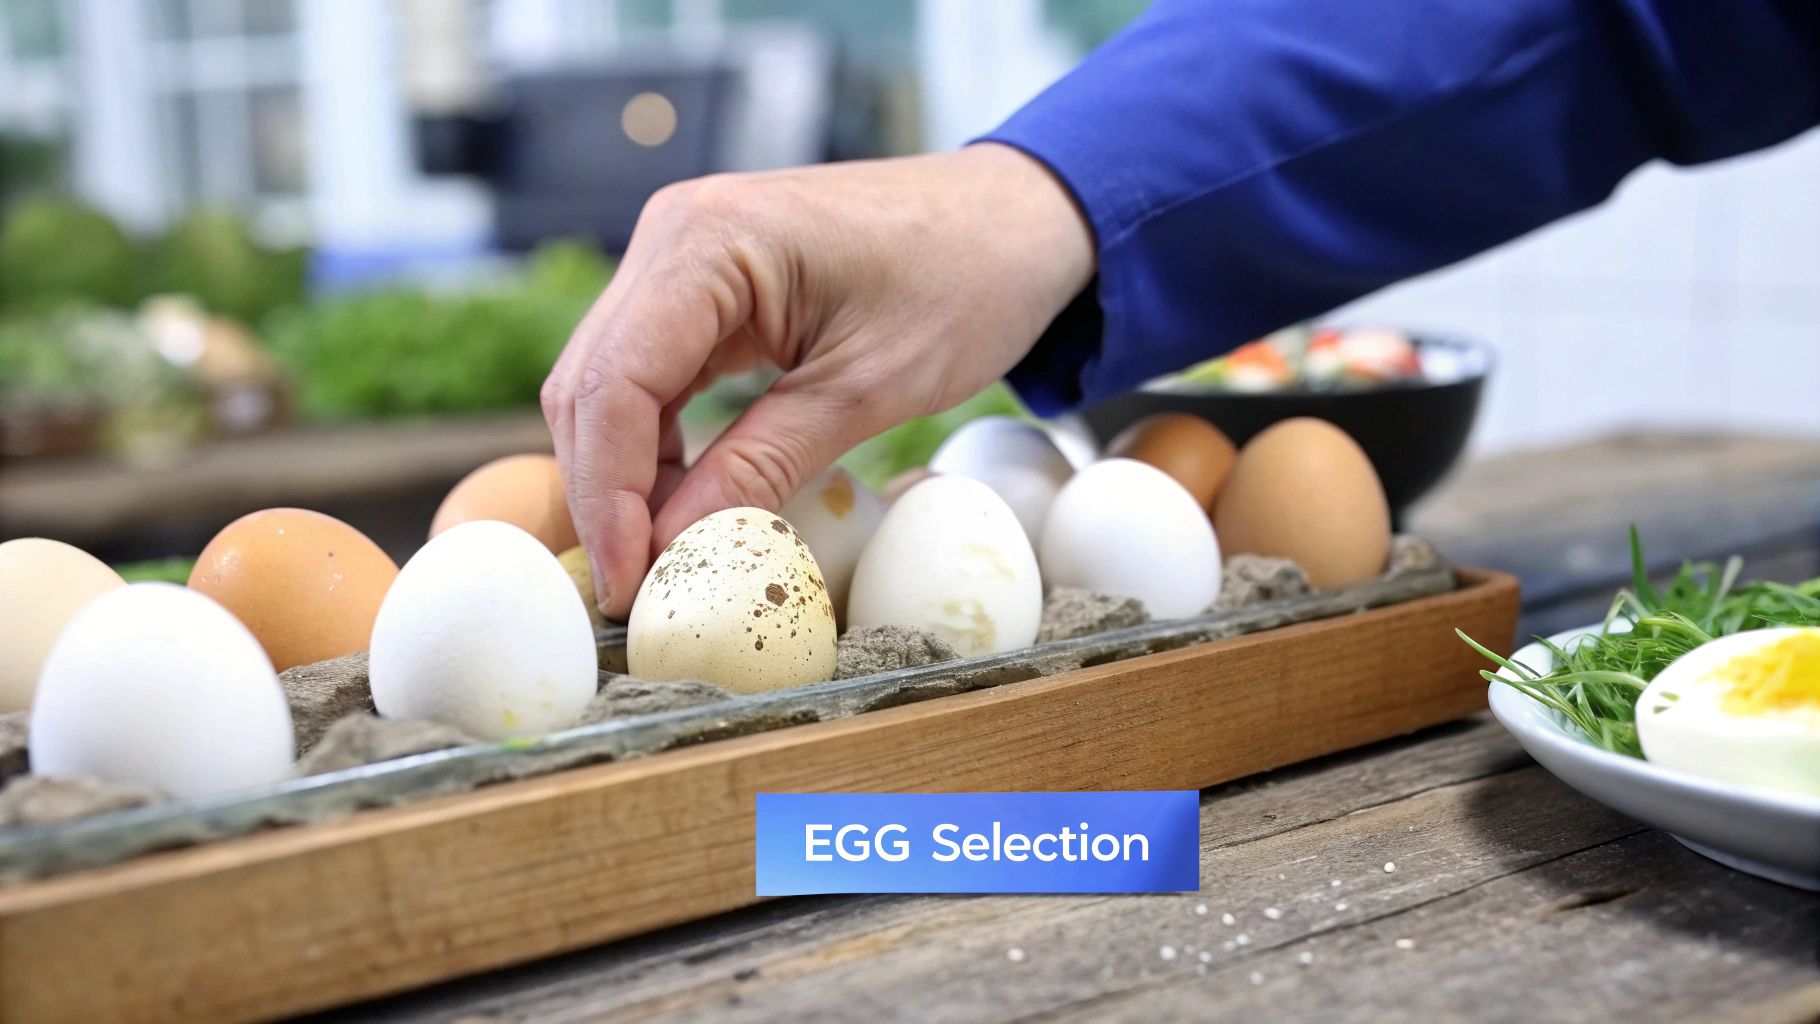
First things first, let’s talk eggs. The ones from your local supermarket won’t do; they are unfertilised and will never develop into chicks. You need fertile hatching eggs, which come from a flock that includes at least one rooster. If you have your own cockerel, you’re all set. However, most people, especially when starting out, buy eggs from reputable breeders. A good breeder ensures high fertility rates and maintains a healthy, strong flock, giving your future chicks a great genetic start.
When selecting a supplier, find someone who knows how to properly pack and handle eggs for shipping. The postal journey can be rough on the delicate embryos inside, and experienced sellers have packing methods that minimise shocks and damage. Remember, an egg with even a tiny hairline crack is very unlikely to hatch successfully.
Choosing Your Incubation Space and Gear
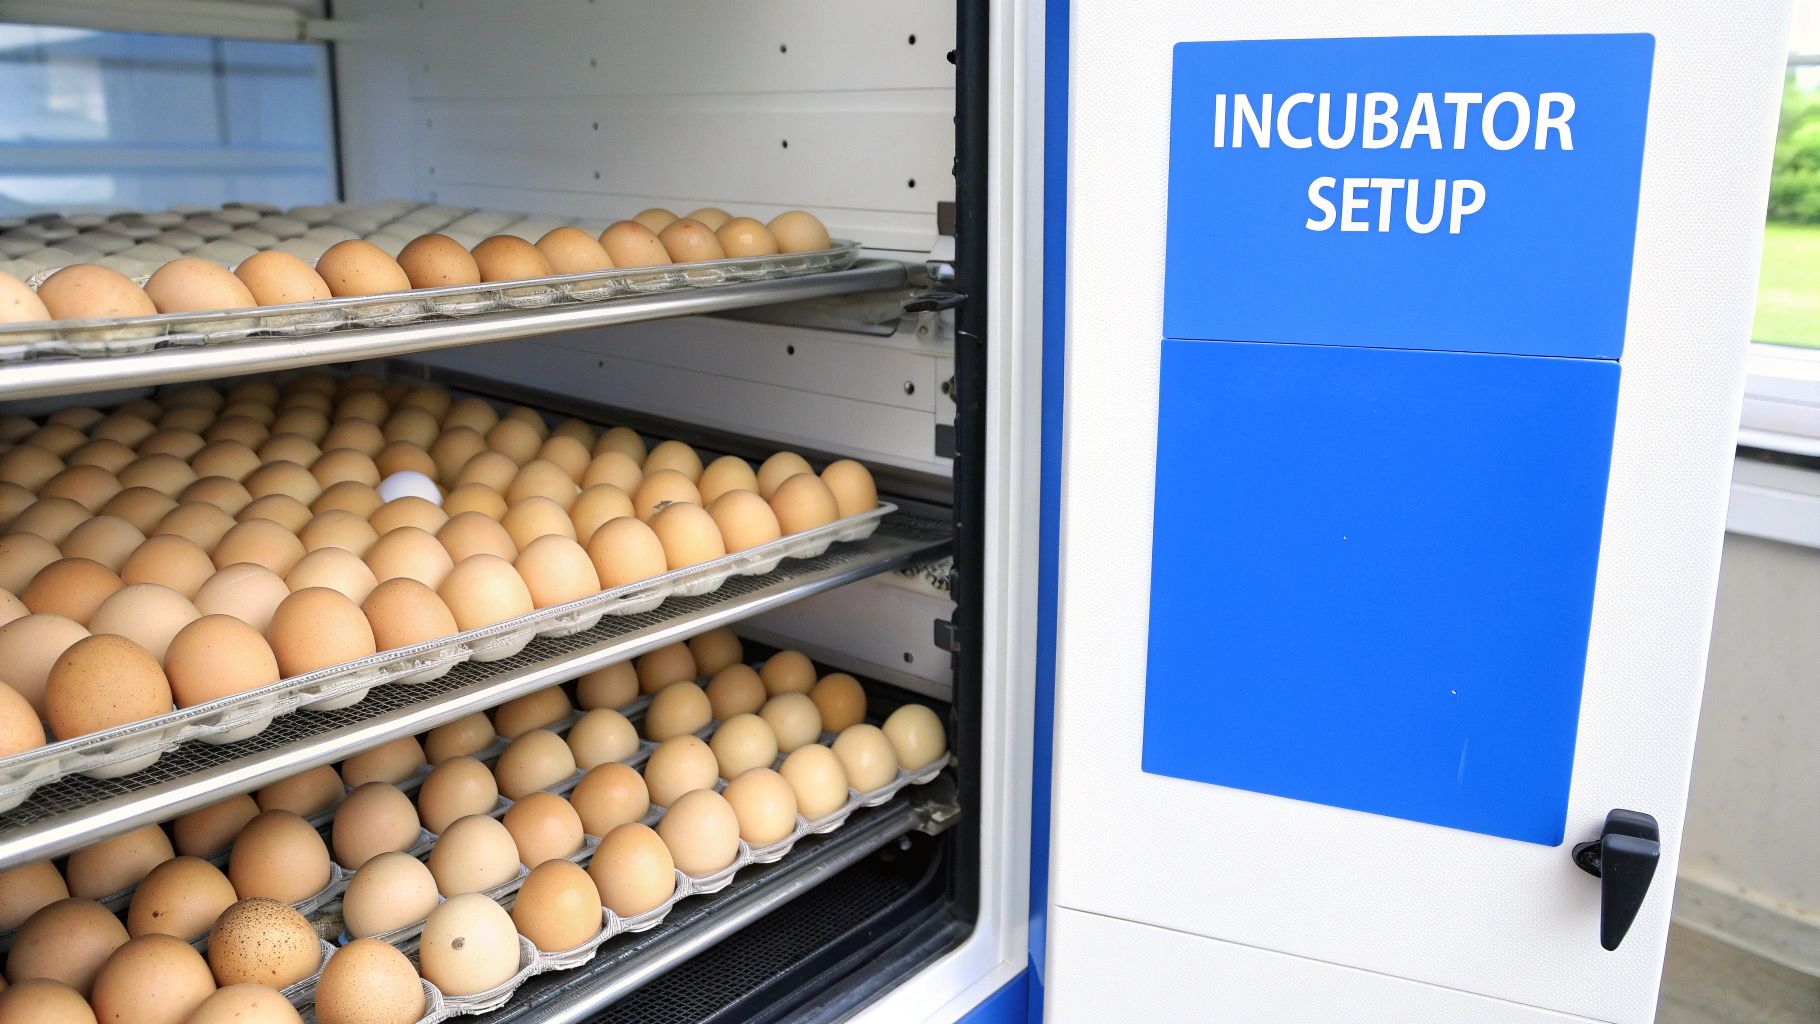
With your eggs sorted, your next big decision is finding the right spot for your incubator. This isn’t something to take lightly. Your incubator needs a consistent environment, far from direct sunlight, draughts, and sudden temperature changes. A spare bedroom or a quiet study often works much better than a busy kitchen or a conservatory with fluctuating temperatures. The room’s ambient temperature has a direct effect on your incubator’s performance. If the room is too chilly, the machine might struggle to maintain the ideal 37.5°C for chicken eggs.
Your incubator is the star of the show, and there are many types available, from simple still-air models to high-tech, fully automated cabinets. While grabbing the cheapest option is tempting, it often leads to frustration. To help you choose what’s right for you, let’s look at the most common types.
Incubator Types and Features Comparison
To give you a clearer picture, here’s a breakdown of the different incubators you’ll come across.
| Incubator Type | Capacity | Key Features | Price Range | Best For |
|---|---|---|---|---|
| Still-Air Incubator | 6-24 eggs | Basic manual controls, no fan for air circulation, requires frequent monitoring. | £30 – £80 | Budget-conscious beginners with small batches. |
| Forced-Air Incubator | 12-60 eggs | Internal fan for even heat distribution, often has automatic turning. | £100 – £300 | Most home hatchers, offering reliability and good results. |
| Cabinet Incubator | 100-500+ eggs | Precise digital controls for temperature and humidity, multiple shelves. | £400+ | Serious breeders or small-scale commercial operations. |
As you can see, each type serves a different purpose. For most people embarking on hatching eggs at home, a quality forced-air incubator hits the sweet spot. The internal fan makes a world of difference by preventing hot and cold spots, which can cause developmental problems in the embryos.
An automatic egg turner is another feature that’s absolutely worth the extra cost. Eggs must be turned several times a day to prevent the embryo from sticking to the shell membrane. You could turn them by hand, but it’s easy to forget, and opening the incubator repeatedly messes with the temperature and humidity. An automatic turner does the job for you, providing the consistency your eggs need. For more in-depth advice, you can find a great walkthrough on how to incubate chicken eggs at home that covers these details.
Before your precious eggs even arrive, get your incubator running for at least 24-48 hours. This is your chance to calibrate it and make sure it holds a steady temperature and humidity. Always use a separate, trustworthy thermometer and hygrometer to verify the incubator’s built-in readings. This trial run is your best opportunity to catch any problems before you place the eggs inside.
Mastering the Critical Environment Controls: Your 21-Day Guide
Those 21 days of incubation are a bit like conducting a delicate orchestra; every element must work in perfect harmony, or the entire performance can fall flat. When you’re hatching eggs at home, the two most important instruments in your orchestra are temperature and humidity. Getting these right isn’t just a suggestion—it’s the bedrock of a successful hatch. Think of your incubator as a high-tech nest, meticulously controlled to replicate what a mother hen does instinctively.
Your main goal is stability. A developing embryo is incredibly sensitive to its surroundings, and even small fluctuations can have big consequences. This is where your incubator’s quality really makes a difference. A good forced-air model is designed to maintain a consistent environment, but it’s your job to monitor it like a hawk.
The Fine Art of Temperature Management
Temperature is the engine that drives embryonic development forward. For chicken eggs, the magic number is a very specific 37.5°C (or 99.5°F). It might seem simple enough, but experienced hatchers know that a deviation of even half a degree for too long can cause developmental problems, a delayed hatch, or worse. For instance, temperatures that are consistently too high can speed things up, resulting in smaller, weaker chicks with unhealed navels. On the flip side, temperatures that are too low will slow everything down, often leaving chicks too weak to even start pipping the shell.
To prevent this, always use a calibrated, separate thermometer placed at the same level as the eggs to double-check what your incubator’s display is telling you. Never just trust the factory setting. I always recommend running your incubator for at least 24 hours before putting any eggs inside to make sure it holds a steady temperature. Real-world problems happen, so have a plan for power cuts. Throwing a thick duvet or blanket over the incubator during a short outage can help insulate it and keep that precious warmth inside.
Demystifying Humidity Levels
Humidity is often the element that trips up beginners, but it’s just as vital as temperature. It governs the rate at which moisture evaporates from the egg through its porous shell. Proper moisture loss is crucial for the air sac inside the egg to grow to the correct size—this is the pocket of air the chick will take its first breath from just before hatching.
For the first 18 days, you should aim for a relative humidity of around 50-60%. The ideal level can depend on the natural humidity in your room. If you notice during candling that the air cells look too small, your humidity is probably too high. If they look too large for that stage of development, it’s too low. In the final three days, known as the lockdown period, you’ll stop turning the eggs and ramp up the humidity to 70% or higher. This makes the shell membrane softer and easier for the chicks to break through. You can dive deeper into the specifics of managing moisture in our detailed article on incubation humidity.
The Importance of Regular Turning
The final piece of the environmental puzzle is turning the eggs. A mother hen is constantly shuffling and turning her eggs in the nest. This is essential to prevent the delicate embryo from sticking to the side of the shell membrane. If it sticks, its development will be permanently stunted. Most modern incubators come with automatic turners, which is a feature I believe is well worth the investment. They provide consistent, gentle turning without you having to open the incubator and disrupt the stable environment.
This simple infographic breaks down the core monitoring tasks you’ll perform daily when hatching eggs at home.
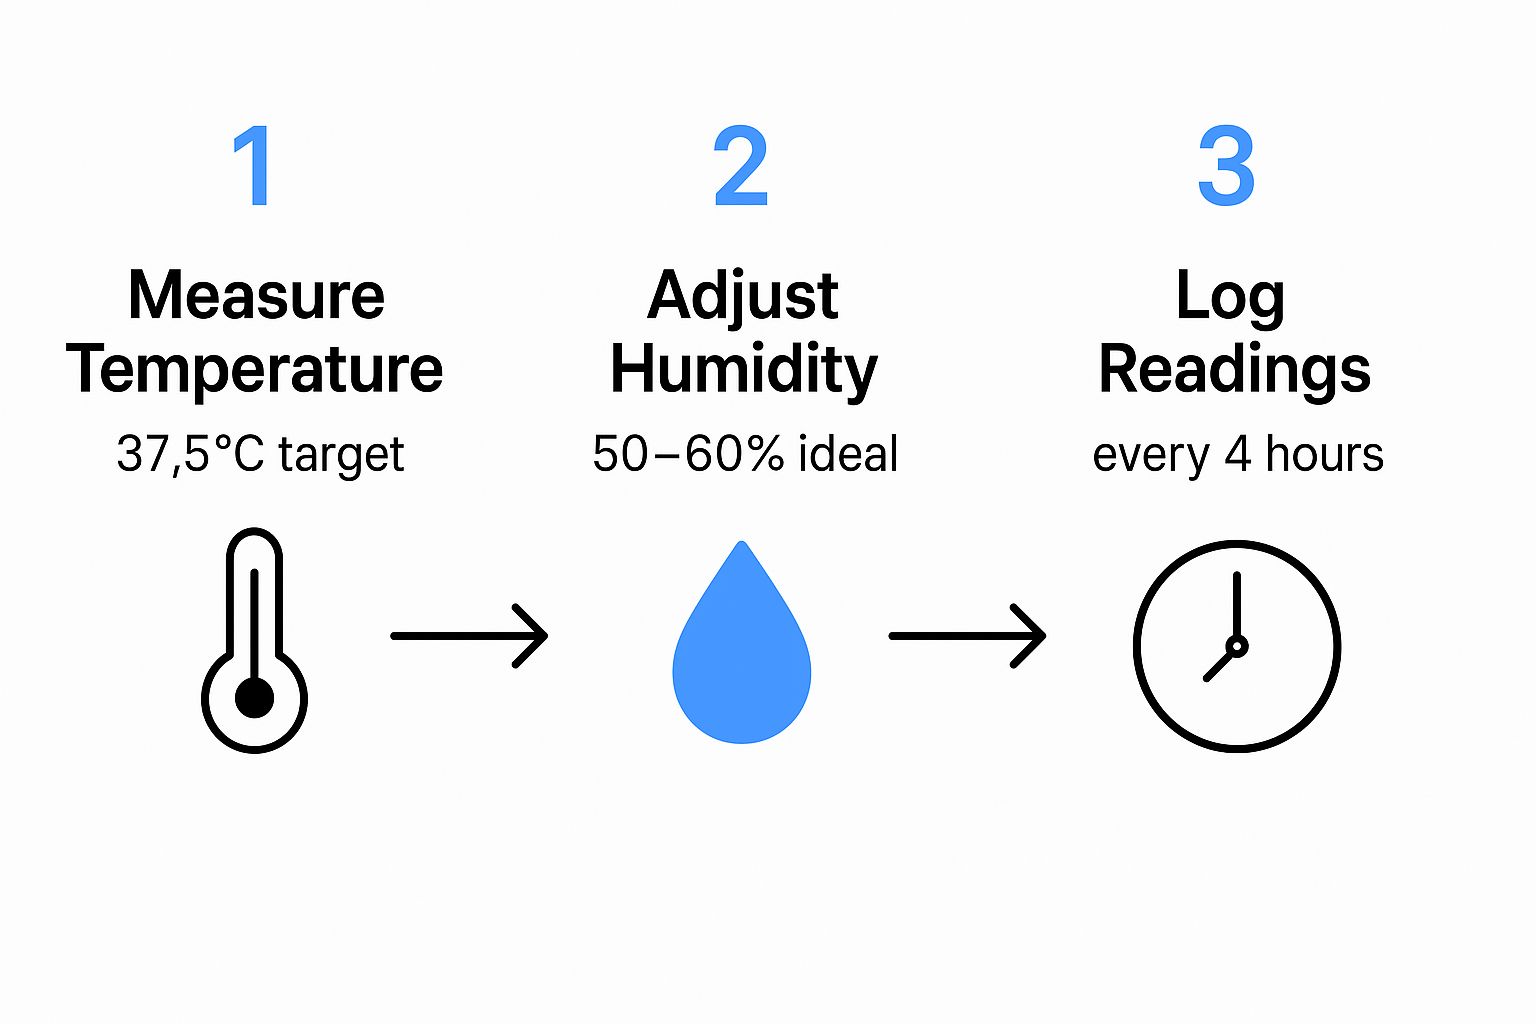
This visual guide highlights the constant cycle of measuring, adjusting, and logging that ensures a stable environment for your developing eggs.
If you are turning by hand, you have to be disciplined. A simple trick is to mark one side of each egg with a pencil (an ‘X’) and the other with an ‘O’. You’ll need to turn them at least three to five times a day, ensuring they rotate 180 degrees each time. This manual process requires real diligence, as forgetting even one or two turns can affect your results. Whichever method you use, remember that all turning must stop on day 18 when you enter lockdown.
To help you keep everything straight, here is a day-by-day schedule outlining exactly what you need to do and what’s happening inside those precious eggs.
Daily Incubation Schedule and Checkpoints
This table provides a day-by-day breakdown of incubation requirements including temperature, humidity, turning schedule, and key developmental milestones.
| Day Range | Temperature | Humidity | Turning Frequency | Development Stage | Action Required |
|---|---|---|---|---|---|
| Days 1-3 | 37.5°C | 50-60% | 3-5 times daily | First signs of embryo, blood vessels forming. | Set eggs, start turning, monitor temp/humidity. |
| Days 4-7 | 37.5°C | 50-60% | 3-5 times daily | Heartbeat visible, limb buds appear. | Check temp/humidity daily. First candling on Day 7. |
| Days 8-14 | 37.5°C | 50-60% | 3-5 times daily | Feathers begin to form, beak hardens. | Continue turning and monitoring. Second candling on Day 14. |
| Days 15-17 | 37.5°C | 50-60% | 3-5 times daily | Embryo grows rapidly, filling most of the shell. | Continue turning and monitoring. Prepare for lockdown. |
| Day 18 | 37.5°C | 65-70% | Stop Turning | Chick positions for hatching, absorbs yolk. | Enter Lockdown. Increase humidity, stop turning. |
| Days 19-21 | 37.5°C | 70%+ | No Turning | Chick pips internal air cell, then external shell. | Monitor for pips and zips. Do not open incubator. |
This schedule acts as your roadmap for the entire 21-day journey. By following it closely, you ensure the chicks have everything they need at each critical stage, from the first signs of life to the moment they break free from the shell.
Reading the Signs Through Candling
Candling is the moment you go from being a hopeful spectator to an informed participant in your hatching journey. It’s like having a secret window into the shell, giving you vital insights that can really improve your success rates when **hatching eggs at home**. This simple check turns the 21-day wait from a pure guessing game into a hands-on experience, connecting you more deeply with the tiny life developing inside.
This connection is something many chicken keepers treasure. It’s fascinating how our view of chickens has changed; a recent UK study found that 68.8% of keepers now see their flock as companions, not just livestock. The intimate process of candling definitely strengthens that bond. You can read more about how UK chicken keepers view their flocks in this interesting study.
The technique itself involves shining a bright light through the egg in a dark room to see what’s happening inside. While you can get by with a bright torch, investing in a purpose-built egg candler is a smart move. These gadgets are designed to form a seal against the shell, directing all the light inside for a much clearer view without creating extra heat that could harm the delicate embryo. Remember to handle the eggs gently; be calm and deliberate, as you’re holding a fragile, developing life.
What to Look For and When
With candling, timing is key. You don’t want to disturb the eggs too often, as every time they’re removed from the incubator, they lose a bit of heat. I find a good routine is to candle on Day 7 and then again on Day 14. Checking any earlier than day seven doesn’t reveal much and can just cause needless worry. For a more detailed schedule, our guide on when to candle chicken eggs is a great resource.
Here’s a breakdown of what to look for at each stage:
Day 7: This is your first proper check-in. In a fertile egg, you’ll see a web of fine blood vessels spreading from a dark spot in the centre – that’s the embryo. It looks like a tiny red spiderweb. If you’re lucky and look closely, you might even spot the minuscule heart beating. If an egg is completely clear with no signs of development, it’s likely infertile and should be removed. You might also find a “blood ring,” which shows the embryo began developing but has sadly died. These also need to be taken out, as they can rot and spread harmful bacteria in your incubator.
Day 14: The embryo will now be a large, dark mass filling much of the egg. The blood vessel network will be far more established, and you’ll probably see movement as the chick wiggles around. The air cell – the pocket of air at the blunt end of the egg – should be noticeably larger. This is a fantastic sign that your humidity levels are spot-on.
Dealing with the Emotional Side
Candling isn’t always a joyful process. Finding and removing eggs that aren’t developing can feel disheartening, but it’s an essential task. It’s important to accept that not every single egg will hatch. Even under a broody hen, a 100% hatch rate is incredibly rare.
Removing non-viable eggs is the responsible choice, preventing them from potentially harming the healthy, developing ones. Try to see it not as a failure, but as an act of good poultry keeping that gives the remaining eggs the best possible chance to hatch successfully.
Navigate Hatching Day Like a Veteran
Day 21 brings a special kind of excitement and anxiety that every home hatcher knows well. After three weeks of careful work, the main event is about to unfold. The single most important rule on hatch day is patience. The toughest part of hatching eggs at home is fighting the urge to get involved, but it’s essential for a good result. The process is a marathon, not a sprint; a healthy chick can take up to 24 hours, sometimes even longer, to hatch after the first crack shows up.
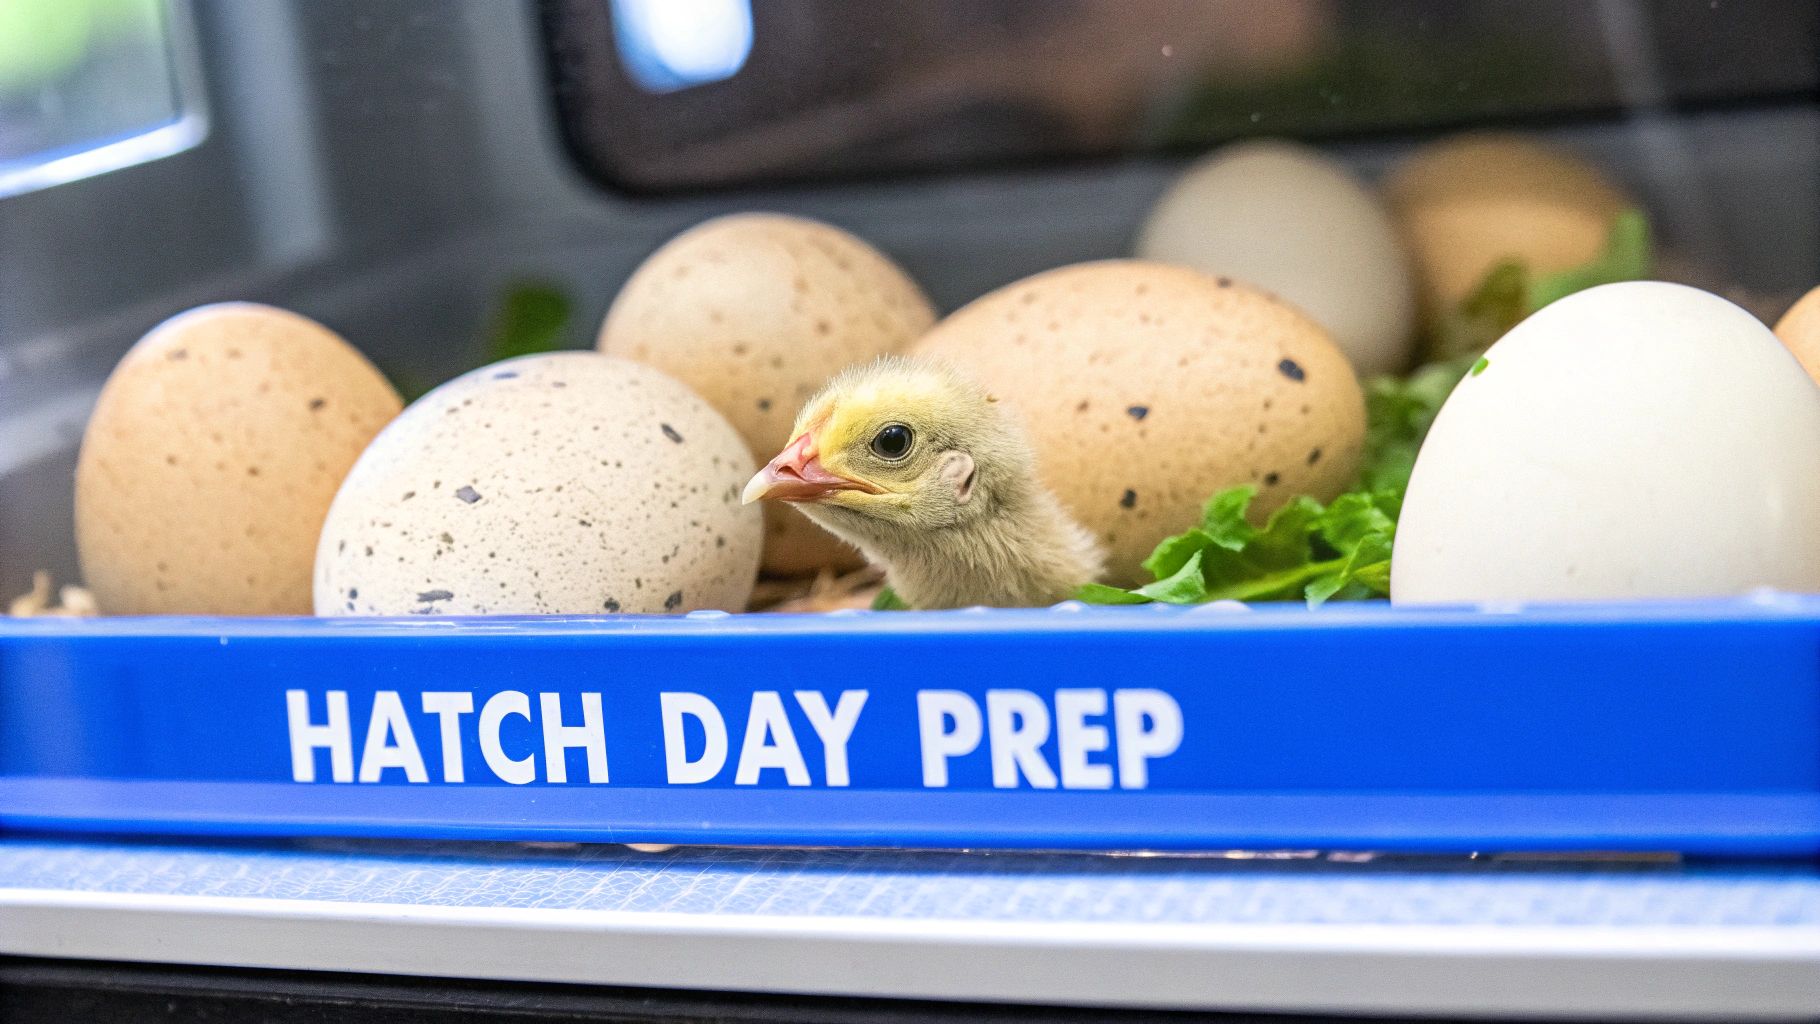
The final countdown actually begins on Day 18. This is when you put the incubator into lockdown, a vital step where you stop turning the eggs and raise the humidity to around 70%. This extra moisture helps soften the shell membrane, which makes it easier for the chick to break through. From this point forward, opening the incubator is a big no-no until all the chicks have hatched. Every time you lift the lid, you let out precious warmth and humidity, making the job much harder for the chicks inside.
Understanding the Three Stages of Hatching
Hatching isn’t one quick action but a sequence of stages. Knowing what’s happening at each point can help you stay calm and understand what’s normal.
- The Internal Pip: The first move happens entirely inside the egg. The chick uses its egg tooth—a tiny, sharp tip on its beak—to break through the internal membrane and into the air cell. You won’t see a thing, but you might hear very faint, muffled cheeps. This is the chick taking its first breaths of air.
- The External Pip: This is the moment you’ve been waiting for. After a rest, the chick will tap against the shell, creating a tiny star-shaped crack or a small hole. This is the pip, and it’s a clear sign that things are moving along as they should.
- The Zip and Emergence: After the first pip, the chick will rest again, sometimes for hours, as it absorbs the last of the yolk sac. Once it’s strong enough, it will begin to turn inside the shell, chipping away in a circle. This is called zipping. Eventually, it will push the top of the shell off like a little cap and wiggle itself free.
This whole process is exhausting for the chick, but the struggle is what builds its strength. Don’t expect the perfect fluffy chicks you see in pictures right away. They will be wet, tired, and honestly, a bit scraggly looking. This is perfectly normal. Let them dry off and fluff up inside the incubator. They can stay in there safely for up to 48 hours, as they continue to draw nutrients from the absorbed yolk sac. While it’s tempting to open the lid for a closer look, you can get a better view by using an automatic egg incubator, as many have clear panels for observation without any disruption.
To Help or Not to Help?
This is probably the most argued-over topic in home hatching. The golden rule is simple: let nature do its work. Assisting a chick can cause more harm than good, potentially leading to bleeding or stopping the chick from absorbing its yolk sac correctly. You should only think about intervening as an absolute last resort. A real emergency might be a chick that has pipped but has made no progress at all for over 24 hours. If you feel you must help, it requires extreme care, using tweezers to gently remove tiny bits of shell, but it’s a risky job best avoided by newcomers. Knowing the difference between what’s normal and what’s a real problem is a skill that develops with experience, making every hatch a learning opportunity.
Raising Your Newly Hatched Chicks to Thrive
The moment the last chick fluffs up in the incubator is a time for celebration, but it quickly shifts to the important job of caring for these tiny, fragile creatures. Those first 48 hours are absolutely crucial. The chicks are making a massive change from living off their yolk sac to needing food and water from the outside world. Your role now is to provide a safe, warm space called a brooder.
Creating the Perfect Brooder Environment
You don’t need anything elaborate for a brooder; a large cardboard box or a plastic storage tub works just fine. The most critical part is a dependable heat source. I’ve found a heat plate is a much safer and more natural option than a traditional heat lamp. It mimics a mother hen, allowing chicks to huddle underneath for warmth, and it significantly lowers the fire risk.
You’ll want to create a temperature gradient. This means one side of the brooder, directly under the heat source, should be around 32-35°C, while the other side is cooler, closer to room temperature. This setup lets the chicks decide what temperature is most comfortable for them.
Their behaviour is the best thermostat you have:
- If they’re all huddled together tightly under the heat, they’re feeling the chill.
- If they’re spread out, avoiding the heat source and panting, it’s too warm.
- If they’re scattered around, some sleeping and others cheeping and exploring, you’ve got it just right.
For bedding, I always start with paper towels for the first couple of days. They provide good grip for tiny feet and stop the chicks from mistaking their bedding for food before they know any better. After a few days, you can switch to pine shavings. Just be sure to avoid cedar shavings, as their strong oils can cause respiratory problems.
First Food and Water
Chicks don’t technically need to eat for the first day or so, as they are still absorbing the nutrients from the yolk. Even so, you should have fresh water and starter feed available right away. Always use a shallow waterer designed for chicks to prevent any tragic drowning accidents. A little trick I use is to place a few clean pebbles or marbles in the water trough as an extra safety measure.
When you move them into the brooder, gently dip each chick’s beak into the water. This small action shows them exactly where to find a drink. For food, a high-quality chick starter crumb is a must. It’s packed with the high protein they need to grow strong and healthy. At first, I just sprinkle the crumb directly onto the paper towels so they discover it naturally as they peck and explore.
Monitoring Health and Social Development
Keeping a close watch on your new flock is the best way to catch any issues before they become serious. One of the most common problems is “pasty butt,” where droppings dry and block their vent. If you spot this, you’ll need to gently clean the area with a warm, damp cloth.
Handling your chicks for short periods every day, right from the start, helps them grow into friendly and relaxed adults—especially important if you envision them as future garden pets! If you plan to introduce these chicks to an existing flock, you must wait until they are fully feathered and about the same size. The introduction should be a slow and carefully supervised process. Our guide to raising chickens from eggs has more in-depth advice on making this transition smooth.
This hands-on approach to poultry is becoming more popular, and the market for good equipment is growing with it. In fact, the global chicken coop market is expected to reach an impressive £720 million by 2035, with UK demand being a significant part of that growth. You can discover more about this market growth and see what it means for backyard chicken keepers like us.
Learning From Setbacks and Planning Future Success
Every single person who tries hatching eggs at home will, at some point, face disappointment. It’s simply part of the learning curve. What truly separates those who improve from those who give up is the ability to turn those setbacks into lessons. Poor hatch rates, chicks developing perfectly only to die in the shell, or an incubator failing at a critical moment always seem to happen at the worst times. But these moments are also valuable teachers.
It’s crucial to understand that not every failure is your fault. Even the most seasoned breeders have off-hatches. Sometimes the issue stems from fertility at the source, or perhaps the eggs were handled roughly during shipping—things entirely out of your control. However, many common problems can be traced back to user error, which is actually good news. It means you have the power to fix it for the next round.
Becoming a Hatching Detective
To figure out what went wrong, you need to put on your detective hat. Your most important tool in this investigation is meticulous record-keeping. Guesswork is your enemy; solid data is your best friend. Without detailed notes, each hatch is just a roll of the dice, and you’ll never spot the patterns that lead to real improvement.
Here’s what you should be tracking for every single hatch:
- Egg Source: Where did the eggs originate? Were they shipped, or did you collect them from a local farm?
- Incubation Log: Make a habit of noting your daily temperature and humidity readings. Did you experience any unexpected spikes or drops?
- Candling Results: Keep a tally of how many eggs were infertile, developed blood rings, or stopped developing at specific stages (e.g., three failed at day 7, one at day 14).
- Hatch Day Notes: How many chicks pipped but couldn’t “zip” out of the shell? How many hatched with problems like unhealed navels or splayed legs?
For instance, if you consistently find that a high number of chicks die in their shells around day 18, this is a classic sign of a humidity problem during the lockdown phase. If several chicks hatch with splayed legs, it’s a strong indicator that the floor of your brooder is too slippery. This kind of data transforms a vague “bad hatch” into a specific, solvable problem.
Planning Your Next Attempt
Once you’ve analysed your records, you can approach your next hatch with renewed confidence. Don’t feel pressured to rush straight into another attempt after a failure. Take the time to genuinely understand what happened. Maybe your records show you need a more reliable hygrometer, or perhaps you need to adjust your target humidity for lockdown.
Consider seasonal factors as well. Trying to hatch during a sudden spring heatwave or a winter cold snap can put immense strain on your incubator as it fights to maintain a stable temperature. By planning your hatches for milder months, you can remove one more challenging variable from the equation.
As your skills develop, you might think about branching out. This could mean trying different breeds or even different species like ducks or quail, which come with their own unique incubation needs. If you find yourself keeping larger numbers of chickens, remember to check your local council’s regulations. Joining a local poultry club or an online forum can also be an incredible source of support and shared wisdom from people who have been through it all before.
Success in hatching eggs at home builds on itself. Each batch, whether it thrives or fails, provides lessons that make you a better, more intuitive hatcher for the next round.
Ready to start your next successful hatch with confidence? At HatchingEggs.eu, we provide premium, fertile eggs from meticulously managed breeding stock. Our commitment to genetic quality and expert handling gives you the best possible start. Explore our diverse range of species and begin your hatching journey today by visiting HatchingEggs.eu.