


Setting Up Your Duck Hatching Space Like a Pro
So, you’re thinking about hatching duck eggs at home? Fantastic! It’s a rewarding experience, and it doesn’t require a super high-tech setup. Forget the sterile lab image; a comfortable, consistent environment is key. Your kitchen table is probably a no-go, but you don’t need a separate building either. I’ve spoken with duck keepers all over the UK, and the common thread is consistency, not fancy equipment.
Location, Location, Location
Think Goldilocks – a space that’s not too hot, not too cold, but just right. Sarah, a duck keeper I know in Yorkshire, uses a spare room for her hatching setup. Her reasoning? Stable temperature. A spare room, or even a temperature-controlled cupboard, avoids the temperature swings and drafts of a busy living space. Consider a spot where maintaining a consistent temperature is relatively easy.
Tackling Temperature Fluctuations
Even the best spot can have its issues. Marcus, a duck enthusiast down in Devon, shared a brilliant tip: towels. He uses towels around his incubator to buffer against temperature drops, especially during colder nights. It’s a simple and effective way to minimize fluctuations without spending a fortune.
Incubator Choices: Still-Air vs. Forced-Air
Choosing an incubator can be tricky. Still-air incubators are generally cheaper, but they can be challenging for beginners because the temperature inside can vary. Forced-air incubators, with their internal fans, distribute heat more evenly, but they often come with a higher price tag. From my experience, while still-air incubators can work with diligent monitoring, my hatch rates improved significantly after switching to forced-air.
Let’s talk hatch rates. Duck hatching in the UK is a fascinating blend of traditional and modern methods. Hatching duck eggs at home has a long history, but interestingly, UK poultry stats are dominated by chickens. Broiler chick placings reached a staggering 94.3 million in December 2024! While duck-specific numbers are harder to find from the government, organizations like the Wildfowl & Wetlands Trust (WWT) offer great resources. They point out that with proper incubation techniques, home hatch rates can easily reach 70-80% for fertile eggs. You can dig into UK poultry statistics here.
To help you decide on the right incubator, I’ve put together a comparison table:
Incubator Types Comparison for Duck Eggs
This table compares different incubator options for hatching duck eggs at home, considering capacity, features, and suitability for beginners.
| Incubator Type | Capacity | Temperature Control | Humidity Control | Auto-Turning | Best For |
|---|---|---|---|---|---|
| Still-Air | Smaller (e.g., 6-12 eggs) | Basic, manual adjustments often needed | Often manual | Usually not included | Experienced hatchers or those on a tight budget |
| Forced-Air | Larger (e.g., 48+ eggs) | More precise, digital thermostats common | Can be manual or automatic | Often included | Beginners or those hatching larger batches |
| Cabinet Incubator | Very large (hundreds of eggs) | Precise, digital controls with alarms | Automatic control common | Usually included | Large-scale hatching operations |
As you can see, each incubator has its pros and cons. Still-air incubators are simpler and less expensive, while forced-air models offer more consistent results, making them a good choice for beginners. Cabinet incubators are best suited for professional breeders.
Power Cuts and Backup Plans
Power cuts are a reality, especially in rural areas. A backup plan is crucial. A small generator or even an insulated box with hot water bottles can be a lifesaver during short outages. Having a plan B could save your entire hatch.
Choosing the right location and incubator is just the beginning. Next, we’ll explore how to select the best duck eggs for hatching.
Finding and Preparing the Right Duck Eggs

This screenshot from Wikipedia really shows you how diverse the duck family is! From your everyday Mallard to the more unusual Muscovy, it’s amazing. This highlights why knowing your breed and choosing eggs accordingly is so important when you’re hatching duck eggs at home. Getting the right eggs is the foundation of a successful hatch.
Believe me, not all duck eggs are the same. I’ve learned that the hard way—and it cost me. Let’s talk about finding those perfect eggs.
Sourcing Your Duck Eggs
Forget supermarket eggs—they won’t hatch. They’re not fertilized. Connecting with local breeders is key. Here in the UK, we have a wonderful network of small-scale duck keepers. Check out your local markets, join online poultry groups, or visit nearby farms. It’s not just about the eggs; it’s about learning from experienced breeders. They can offer invaluable advice, especially for popular UK breeds like Indian Runners and Khaki Campbells.
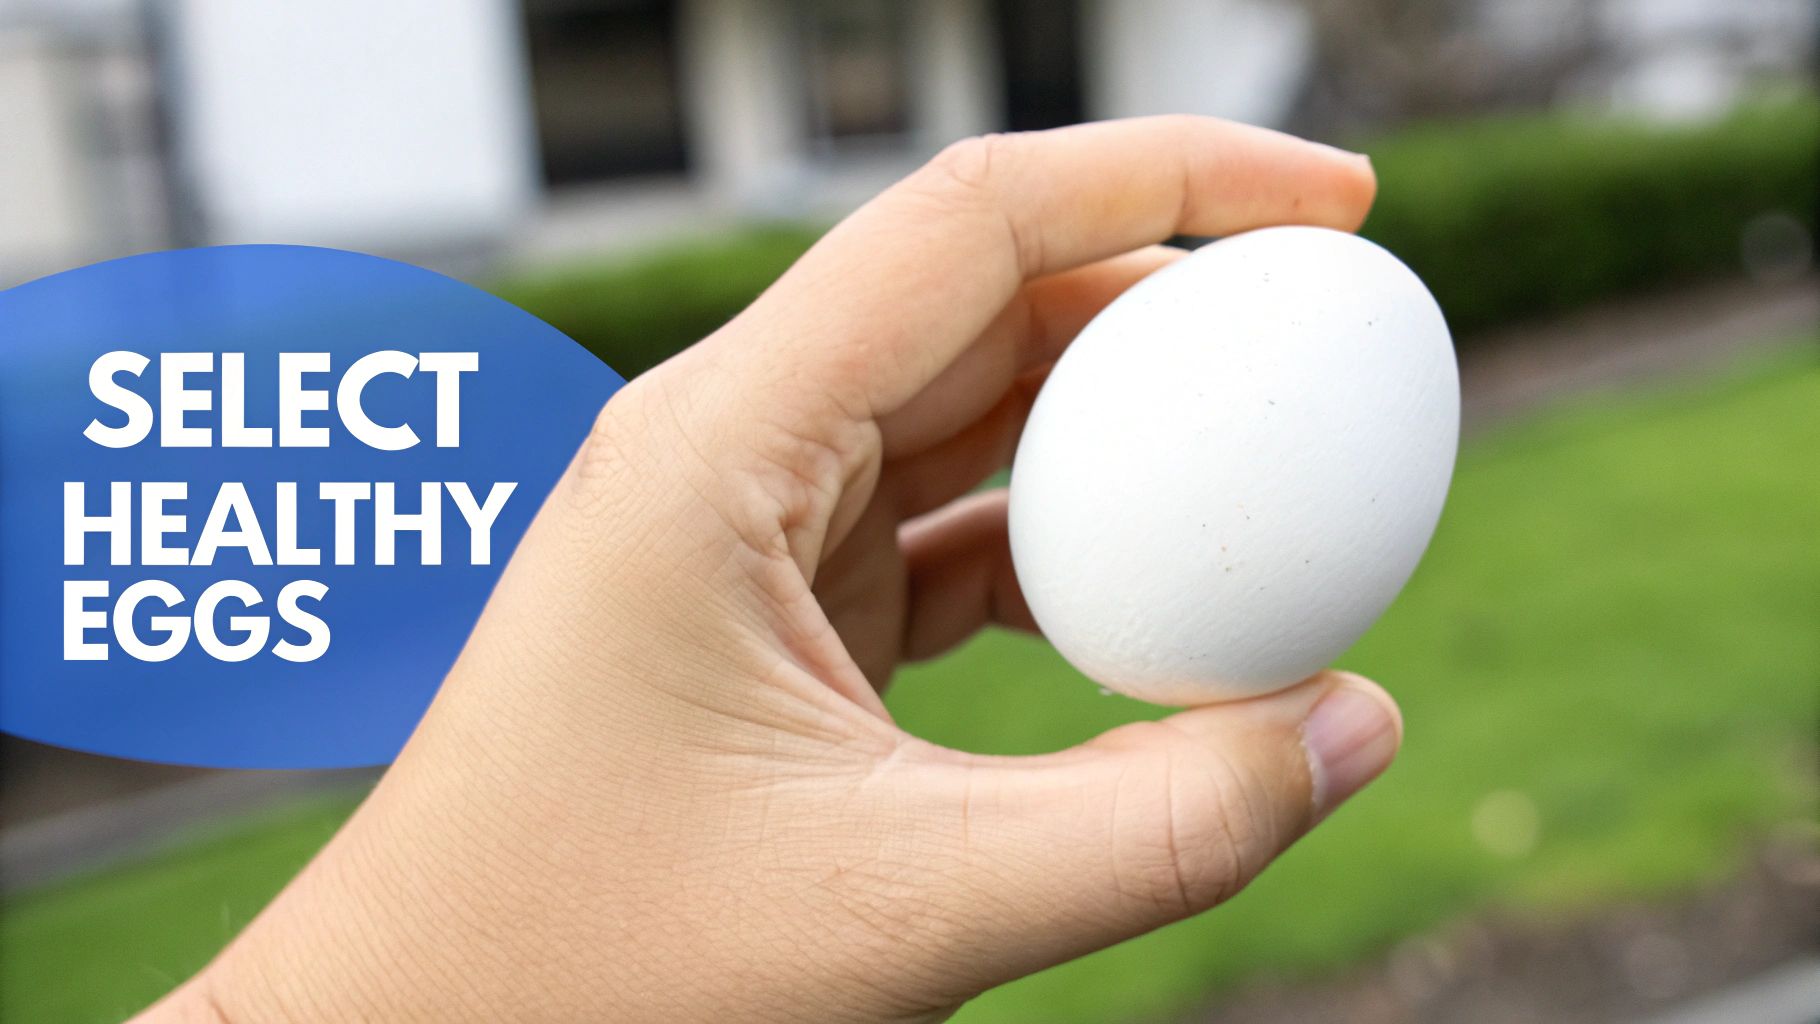
What to Look For: Beyond Pretty Pictures
It’s funny, some of my best hatches have come from eggs that aren’t picture-perfect. A slightly pointed egg, a little bump, or a slightly rough texture—these can actually be good signs! They might indicate a strong, growing embryo. Focus on cleanliness and shell integrity, not looks. Cracks, thin spots, or a lot of dirt are warning signs. These imperfections can harbor bacteria and harm the developing duckling.
The Egg-Washing Dilemma
Cleaning duck eggs is a hot topic. Some breeders swear by it, others avoid it completely. The shell has a natural protective bloom. Washing can remove this bloom, increasing the risk of bacteria getting inside. If an egg is visibly dirty, gently wipe it with a dry or slightly damp cloth (make sure the cloth is a bit warmer than the egg itself). Don’t ever submerge the eggs in water. For more about cleaning, check out our guide on duck egg incubation periods.
Storing Your Fertile Treasures
Time is important with fertile eggs. Ideally, incubate them within 7-10 days of being laid. After that, the hatch rate drops significantly. Store them pointy end down in a cool, dry place at 10-13°C (50-55°F). This helps keep the embryo viable. Consistency is key—avoid temperature swings.
Transporting Eggs Safely
Transporting eggs needs special care. Pack them pointy end down in an egg carton with extra padding. This keeps them from moving around and getting damaged. When you pick up your eggs, ask the breeder about their handling methods. Asking about storage temperature and collection frequency shows you’re dealing with a responsible breeder.
Choosing the right duck eggs is the first—and maybe most crucial—step. By prioritizing quality, cleanliness, and proper storage, you’re giving your ducklings the best possible start. And that sets you up for a successful and happy hatching experience!
Mastering the Temperature and Humidity Dance
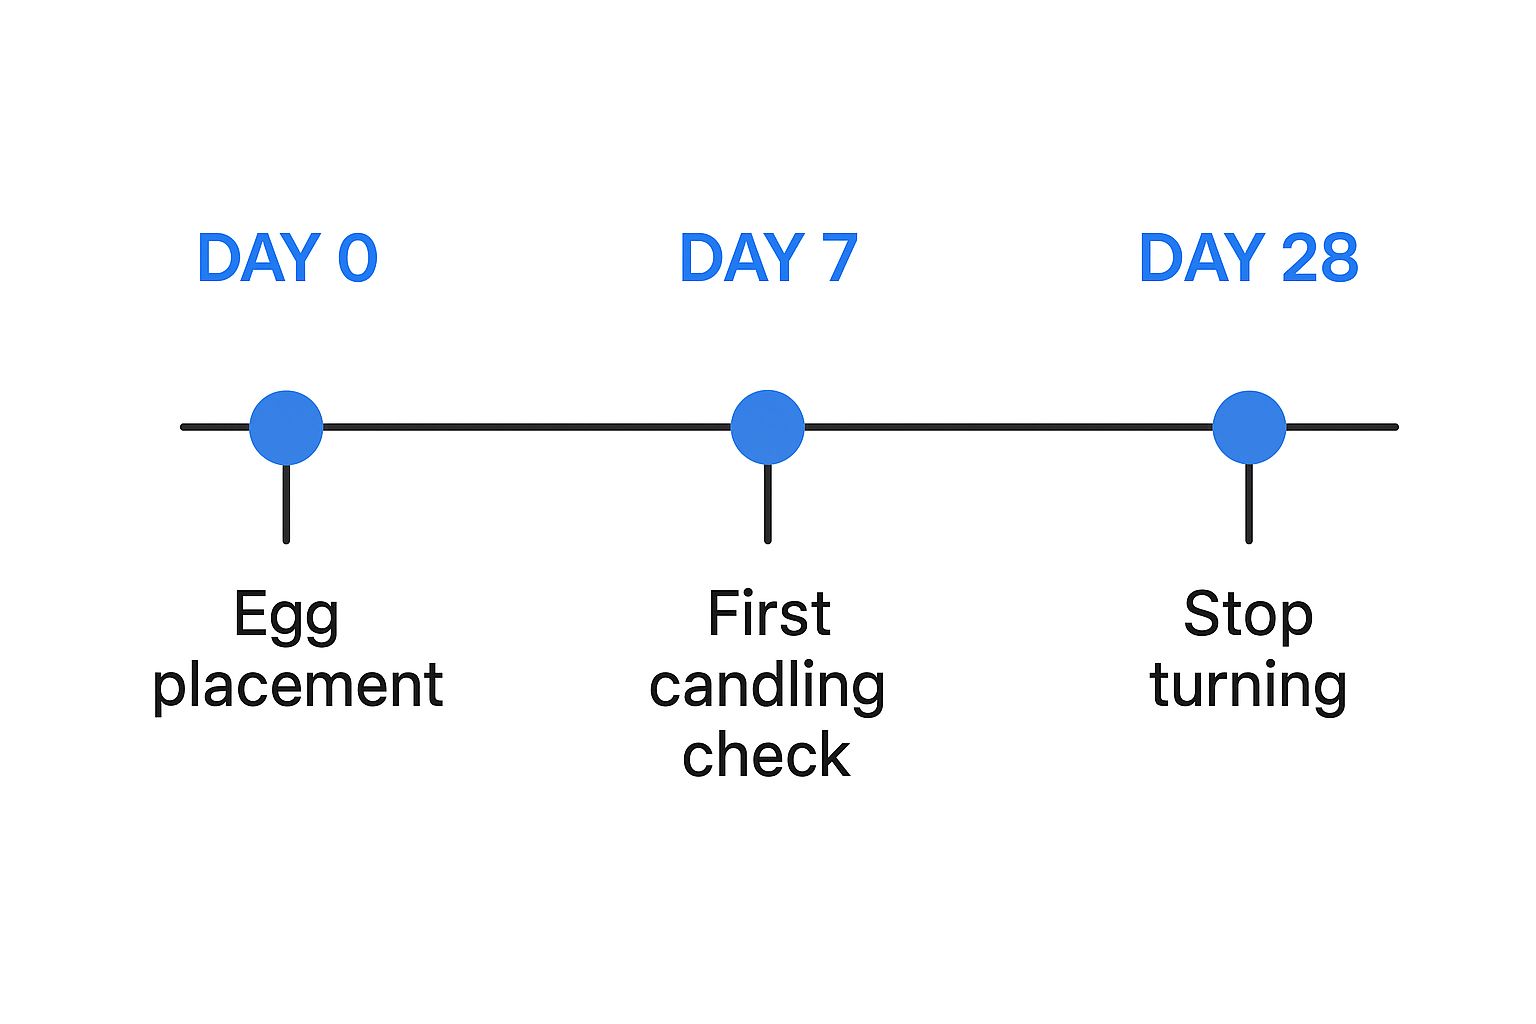
This infographic gives you a quick visual overview of the key milestones in your duck egg incubation journey. You’ll see day 0 (when you place the eggs), day 7 (your first candling), and day 28 (when you stop turning). These markers are a handy framework. But remember, consistency over time is more important than rigidly sticking to the schedule, especially with temperature and humidity.
This is often the point where first-timers start to stress. But those of us who’ve hatched duck eggs at home for a while know it’s more forgiving than you’d think. I’ve talked to loads of duck keepers in the UK, and they’ve shared stories of power outages, unexpected heat waves, and moments when the thermometer seemed to have a mind of its own. Small fluctuations happen. Your ducklings are tougher than you think!
The Importance of Stable Conditions
Keeping a consistent temperature and humidity is key for successful hatching. Think about the humidity challenges in UK homes, especially with our changing seasons. Winter can be bone dry, while summer humidity can be through the roof. This means you’ll need to add or remove moisture as needed. A simple bowl of water inside the incubator can bump up the humidity. A small dehumidifier nearby can help bring it down.
Navigating Real-World Challenges
Even though ducks are less common than chickens, the hatching process is well documented. Pekin duck eggs incubated at home usually take 28 days. You’ll want to aim for a temperature around 37.5–37.7°C and humidity between 55–65% during incubation, increasing to 65–70% in the final days before hatching. UK aviculturists emphasize frequent turning, like in commercial settings. But at home, turning manually 3–5 times a day works just fine. For more on temperature specifics, check out this guide on duck egg incubation temperature. You can also find more information on UK hatcheries here.
What about those inevitable real-life hiccups? One experienced hatcher told me about a power cut that lasted for hours. She put her incubator in a large insulated box and surrounded it with hot water bottles. The ducklings hatched perfectly! This just shows how important it is to be adaptable.
Monitoring Tools and Techniques
Don’t feel you have to buy every gadget out there. Some are definitely not worth the money. A reliable thermometer and hygrometer are essential, though. Consider a digital model with an alarm, especially if you’re busy. The alarm gives real peace of mind.
To give you a clear overview of the process, I’ve put together a handy table:
Duck Egg Incubation Timeline and Conditions
Weekly breakdown of temperature, humidity, and care requirements throughout the 28-day incubation period
| Week | Days | Temperature (°C) | Humidity (%) | Turning Frequency | Key Activities |
|---|---|---|---|---|---|
| 1 | 1-7 | 37.5-37.7 | 55-60 | 3-5 times daily | Monitor temperature and humidity consistently |
| 2 | 8-14 | 37.5-37.7 | 55-60 | 3-5 times daily | Candle eggs to check for development |
| 3 | 15-21 | 37.5-37.7 | 55-60 | 3-5 times daily | Continue monitoring and turning |
| 4 | 22-28 | 37.5-37.7 | 65-70 | Stop turning on day 25 | Increase humidity, prepare for hatch |
This table summarizes the key stages of incubation. Remember, these are guidelines, and some flexibility is okay.
The Final Week Humidity Boost
That last week is so important. Increasing the humidity stops the membrane from drying out and sticking to the ducklings. I’ve found a wet sponge inside the incubator works a treat. It’s a simple and effective way to add that extra moisture.
Mastering the temperature and humidity dance isn’t about hitting perfect numbers every time. It’s about understanding the principles, being prepared for challenges, and adapting to your environment. It’s about creating the best possible environment for those little ducklings. Remember, even experienced hatchers have unexpected things happen. The key is to stay calm, be flexible, and learn from each hatch.
Daily Routines That Actually Work
Forget those rigid incubator schedules. Real life, especially here in the UK, throws curveballs. Work, family, holidays – things happen! Hatching duck eggs shouldn’t add extra stress. I’ve talked with so many people, from busy professionals to shift workers like Emma, who’ve successfully hatched ducklings with busy lives. Their secret? Flexibility.
Egg Turning: Why and How (the Easy Way)
Turning those eggs is crucial. It keeps the developing embryo from sticking to the membrane. Think of it like gently rocking a baby. You don’t need to be glued to a timer. Three to five turns a day is perfect. Emma, who works hospital shifts, turns hers whenever she has a spare moment – before work, after work, even on her lunch break. It’s about consistency, not perfect timing.
It’s about the long game, not stressing over minutes. A few turns spread throughout the day does the trick.
Record Keeping That You’ll Actually Maintain
Detailed logs are great, but let’s be honest, who has the time? A simple notebook, or even a whiteboard near your incubator, works wonders. Just jot down the date, time, and a quick note on temperature, humidity, and turning. Tom, a retired teacher, told me his “good enough” notes are way better than the complex spreadsheet he gave up on after a week. Aim for useful info, not a perfect record.
The point is to track progress, not create extra work for yourself.
Recognizing Normal Development
Those first few weeks can feel like forever. But even without candling, you can see things happening. Look for condensation. A light misting inside the incubator means healthy humidity. And listen for those faint chirps in the final days. It’s the sweetest sound, a sure sign your ducklings are almost here.
These little signs are reassuring and exciting!
Involving the Family (and Staying Sane)
Hatching ducklings is a wonderful family project. Kids love it, and it’s a fantastic learning experience. Simple jobs like marking the calendar or helping turn the eggs build excitement and teach responsibility. If you’re managing multiple batches (which can be a bit much, I know!), try color-coding your eggs or using separate notebooks. This keeps everything organized and prevents mix-ups. You might be interested in: cleaning hatching eggs.
A little organization goes a long way!
Maintaining Enthusiasm During the Long Haul
The middle weeks can feel a little slow. Remind yourself of the magic happening inside those eggs! Read about duckling development, watch videos, or connect with other hatchers online. This keeps the excitement alive.
It helps to reconnect with the wonder of it all.
Daily routines don’t have to be rigid. Find what works for you, your family, and your future ducklings. It’s about consistent care, not perfection. Enjoy the flexibility, the process, and those small wins along the way!
Candling Without the Guesswork
Candling duck eggs is a bit like peeking into a secret world. It’s fascinating, but that first time can be a little daunting. I know I was totally bewildered when I first held a light up to an egg! What are all those shadows? Is this normal? Don’t worry, it gets easier. With a bit of practice, you’ll be reading those shadowy shapes like a pro. You might even find this article helpful: when to candle chicken eggs.
Choosing the Right Candling Tool
Forget the fancy, expensive candlers. A powerful LED flashlight and a dark room work perfectly. I’ve actually found some cheaper candlers get too hot, which isn’t good for the developing embryo. A simple flashlight gives you much better control over the heat and light intensity.
What to Look For at Each Stage
During the first week, look for a faint network of blood vessels – it looks like tiny red spiderwebs. This tells you the egg is fertile and growing. By the second week, you’ll see a darker mass, which is the developing embryo. You might even see it move! It’s pretty amazing.
Handling Eggs With Care
Be extra gentle! Warm your hands before touching the eggs to avoid a cold shock. Support the egg from underneath and give it a quick rotation in front of the light. The idea is to minimize handling time and avoid any jerky movements.
Interpreting the Shadows
Candling isn’t always straightforward. There are some things you might see that’ll leave you puzzled. For instance, a blood ring indicates the embryo has stopped developing. It’s sad, but important to know so you can remove the egg from the incubator.
Common Candling Mistakes and How to Avoid Them
Candling too early is a common mistake. Before the first week, there’s not much to see, and you could risk harming the delicate embryo. Candling too often is another pitfall. Once a week is plenty. Excessive handling stresses the eggs and can disrupt development. Try to trust the process, and resist the urge to check constantly!
Success Stories and Surprises
I once had an egg that looked completely clear during the first candling. I was absolutely sure it was infertile. But something told me to leave it in the incubator. Surprise! A healthy duckling hatched. It just goes to show, sometimes eggs surprise us. It’s a good reminder to trust your instincts and give those questionable eggs a fighting chance.
Candling is a really useful tool, but it’s not an exact science. Practice your skills, learn from each session, and remember that even the most experienced hatchers get it wrong sometimes. It’s all part of the learning curve. The more you candle, the more confident you’ll become. And that confidence will make hatching duck eggs at home even more rewarding.
Hatching Day Magic and First Steps
After 28 days of waiting, hatching day finally arrives! It’s a mix of excitement and nerves, kind of like Christmas morning, but with fluffy ducklings instead of presents. Let’s talk about what to expect, from that first little “pip” to patiently letting nature do its thing.
The First Pip: A Moment of Pure Joy
That first tiny crack in the eggshell is a major milestone. It means your duckling is strong and ready to hatch. I remember the first time I saw a pip—I was practically holding my breath! It’s truly thrilling, the culmination of weeks of care. If you’re looking for a good incubator, check out Hatching Eggs.
Patience is Key: Letting Nature Unfold
Hatching takes time. It can be hours, or even a day or two, for a duckling to completely hatch. Resist the urge to help! Interfering too soon can harm the duckling. They need time to absorb the yolk sac and get stronger.
When to Help (and When to Hands Off)
Patience is important, but sometimes you might need to step in. If a duckling has pipped but hasn’t made progress for 24 hours, it might be struggling. Gently increasing the humidity can soften the membrane and help them break free. But try to avoid too much intervention. Most ducklings do just fine on their own.
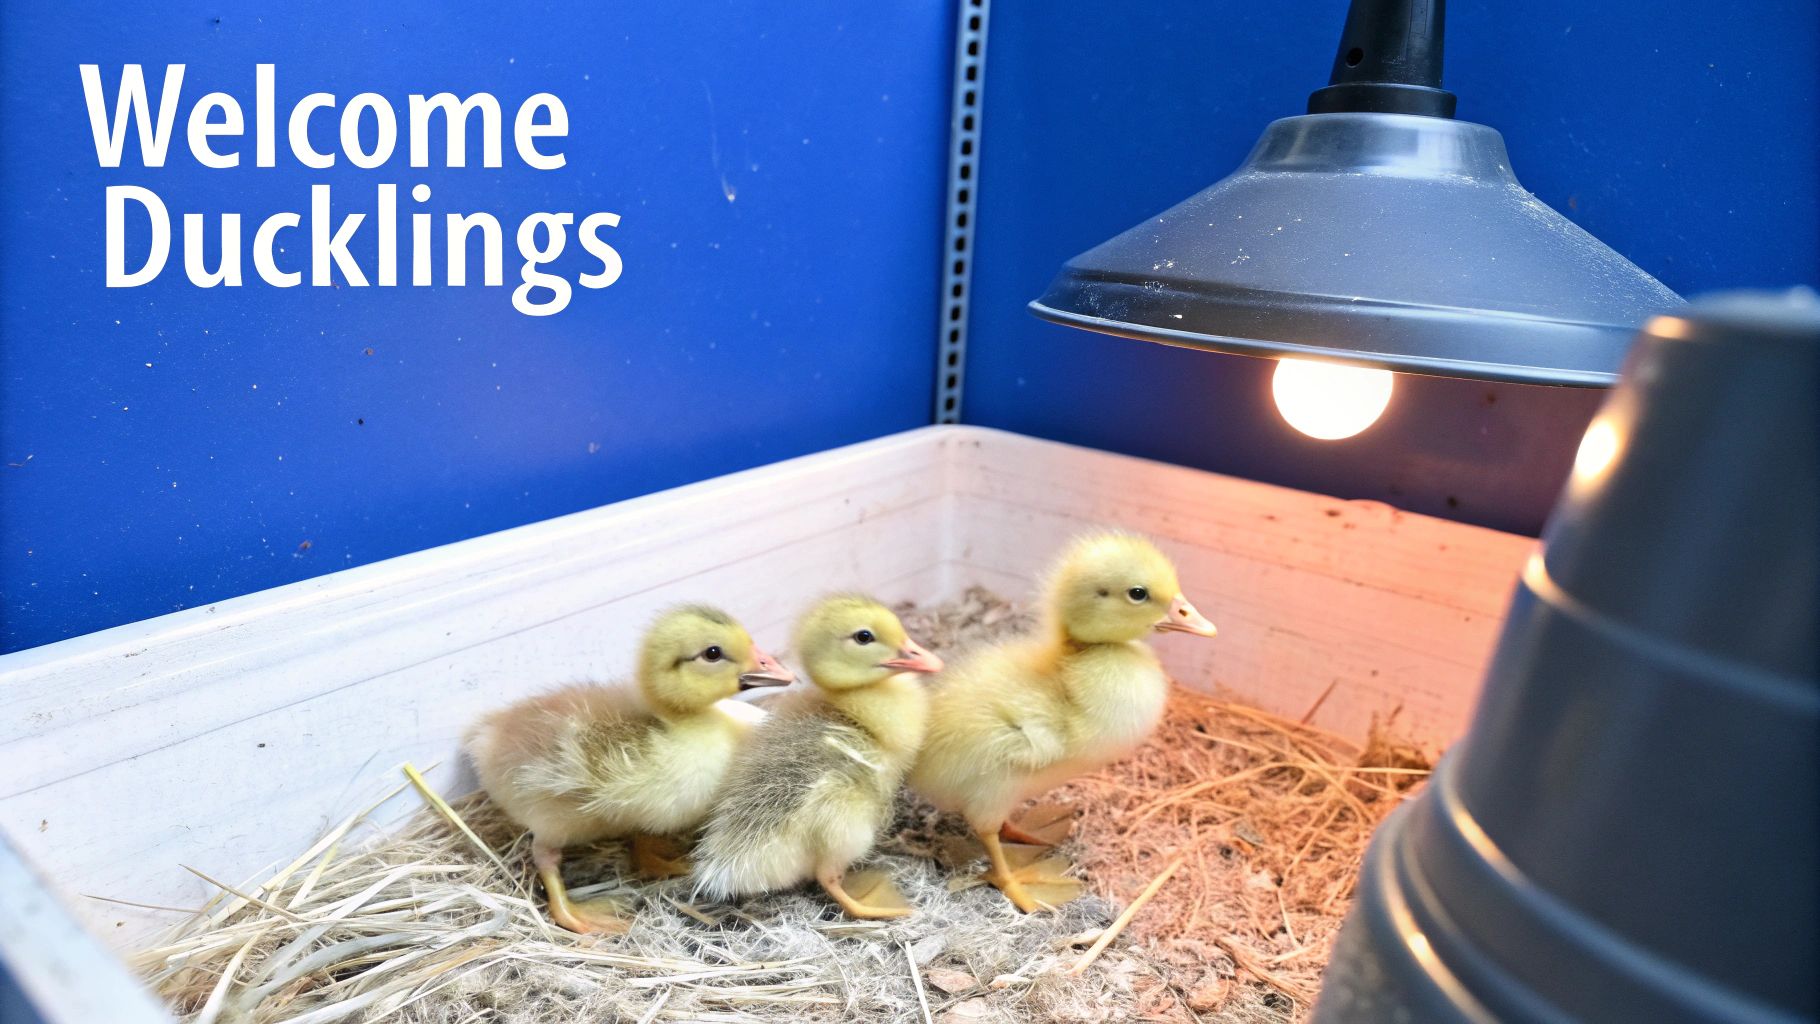
A Warm Welcome: Setting Up the Brooder
While the hatching is happening, have your brooder ready. A simple cardboard box or plastic tub lined with clean towels works great. A heat lamp is crucial for warmth. Aim for around 35°C (95°F) the first week, then gradually reduce it as they grow. This mimics the warmth of a mother duck.
From Incubator to Brooder: A Gentle Move
Once a duckling is dry and fluffy, carefully move it to the brooder. Give them shallow dishes of water and duckling starter crumbles. Don’t use medicated chick starter—it can be harmful to ducklings. Watch them closely—those first sips and pecks are precious!
First Few Hours: Food, Water, and Warmth
The first few hours are key. Make sure they have fresh water and food all the time. Watch their behavior. Are they active and alert? Eating and drinking? These are good signs of a healthy start.
Building Trust With Your Ducklings
Ducklings imprint quickly. Talk to them softly and handle them gently. This builds trust and makes them comfortable. Plus, it helps you bond with these adorable little creatures!
Normal vs. Concerning Behavior
Healthy ducklings are active, curious, and noisy. They’ll peep and waddle around exploring. If a duckling is lethargic, unresponsive, or has trouble breathing, talk to a poultry vet. Early intervention can make a big difference.
The Ups and Downs: Embrace It All
Hatching ducklings is an emotional journey. There will be moments of pure joy, and maybe some setbacks too. I’ve been through both. It’s all part of learning. Celebrate the wins, learn from the losses, and remember every hatch teaches you something new.
Learning and Growing With Each Hatch
Every hatching experience is a chance to learn. Don’t be afraid to experiment with different techniques, and connect with other duck hatchers. Sharing experiences and advice is incredibly helpful. Most importantly, enjoy the amazing experience of bringing new life into the world. It’s truly magical!
Your Hatching Success Blueprint
So, you’re ready to hatch some ducklings! We’ve covered the basics, from setting up your incubator to those first precious hours after hatching. Now, let’s put it all together. Consider this your personal roadmap to hatching duck eggs at home. We’ll review the essentials, share some handy tips from my own experience, and help you feel confident as you embark on this exciting adventure. Because honestly, there’s nothing quite as magical as watching those fluffy little ducklings break free from their shells.
Realistic Expectations for Your First Hatch
Let’s be real, even seasoned hatchers have hatches that don’t go perfectly. Don’t get discouraged if you don’t hit a 70-80% hatch rate right off the bat. I remember chatting with Sarah from Yorkshire. Her first attempt was, in her words, “a bit of a disaster,” with only a few ducklings surviving. But she learned from it and now gets consistently great results. Every hatch is a learning opportunity.
Troubleshooting Common Challenges
Incubation isn’t always smooth sailing. What if your temperature suddenly spikes? Or the humidity takes a nosedive? It happens! Don’t panic. A little fluctuation isn’t the end of the world. I remember Marcus, another duck keeper I know, used a damp towel trick to stabilize his humidity. Sometimes the simplest solutions are the best. And if you encounter a real head-scratcher, there are tons of online communities filled with experienced duck keepers happy to help.
Connecting With the Duck Hatching Community
Speaking of community, connecting with other duck keepers is a game-changer, especially when you’re just starting. Local poultry groups, online forums, and even social media groups can be amazing resources. They’re great for advice, troubleshooting, and even sourcing hatching eggs. Sharing your wins (and losses) with others who understand makes the whole journey even more rewarding.
Building on Your Initial Success
Once you’ve hatched your first batch, a world of possibilities opens up. Maybe you want to expand, try different duck breeds, or even share what you’ve learned with other aspiring hatchers. It’s a constant journey of learning and discovery.
Expanding Your Duck Hatching Adventures
Expanding your setup might mean getting a bigger incubator or hatching eggs for friends and family. Imagine the joy of helping others experience the magic of hatching! I started small, with a tiny incubator, and now I have a dedicated hatching area in my shed. It’s been a gradual process, with lots of lessons learned along the way.
Exploring Different Duck Breeds
The UK boasts a wonderful variety of duck breeds, each with its own quirks and qualities. From the prolific egg-laying Indian Runner to the stunning Cayuga, there’s a breed for everyone. Exploring different breeds can be a fun way to expand your knowledge and appreciate the amazing diversity of these birds.
Sharing Your Hatching Expertise
As you gain experience, you’ll inevitably develop your own tips and tricks. Sharing your knowledge is a wonderful way to contribute to the community and inspire the next generation of duck hatchers. Maybe you’ll start a blog, join a local poultry club, or mentor a newbie.
Maintaining Perspective and Staying Motivated
Hatching duck eggs is incredibly rewarding, but it takes patience and commitment. Even experienced hatchers face setbacks. Don’t be disheartened by challenges. Each hatch, whether successful or not, is a valuable learning experience. Celebrate the small victories, learn from the bumps in the road, and most importantly, enjoy the process! There are so many resources out there to help you: online guides, books, and even workshops. And remember, there’s a whole community of duck keepers cheering you on!
Are you ready to hatch your dreams? HatchingEggs.eu offers premium hatching eggs sourced from carefully chosen breeding stock. With over 18 years of expertise, we provide top-quality eggs and expert guidance for successful hatching. Join our community of passionate poultry enthusiasts and start your hatching journey with confidence.