


Getting Started With Egg Candling Basics
Let’s face it: candling eggs can feel intimidating for first-time chicken hatchers. But knowing when to candle is simpler than you think. It starts with understanding the basics. We’ll guide you through the process and explain why it’s essential for successful hatching.
Why Candle? The Purpose of Candling
Candling involves shining a bright light through an egg to see inside without cracking it open. This lets you observe the developing embryo and check if it’s viable. This time-honored practice, once done with actual candles, now uses modern LED devices. The core idea remains the same: using light to reveal the egg’s contents.
When to Candle Chicken Eggs: The Optimal Window
Timing is key for effective candling. The best time to candle chicken eggs is between days 7 and 10 of incubation. This period offers the clearest view of the developing embryo and its blood vessels. Candling too early might not give you clear results, while waiting too long could mean wasted incubator space if an egg isn’t viable. For more hatching information, see our guide on Getting Started With Hatching Eggs.
What to Look For: Signs of Healthy Development
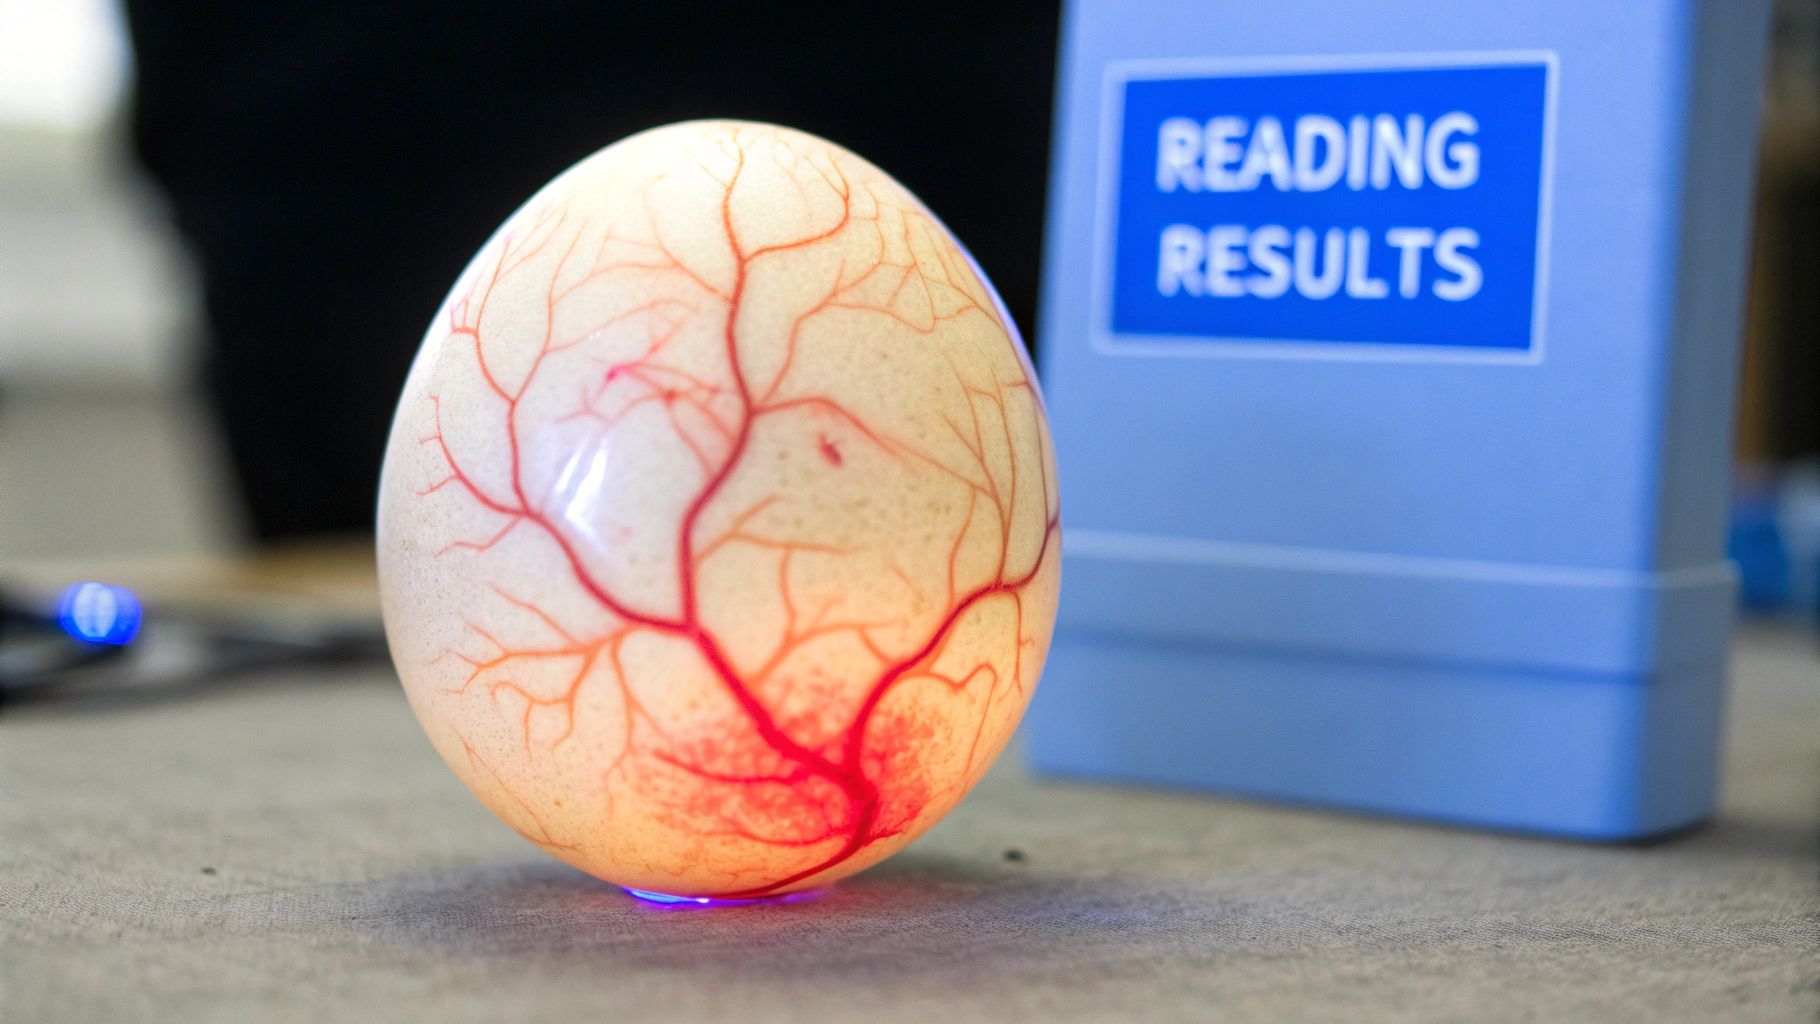
When candling, look for specific signs of a healthy embryo. A network of blood vessels, resembling a spider-web pattern, is a key indicator. You should also see the embryo itself as a darker shape inside. Embryo movement is another positive sign.
Identifying Problems: Recognizing Non-Viable Eggs
Candling also helps identify eggs that aren’t developing correctly. A clear egg with no signs of development means it’s infertile. A blood ring, a dark circle inside, indicates early embryonic death. Other issues, like missing blood vessels or unusual embryo positioning, can also signal problems. Removing these non-viable eggs is important for a healthy incubator.
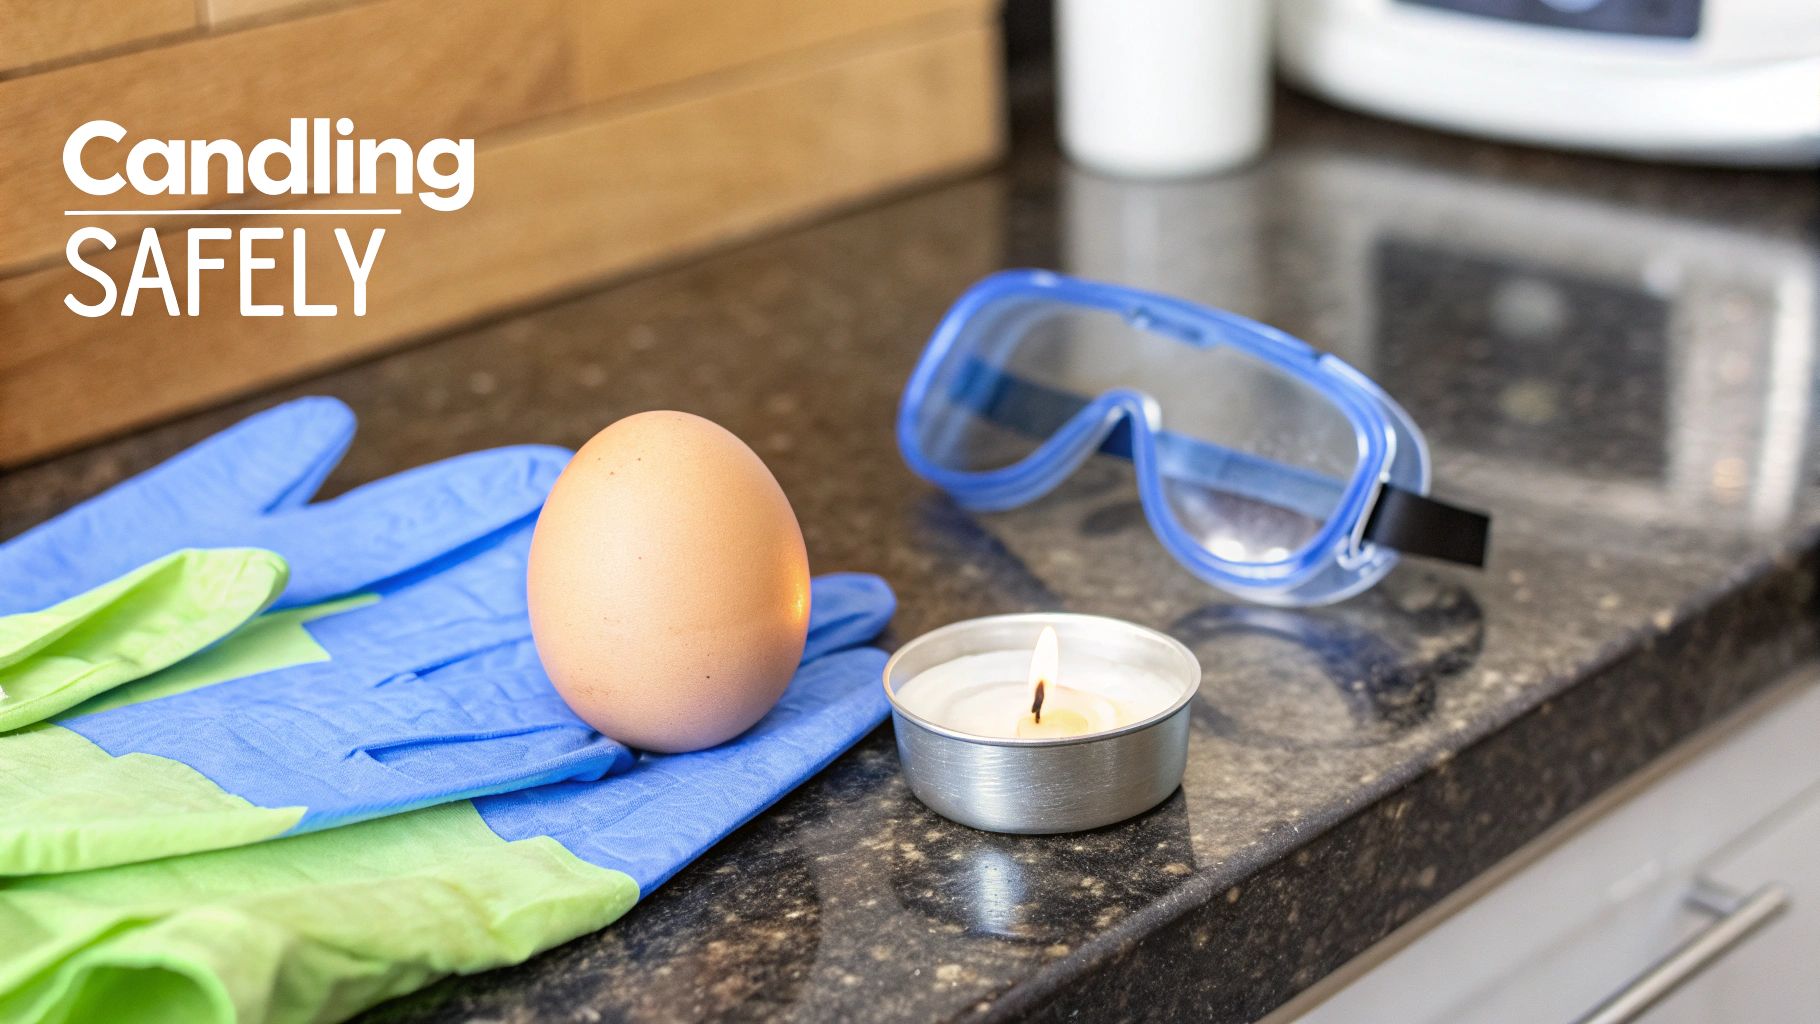
Candling Equipment: Choosing the Right Tool
Various candling tools are available, from simple, budget-friendly options to more advanced devices. Your choice depends on your needs and budget. A bright LED candling lamp is a popular and practical choice for backyard poultry keepers. Whatever tool you choose, proper handling is crucial to avoid harming the embryos. You might find this interesting: How to master….
The Benefits of Proper Candling
Accurate candling between days 7 and 10 significantly impacts your hatch rates. By removing non-viable eggs early, you improve incubator efficiency and reduce the risk of contamination. This leads to healthier chicks and a more successful hatch, saving you time and resources. Candling lets you make informed choices about your eggs, making hatching more predictable and successful.
The Science Behind Days 7-10: Why This Window Works
The 7-10 day window for candling chicken eggs isn’t folklore; it’s based on years of hatchery experience and scientific understanding of embryo development. This period offers the perfect balance: enough development for clear observation, but early enough for informed decisions about egg viability.
Understanding Embryonic Development
During the first week of incubation, a significant transformation happens inside the egg. Rapid cell divisions form the foundation of the chick’s circulatory system. Around day 4, the heart starts beating. By day 7, a network of blood vessels spreads across the yolk sac, becoming visible during candling and signaling a viable embryo.
Between days 7 and 10, the embryo grows significantly. Starting as a tiny speck, it develops into a recognizable shape, showing discernible movement. This growth, combined with the expanding blood vessels, makes this timeframe perfect for assessment. Candling too early may not reveal these vital signs. Candling too late could mean wasted incubator space.

This infographic shows the ideal candling scenario: a person using a candling lamp in their coop. It clearly demonstrates the process and purpose behind candling eggs – seeing inside to determine viability, which is exactly what happens during this crucial 7-10 day window.
Why Timing Matters: Maximizing Hatch Rates and Efficiency
Candling chicken eggs in the UK typically happens between days 7 and 10 of incubation, aligning with the embryo’s biological development. According to UK poultry industry standards, candling at this stage is vital for assessing fertility and embryo viability. At this point, the blood vessels and embryo are clearly visible through the eggshell with a bright light, allowing hatcheries to identify non-viable eggs early and reduce wasted incubator space.
This timing maximizes hatch rate and incubator efficiency. Removing infertile or non-developing eggs frees up valuable space for viable ones. This prevents contamination from rotting eggs and reduces energy wasted on incubating eggs that won’t hatch. For more information on temperature sensitivity, you can read about whether hatching eggs can get cold.
The following table summarizes the key development milestones and recommended actions for each day within the 7-10 day candling window. This information can help you interpret your candling observations and make informed decisions.
Candling Timeline Comparison: A comprehensive comparison of candling at different stages of incubation showing optimal timing benefits.
| Incubation Day | Embryo Development Stage | Visibility Level | Recommended Action |
|---|---|---|---|
| 7 | Circulatory system developed, heart beating, embryo visible | Good visibility of blood vessels | Discard clear eggs or those with blood rings |
| 8 | Embryo growth continues, movement noticeable | Increased visibility of embryo and blood vessels | Monitor development, discard any non-viable eggs |
| 9 | Embryo further develops, more defined shape | Clear visibility of embryo and extensive blood vessel network | Continue monitoring, remove any eggs showing signs of arrested development |
| 10 | Embryo readily visible, active movement | Excellent visibility, embryo occupies a significant portion of the egg | Final candling opportunity before the later stages of incubation, remove any remaining non-viable eggs |
This table highlights the progression of embryo development and the increasing visibility during the 7-10 day window. The recommended actions emphasize the importance of early identification and removal of non-viable eggs.
The 7-10 Day Sweet Spot: Clear Visibility, Informed Decisions
This period provides the best assessment of egg viability. The embryo and its circulatory system are easily visible, offering clear proof of development or problems. This empowers confident decisions about which eggs to keep or discard. For example, a well-defined blood vessel network filling about one-third of the egg signifies healthy development. A clear egg or a blood ring indicates a non-viable embryo. These visual cues, apparent during the 7-10 day window, make candling a powerful tool for maximizing hatching success and contribute to a more efficient and rewarding hatching experience.
Reading The Signs: What You’re Actually Looking For
Knowing when to candle chicken eggs is the first step. Interpreting the results is next. This section explains how to identify healthy embryos and those that need to be removed from the incubator.
Signs of Healthy Development: What to Look For
Healthy embryos display several key indicators. A thriving embryo shows a network of blood vessels resembling a delicate spiderweb across the yolk. This is one of the earliest and most reassuring signs.
You should also see the embryo itself. It appears as a darker shadow, often near the center of the egg. At day 7, it might be a small, slightly opaque shape. As time progresses, it grows larger and more defined.
Movement is another positive sign. A healthy embryo will move and wiggle within the egg, demonstrating life and growth. This movement becomes more noticeable as the chick develops.
Spotting Trouble: Identifying Non-Viable Eggs
Knowing the signs of a problem is equally important. A clear egg is one clear sign. If you candle an egg on day 7 or later and see nothing inside, it’s likely infertile and should be removed.
A blood ring is another warning sign. This appears as a distinct red circle inside the egg, indicating early embryonic death. The egg should be removed. However, some blood streaking can be normal in certain breeds.
Other problems include a lack of blood vessels after day 7 or an abnormally positioned embryo. Any significant deviations from typical development warrant close attention. If unsure, it’s best to err on the side of caution and remove the egg to prevent possible contamination.
Making the Call: Keep or Remove?
Candling provides valuable information for informed decision-making. Recognizing these visual cues is key to maximizing your hatch rates. This knowledge directly impacts your results, whether you’re a hobbyist or running a larger operation.
Candling is a skill honed through practice. The more you candle, the better you’ll become at interpretation. Don’t be discouraged if you’re unsure at first. Over time, you’ll gain confidence in making those crucial keep-or-remove decisions, which directly affects your results and flock health. For example, experienced hatchers often spot subtle signs of weakness a novice might miss. This informed decision-making is crucial for a healthy and productive flock.
The Real Impact: How Timing Affects Your Success Rates
Professional UK hatcheries candle eggs between days 7 and 10 for good reason. It’s not just tradition; it directly impacts their success rates and profitability. Knowing when to candle is just as important as knowing how.
Improved Resource Efficiency: Making Every Egg Count
Early identification of non-viable eggs through candling improves resource efficiency, whether you have a small backyard setup or a large commercial hatchery. Removing infertile eggs early saves electricity by not incubating them for the full 21 days. This small saving adds up, especially with larger flocks.
Candling also conserves valuable incubator space. Every slot counts, and a non-developing egg occupies space a potentially healthy chick could use. This is especially important for breeders with limited incubator capacity.
Minimizing Contamination Risks: Protecting Your Healthy Eggs
Dead eggs left in the incubator increase contamination risks. Decomposing eggs become breeding grounds for bacteria and fungi, which can spread to healthy embryos. This reduces hatch rates and can even lead to the loss of entire clutches. Candling at days 7-10 mitigates these risks by removing potential contamination sources early.
Higher Overall Success Rates: The Bottom Line
Proper candling timing leads to significantly higher overall success rates. Data from UK hatcheries show that effective candling directly impacts hatchability rates, improving chick production outcomes by removing non-viable eggs. Research in UK poultry operations shows candling at days 7 to 10 reduces late-stage embryo mortality by roughly 6%, saving millions of potential chicks annually. Find more detailed statistics here. This translates to increased chick yields and more efficient resource use for breeders.
Avoiding Hidden Costs: Beyond Wasted Energy
Incubating dead eggs wastes more than just electricity. It also wastes your time and effort caring for eggs that won’t hatch. The emotional disappointment of unfulfilled expectations also contributes to the frustration of low hatch rates.
From Hobby to Business: Why Timing Matters
Understanding the benefits of candling is crucial for both backyard enthusiasts and commercial breeders. Successful hatches mean more chicks for hobbyists to enjoy or share. For commercial operations, higher hatch rates directly improve profitability.
Learn more about whether hatching eggs can carry bird flu.
The Measurable Benefits: Quantifying Success
Timely candling offers measurable benefits contributing to short-term and long-term success:
- Increased hatch rates: More chicks from each batch.
- Reduced incubator costs: Less wasted energy and maximized space.
- Lower risk of contamination: Healthier chicks and a cleaner environment.
- Improved profitability: More chicks to sell or add to your flock.
These tangible results demonstrate the importance of correct candling timing for any poultry breeder.
Mastering The Technique: Your Step-by-Step Approach
Knowing when to candle (days 7-10) is key, but the technique itself ensures accurate results and prevents mistakes. This guide provides a practical, step-by-step approach, protecting your embryos while giving you clear readings.
Choosing Your Candling Equipment
The right candling equipment depends on your individual needs and budget. A simple, bright LED candling lamp is a great option for beginners. It’s cost-effective and easy to find. For larger flocks or more experienced breeders, a professional-grade candler with adjustable brightness and magnification might be a better fit.
To help you choose, let’s compare some options:
Candling Equipment Comparison:
| Equipment Type | Cost Range | Effectiveness | Best For | Pros/Cons |
|---|---|---|---|---|
| LED Candling Lamp | £10-£30 | Good | Beginners, small flocks | Affordable, easy to use, portable / Limited features |
| Professional Candler | £50+ | Excellent | Larger flocks, experienced breeders | Adjustable brightness, magnification, greater accuracy / Higher cost |
This table summarizes the key differences, allowing you to select the equipment that best suits your circumstances. Consider your flock size and experience level when making your decision.
Creating the Ideal Candling Environment
A dark room is essential. This allows the light to penetrate the eggshell properly, showing the embryo’s development. Minimize external light for the clearest possible view. A comfortable room temperature is also important to prevent chilling the eggs.
Handling Eggs With Care
Proper handling is vital. Warm hands are best to avoid temperature shock. Gently hold the egg against the lamp, rotating it slowly to see all angles. Avoid excessive pressure or jarring movements. These could harm the developing embryo.
The Step-by-Step Candling Process
Here’s a step-by-step guide to the candling process:
Prepare Your Environment: Darken the room and ensure your hands are clean and warm.
Select an Egg: Carefully remove an egg from the incubator, minimizing handling time.
Position the Egg: Gently hold the egg against the candling lamp, larger end up.
Observe and Rotate: Shine the light through the egg, slowly rotating it to examine all sides.
Interpret the Results: Look for key indicators: blood vessels, embryo shape, and movement (or lack thereof).
Return the Egg: Quickly return the egg to the incubator to maintain a consistent temperature.
Record Your Observations: Document the development stage or any issues for each egg.
Troubleshooting Common Challenges
Dark-shelled eggs can be difficult. Try a brighter candler or slightly increase the candling time. If readings are unclear, candle again in a day or two. You might find this helpful: How to master washing hatching eggs.
Practise Makes Perfect
Candling is a learned skill. With practice, you’ll become more confident. Don’t be discouraged at first. Experience will help you master this essential technique and maximize your hatch rates. Consistent practice will lead to more accurate readings and better decisions about egg viability.
Avoiding The Pitfalls That Kill Success Rates
Even with perfect timing, common mistakes can sabotage your hatching success. This section addresses the most frequent errors during the critical 7-10 day candling period, offering practical solutions.
Timing Mistakes: Too Much of a Good Thing?
Candling too often can stress developing embryos. While it’s natural to want to check progress, excessive handling and temperature fluctuations outside the incubator can be harmful. Aim for two candling sessions: one around day 7 and another around day 10. This gives you enough information without risking the embryos’ development.
Think of baking a cake. Taking it out of the oven every few minutes to check if it’s done can prevent it from rising properly due to the constant temperature changes. Similarly, repeatedly removing eggs from the incubator disrupts the stable environment essential for optimal embryo development.
Another timing mistake is rushing the process. Rushing can lead to careless handling, increasing the risk of cracked or dropped eggs. Take your time and handle each egg gently.
Environmental Errors: Maintaining a Stable Environment
Temperature fluctuations are a major threat to embryo survival. Minimize the time eggs spend outside the incubator during candling. A cool room can quickly chill the eggs, potentially stopping their development.
Imagine bringing a plant indoors during winter. Even brief exposure to the cold can damage it. Likewise, eggs are vulnerable to temperature changes.
Also, ensure your hands are warm before handling the eggs to prevent temperature shock. This simple precaution can significantly impact the embryo’s well-being.
Interpretation Mistakes: The Costly Misunderstandings
Misinterpreting candling results can lead to discarding viable eggs or keeping non-viable ones, wasting valuable incubator space. One common error is confusing a normal air cell with a clear egg. The air cell, located at the larger end of the egg, is crucial for chick respiration and expands as incubation progresses. Mistaking this for an infertile egg can lead to discarding a perfectly healthy embryo.
Some blood vessels or slight abnormalities are normal developmental variations and shouldn’t automatically lead to discarding the egg. If you are unsure, consult resources like HatchingEggs.eu, which offer valuable guidance and support. You can find additional information in their article about which eggs are used for hatching.
Learning From Experience: Real-World Examples
UK poultry specialists emphasize the importance of patience and careful observation. One breeder recounted discarding several eggs because she thought they contained blood rings, only to discover later they were normal blood vessels. This costly mistake highlighted the need for accurate interpretation.
Another UK hatchery shared their experience with temperature fluctuations, reporting a decrease in hatch rates after a power outage during candling. This reinforces the importance of a stable environment and minimal handling time. These real-world examples demonstrate how avoiding common pitfalls can significantly improve your hatch rate.
Key Takeaways
Your journey to hatching success starts with understanding when to candle those chicken eggs. This essential step, typically done between days 7 and 10 of incubation, is more than just a routine practice—it’s a cornerstone of effective poultry management. It helps you identify developing embryos, catch potential issues early, and ultimately boost your hatch rates.
Why the 7-10 Day Window Is Crucial
This specific timeframe aligns perfectly with key embryonic development milestones. By day 7, the circulatory system is established, and the characteristic spiderweb of blood vessels becomes visible during candling. This is your first clear visual confirmation of a viable embryo.
Between days 7 and 10, the embryo grows rapidly, changing from a tiny speck to a more defined shape. This growth, combined with the expanding network of blood vessels, provides a clear picture of development. Candling before day 7 might be too early to observe these vital signs, while waiting longer could mean wasted space in your incubator.
What to Look For: Signs of Life
When you candle during this optimal window, look for these specific indicators of healthy development:
- A network of blood vessels: This “spiderweb” pattern confirms a developing circulatory system.
- The embryo itself: A darker shadow, growing larger and more defined with each passing day.
- Movement: A healthy embryo will wiggle and shift, a sure sign of life.
Spotting Trouble Early: Identifying Non-Viable Eggs
Just as crucial as recognizing healthy development is identifying problems early on:
- Clear eggs: If the egg appears completely clear after day 7, it’s likely infertile.
- Blood rings: A distinct red circle suggests early embryonic death.
- Lack of development: If no blood vessels or embryo are visible by day 10, it’s time to remove the egg.
The Benefits of Timely Candling
Accurate candling between days 7 and 10 directly impacts your hatching success. Here’s how:
- Improved resource efficiency: Removing non-viable eggs early saves energy and valuable incubator space.
- Reduced risk of contamination: Dead eggs can harbor bacteria that threaten healthy embryos. Early removal protects the remaining clutch.
- Increased hatch rates: Identifying and removing non-viable eggs allows you to focus resources on those most likely to hatch.
Putting It All Together: Your Candling Checklist
- Timing: Candle between days 7 and 10 of incubation.
- Environment: A dark room is essential for clear visibility.
- Equipment: Choose a reliable candling lamp.
- Handling: Handle eggs gently and minimize time outside the incubator.
- Observation: Look for the key indicators of healthy development or potential problems.
- Action: Remove non-viable eggs promptly to safeguard your healthy embryos.
Real-World Results: From Theory to Practice
Experienced poultry keepers in the UK understand the importance of this 7-10 day window. For them, it’s not just about following tradition; it’s about maximizing hatch rates and ensuring flock health. This knowledge, combined with consistent practice, differentiates successful hatchers from those struggling with disappointing results. By following these guidelines, you’ll be on your way to a more productive and rewarding hatching experience.
Ready to elevate your hatching success? HatchingEggs.eu offers premium hatching eggs from meticulously selected breeding stock, ideal for backyard enthusiasts and small-scale farmers across Europe. With a commitment to maximizing hatch rates and expert guidance every step of the way, HatchingEggs.eu helps you hatch your dreams with confidence.
Article created using Outrank