


Getting Started Without Overwhelming Yourself
Starting your first pheasant incubation might seem daunting. But with proper planning and guidance, it can be surprisingly manageable. Success starts well before you even turn on your incubator). Consider everything from finding top-quality eggs to understanding UK legal requirements for pheasant keeping. For a helpful guide, check out this resource: How to master hatching eggs.
Sourcing Your Pheasant Eggs
Your first step is finding your pheasant eggs. You can source fertile eggs from reputable breeders or raise your own breeding stock. When choosing eggs, look for consistency in size, shape, and shell texture. Avoid eggs with cracks, thin spots, or irregularities. This initial quality check significantly impacts your hatch rate.
Keep detailed records of your egg sources and incubation dates. This not only tracks your progress but also helps identify successful breeding lines and improve future hatches.
Understanding Pheasant Egg Characteristics
Pheasant eggs differ from other poultry eggs in several ways. Pheasant eggshells are typically thicker than chicken eggshells. This added thickness offers greater protection during incubation but can affect humidity levels inside the incubator.
Egg size also varies depending on the breed. This is important to consider when choosing incubator trays and setting turning mechanisms. Understanding these nuances can significantly impact your success.
UK Regulations and Best Practices
Understanding UK legal requirements for pheasant keeping is crucial. Familiarize yourself with biosecurity best practices to protect your flock from disease and ensure their welfare. The UK’s pheasant shooting industry offers interesting context. While heavily reliant on artificial incubation and rearing, breeding and incubating eggs is less common than rearing or releasing birds.
According to the Animal and Plant Health Agency (APHA), over 25.7 million pheasants were registered in England in January 2024. Of these, only about 1.2 million were bred for shooting, while 14.7 million were reared, and 9.8 million were released. For more detailed statistics: https://whoownsengland.org/2024/03/05/just-131-shoots-game-farms-rear-and-release-6-2million-pheasants/.
By taking these initial steps and approaching pheasant incubation with a well-informed plan, you’ll significantly increase your chances of a successful hatch and a thriving flock.
Mastering The Critical 23-25 Day Timeline
The pheasant incubation journey is a delicate dance with time. Understanding each stage, from the moment the egg is laid until the chick hatches, is crucial for success. This means knowing what’s happening inside the egg every step of the way.
The First Week: Early Development
The first week is a period of rapid growth. The pheasant embryo undergoes rapid cell division and begins to form vital organs. Maintaining stable conditions in your incubator is paramount during this fragile stage. Your first candling session will reveal the initial signs of development.
The Middle Stage: Organ Development
Organ development takes center stage during the middle phase of incubation. Regular candling becomes your window into the egg, allowing you to monitor growth and spot any potential problems. This is the opportune time to fine-tune your incubator settings, ensuring proper development and avoiding setbacks. You might be interested in: How to master incubating eggs.
The Final Week: Lockdown and Hatching
The final week is where all the preparation pays off. This marks the critical lockdown period, where turning the eggs ceases, and the focus shifts to hatching. Maintaining proper humidity levels is vital to prevent the chicks from sticking to the shell.
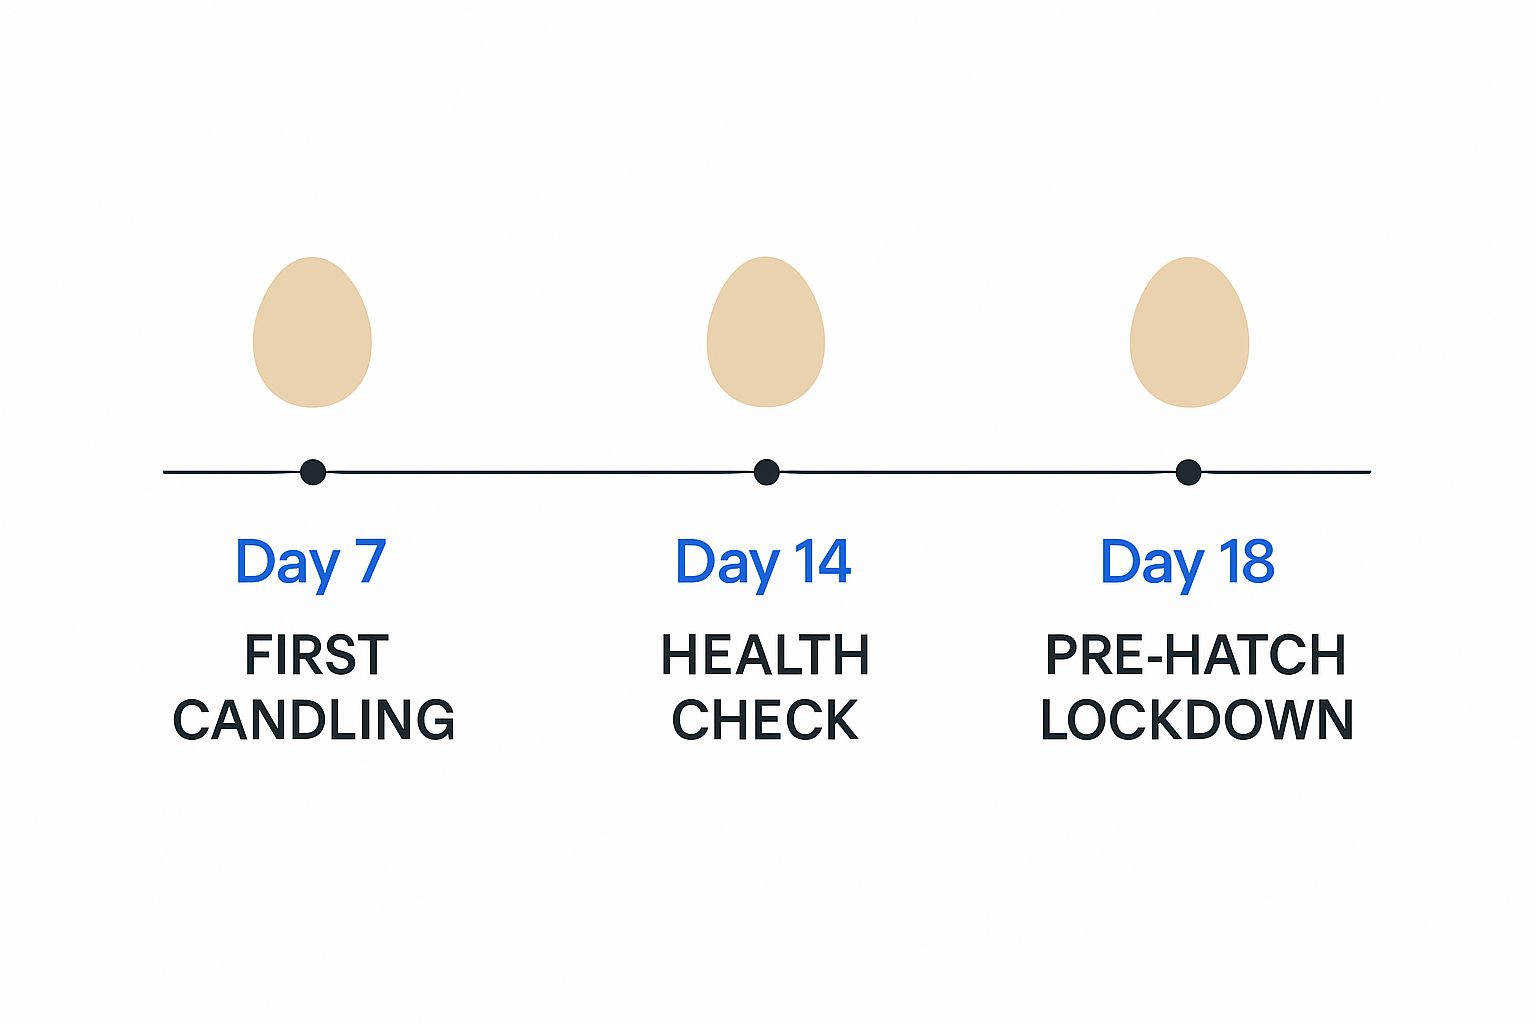
This infographic illustrates key milestones: the first candling at day 7, a health check at day 14, and the pre-hatch lockdown at day 18. These checkpoints are vital for monitoring development and ensuring a successful hatch. Adjusting your incubation strategy based on these milestones is essential for maximizing your hatch rate.
UK Breeding Seasons and Timing
The pheasant incubation period in the UK generally lasts 23 to 25 days, consistent with other regions. Wildlife and conservation organisations observe most pheasant chicks hatching from May onwards, with mid-June often being the peak. Learn more about pheasant facts. UK weather can influence this timeline. Colder temperatures may slightly lengthen the incubation period, while warmer temperatures can shorten it.
Troubleshooting Timing Issues
Even with careful planning, incubation timelines can sometimes deviate. Delayed hatching might result from several factors, including incorrect incubator temperatures, fluctuating humidity, or the age of the eggs. Addressing these issues promptly can sometimes save the hatch.
Daily Guidance and Adjustments
Consistent environmental conditions are key to successful pheasant hatching. This requires daily monitoring of temperature and humidity levels. Minor adjustments may be necessary to compensate for fluctuations, especially given the variable UK climate.
The Importance of Record Keeping
Meticulous record-keeping throughout the incubation process can be invaluable. Document daily temperature and humidity readings, turning schedules, and candling observations. This data helps identify patterns, troubleshoot problems, and improve future hatches. It can also reveal trends linked to specific incubator settings or egg sources, particularly beneficial when working with different pheasant breeds or trying new incubation techniques. This detailed approach maximizes your chances of a successful and rewarding hatching experience.
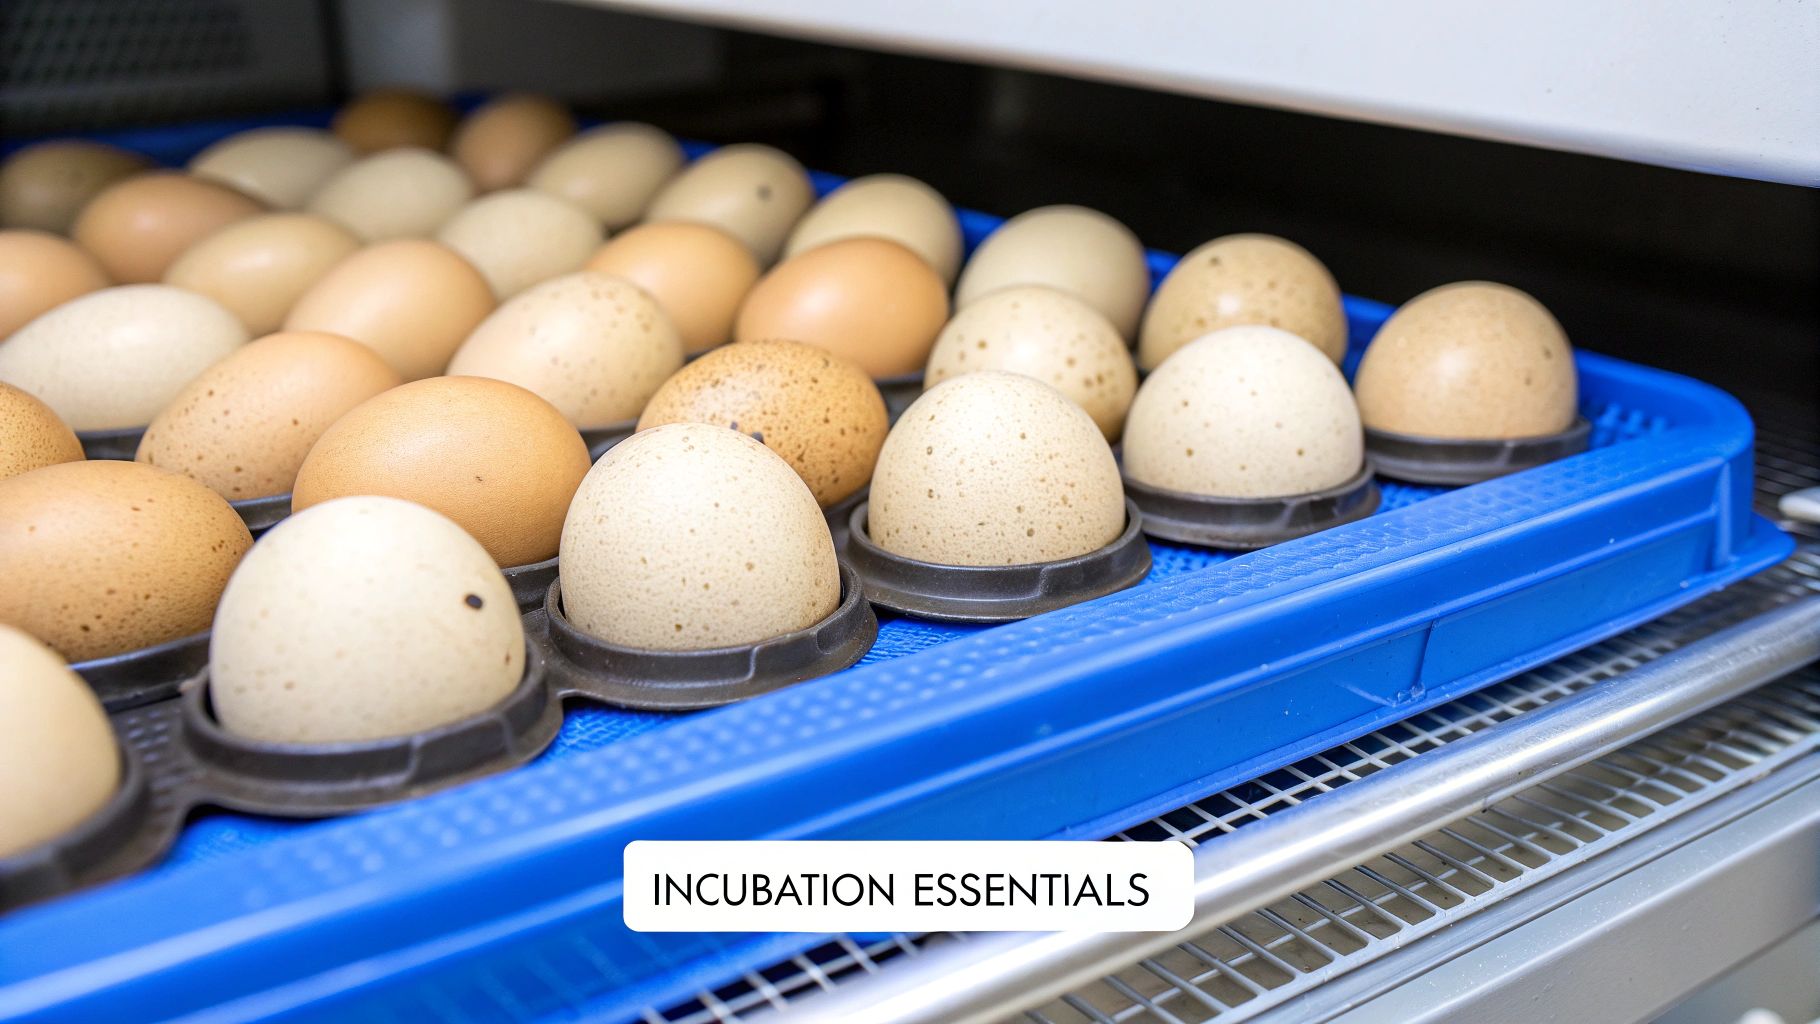
Choosing Equipment That Actually Works
Forget the hype. Successful pheasant incubation depends on reliable equipment. This section offers practical advice based on real-world experience from UK keepers. We’ll explore what truly matters for consistent hatching success and help you choose a setup that works for you.
Incubator Types: Still-Air vs. Forced-Air
Choosing the right incubator is crucial for pheasant egg incubation. Still-air incubators rely on natural convection. They are often more affordable, but can have uneven temperatures, a real challenge in the fluctuating UK climate.
Forced-air incubators use fans for better temperature distribution but come at a higher price. Consider your budget and the stability of your environment when making this choice.
Size and Design: Cabinet vs. Tabletop
Cabinet incubators provide large capacities and precise environmental control, ideal for serious breeders. These are perfect for larger-scale operations and offer advanced features.
Tabletop models, however, are better for smaller-scale incubation or hobbyists. The number of eggs you plan to incubate will determine the right size. Think about your available space and future plans.
Automatic Turning Systems: Reliable Automation
Automatic turning systems are essential for evenly distributing heat and preventing the embryo from sticking to the shell. But not all systems are equal. Choose reliable, proven mechanisms. Consider the turning mechanism, the frequency, and ease of programming.
Check out our guide on How to master Golden Pheasant hatching for more tips.
Backup Power: Essential for British Weather
Unpredictable British weather demands a reliable backup power source. This will maintain incubator operation during power outages. A dedicated generator or a robust Uninterruptible Power Supply (UPS) system is recommended. This protects your investment and ensures a successful hatch.
Monitoring Equipment: Preventing Disasters
Accurate monitoring is vital. Invest in a good thermometer and hygrometer to track temperature and humidity. Digital models with alarms can offer peace of mind, alerting you to deviations. These tools allow you to step in early and prevent problems.
To help you choose the right incubator, here’s a comparison of common types:
Incubator Types and Features Comparison:
Comparison of different incubator types suitable for pheasant eggs, including capacity, features, and price ranges
| Incubator Type | Capacity (Pheasant Eggs) | Key Features | Price Range | Best For |
|---|---|---|---|---|
| Still-Air | 20-50 | Simple, Affordable | £50-£150 | Small-scale hobbyists |
| Forced-Air (Small) | 50-100 | Fan-assisted circulation, better temperature control | £150-£300 | Medium-scale breeders, hobbyists |
| Forced-Air (Cabinet) | 100+ | Precise temperature and humidity control, automatic turning | £300+ | Large-scale breeders, commercial operations |
This table provides a general overview, and specific models may vary. Remember to choose an incubator that meets your individual needs and budget.
Placement and Room Requirements
Correct incubator placement contributes to stable temperatures. Avoid drafty areas and direct sunlight. The room should be well-ventilated and temperature-controlled to create a stable incubation environment.
Maintenance and Calibration: Ensuring Accuracy
Regular incubator maintenance is essential. This includes cleaning, calibrating the thermometer and hygrometer, and checking the turning mechanism. A well-maintained incubator ensures accurate readings and consistent hatches.
Redundancy: Budgeting for Backup
Having backup systems, like an extra thermometer or a secondary heat source, can save your hatch in an emergency. While cost is a factor, prioritize key areas where redundancy offers crucial protection. This minimizes risk without overspending.
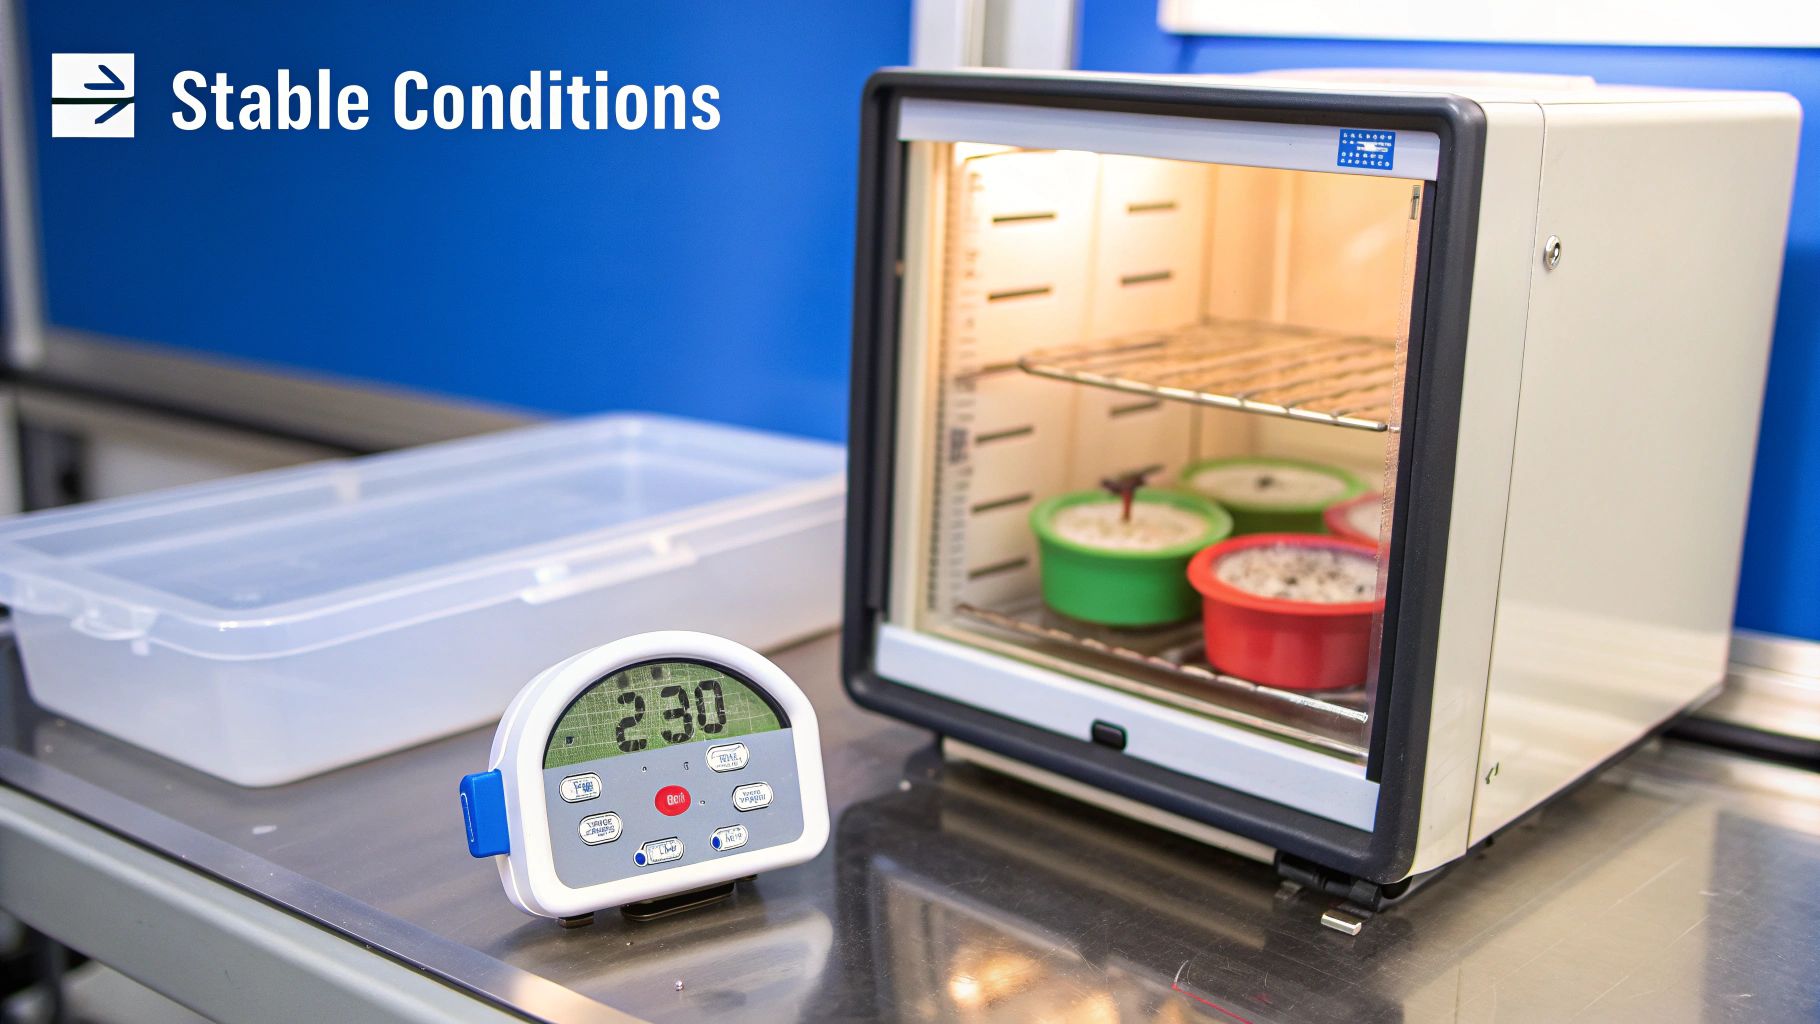
Getting Temperature And Humidity Right Every Time
Maintaining correct temperature and humidity is crucial for successfully incubating pheasant eggs. It can mean the difference between a healthy hatch and a disappointing outcome. This section explores the precise methods experienced UK keepers use to ensure ideal conditions throughout the incubation process.
Temperature Control: The Foundation of Success
The ideal temperature for pheasant egg incubation is around 37.5°C (99.5°F). This can vary slightly based on your incubator type. Forced-air incubators, for example, generally maintain a more consistent temperature than still-air models.
Understanding these nuances can help you fine-tune your settings, especially given the variable UK climate. Regularly monitoring your incubator’s temperature and making small adjustments as needed is key.
UK Climate Considerations: Adapting to the Weather
The unpredictable UK weather can impact incubator stability. During colder months, you might need to slightly increase the incubator temperature to compensate for heat loss. Conversely, a slight decrease might be necessary during warmer periods to prevent overheating.
A well-insulated incubator and a dedicated incubation room can be invaluable in mitigating these fluctuations.
Humidity Management: From Setting to Lockdown
Proper humidity is just as important as temperature control. A humidity level of approximately 55% is generally recommended during the initial setting period.
As incubation progresses, this should gradually increase to about 65% during lockdown. This higher humidity helps prevent the chicks from sticking to the shell during hatching. Using a reliable hygrometer and adding water to the incubator as needed will help you maintain optimal humidity. Check out our guide on whether hatching eggs can get wet for further insights into humidity management.
Monitoring and Backup Systems: Peace of Mind
Investing in quality monitoring equipment provides peace of mind. Digital thermometers and hygrometers with alarms can alert you to any deviations, allowing for timely corrective action.
Consider having backup systems, such as a secondary heat source or a generator. These can be lifesavers in the event of a power outage, a common occurrence in some parts of the UK.
Troubleshooting Temperature and Humidity Problems
Even with careful planning, issues can arise. Fluctuating temperatures or humidity can indicate problems with your incubator, ventilation issues, or even external environmental factors. Addressing these promptly is crucial for a successful hatch.
Emergency Procedures: Saving Your Hatch
Power outages, equipment malfunctions, or unexpected environmental changes can threaten your hatch. Knowing how to respond quickly can make all the difference.
This might involve using a backup power source, relocating the incubator, or manually turning the eggs to prevent temperature gradients.
To summarize the recommended temperature and humidity settings during pheasant egg incubation, refer to the table below:
To help you maintain optimal conditions, we’ve compiled a detailed schedule outlining the recommended temperature and humidity levels for each stage of pheasant incubation:
Temperature and Humidity Schedule:
Detailed breakdown of optimal temperature and humidity settings for each stage of pheasant incubation
| Incubation Stage | Days | Temperature (°C) | Temperature (°F) | Humidity (%) | Notes |
|---|---|---|---|---|---|
| Setting | 1-18 | 37.5 | 99.5 | 55 | Maintain consistent temperature and humidity |
| Lockdown | 19-25 | 37.2 | 99 | 65 | Increase humidity to aid hatching |
| Hatching | 23-25 | 37.2 | 99 | 70-75 | Maintain high humidity to prevent chicks from sticking to the shell |
These values serve as guidelines. Slight adjustments might be necessary based on your specific incubator and environmental conditions. Always monitor your eggs closely and adjust as needed. By understanding and managing these critical environmental factors, you significantly increase your chances of hatching healthy pheasant chicks.
Perfecting Egg Turning and Positioning
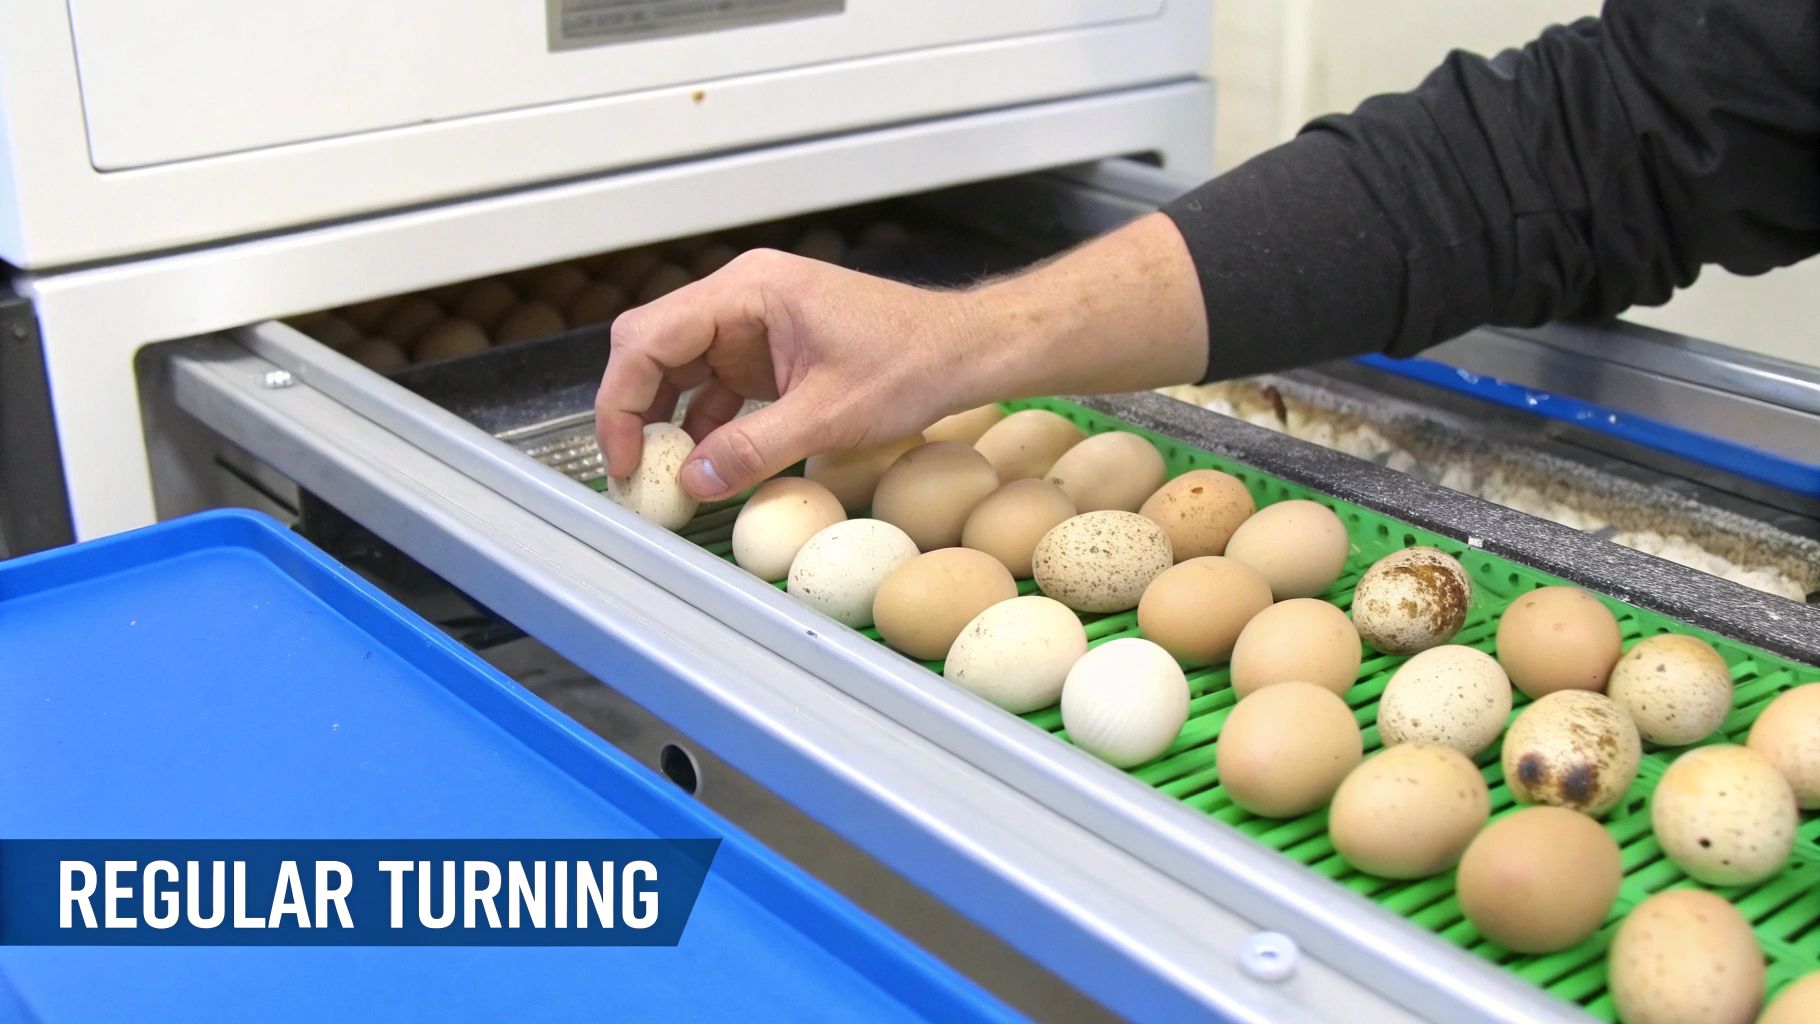
Proper egg turning is crucial for successful pheasant incubation. It’s not just a good practice; it’s a necessity for preventing embryo malformations and promoting healthy chick development. This section explores the techniques used by experienced game bird breeders in the UK, covering both manual and automatic turning methods.
Why Turning Frequency Matters
Think of the yolk as a delicate balloon suspended in the egg white. Without regular turning, the yolk, containing the developing embryo, can drift and adhere to the shell membrane. This can lead to developmental issues or even embryo death. Turning replicates the natural rolling action of a hen, ensuring even heat distribution and proper nutrient absorption.
Optimal Turning Angles and Marking Systems
The optimal turning angle is 45 degrees from horizontal, multiple times per day. This keeps the embryo properly suspended within the egg. A simple marking system, such as an “X” on one side and an “O” on the other, helps avoid confusion during turning. This method tracks which eggs have been turned, preventing over- or under-turning.
Manual Turning: A Hands-On Approach
Manual turning involves physically rotating each egg. This requires gentle handling to prevent jarring the developing embryo. Carefully cradle the egg and rotate it along its long axis. While time-consuming, manual turning offers direct control and allows for close inspection of each egg.
Automatic Turning Systems: Streamlined Efficiency
Automatic turning systems provide convenience and consistent turning frequency. However, regular checks are essential to ensure proper operation. Consider a manual backup method in case of power outages, which can occur in some UK areas.
Turning Schedules and Storage Orientations
Various turning schedules exist, from hourly to three times a day. A good starting point is turning every 3-4 hours. How eggs are stored before incubation also matters. Storing eggs pointed-end down helps maintain correct yolk positioning, promoting proper embryo development during the initial incubation stages.
Stop Turning: Critical Timing for Lockdown
A few days before hatching, stop turning the eggs. This essential step, called lockdown, allows the chick to position itself for hatching. Stopping rotation too early can hinder the chick’s ability to pip the shell, while continuing too late can disrupt final development.
Troubleshooting Turning System Problems
Like any mechanical system, automatic turners can malfunction. Common issues include motor failure, jammed trays, and uneven turning. Regular maintenance, such as checking for obstructions and lubricating moving parts, can prevent these problems. A manual backup system is a wise precaution, especially in the early stages.
Handling During Candling: Maintaining Position
Candling is crucial for monitoring embryo development. However, handling eggs during candling can disturb their position. Be gentle and minimize movement to maintain proper egg orientation.
Tips for Successful Egg Turning
- Consistency is Key: Maintain a regular turning schedule throughout incubation.
- Gentle Handling: Handle eggs with care to avoid damage.
- Marking System: Employ a clear marking system to track rotations.
- Backup Plan: Have a manual turning method in case of automatic system failure.
- Monitor Regularly: Regularly check automatic turners for proper function.
By following these techniques, you can give your pheasant eggs the best chance of hatching healthy chicks. Proper turning is a vital part of incubation, impacting development and overall hatching success.
Monitoring Progress And Solving Problems Fast
Successful pheasant incubation is a hands-on process. It’s not enough to simply set the eggs and walk away. Careful monitoring and quick responses to any emerging problems are essential for a successful hatch. This means understanding pheasant egg development and knowing how to address common incubation challenges.
Candling: Your Window Into The Egg
Candling is a vital technique that lets you peek inside the egg without damaging it. By shining a bright light through the egg in a dark room, you can see the internal structures. This helps you monitor the embryo’s growth and spot potential issues.
- Optimal Timing: The first candling should happen around day 7. This helps identify fertile eggs, allowing you to discard any infertile ones. Follow up with weekly candling sessions to track development and catch any problems early.
- Proper Equipment Setup: You can use a dedicated candling lamp or a bright LED flashlight. The important thing is to create a good seal between the egg and the light to minimize light leakage, which makes it harder to see clearly.
- Accurate Interpretation: Learning to recognize normal development is crucial. A fertile egg will show a network of blood vessels and a dark spot – the developing embryo. As the embryo grows, you’ll observe movement, and the air sac will increase in size.
Common Incubation Problems and Solutions
Even with careful preparation, problems can arise. Here are a few common challenges and how to address them:
- Temperature Fluctuations: Maintaining a stable temperature is critical. Fluctuations can result from a faulty thermostat, drafts, or changes in the external temperature. Regularly calibrate your thermometer, seal any drafts, and consider having a backup heat source.
- Humidity Issues: Low humidity can cause chicks to stick to the shell, while high humidity can encourage fungal growth. Use a reliable hygrometer and adjust the water levels in your incubator accordingly.
- Power Failures: Power outages can happen. A backup power source, such as a generator or a UPS (Uninterruptible Power Supply), can keep your incubator running.
- Contamination Risks: Bacteria and fungi can be a serious threat. Thoroughly clean your incubator before each use and maintain good hygiene throughout the incubation period.
Emergency Procedures and Backup Systems
Planning for the unexpected is vital. Establish emergency procedures for different scenarios, like power outages and equipment malfunctions. A backup incubator can be a real lifesaver. Having a second set of essential equipment on hand can also prevent a minor problem from becoming a major setback. For example, if your main incubator breaks down, a backup incubator allows you to quickly transfer the eggs and minimize disruption. Read also: Can hatching eggs carry bird flu?
In the UK, the hatching success rate for wild pheasant clutches is surprisingly low, with only 34% of clutches hatching successfully. A study by the Game and Wildlife Conservation Trust analyzed data from 450 nests and highlighted the many challenges pheasant nests face. This emphasizes the importance of good incubation practices for improving hatch rates.
Record Keeping: Tracking Your Progress
Keeping detailed records is incredibly valuable. Track temperature, humidity, turning frequency, and your candling observations. This data can provide valuable insights into your successes and failures, allowing you to identify areas for improvement and refine your approach over time.
Recovery Techniques: Bouncing Back From Setbacks
Sometimes, despite our best efforts, things go wrong. Knowing how to recover from setbacks can help salvage at least part of your hatch. This might involve adjusting the incubator settings, moving eggs to a backup incubator, or even assisting chicks that are struggling to hatch. Persistence and quick action can maximize your success, even when facing challenges.
Key Takeaways For Incubation Success
Your journey to raising healthy pheasant chicks begins with understanding the key elements of successful incubation. This guide, drawing on practical advice from experienced UK game bird keepers, provides a roadmap for consistently good results. Whether you’re a beginner or an experienced breeder looking to refine your techniques, these insights are designed to boost your incubation process.
Essential Factors for Hatching Success
Several factors contribute to a successful pheasant hatch. These elements work together, and overlooking any single one can significantly impact your results:
Egg Quality: Begin with high-quality, fertile eggs from trusted sources like HatchingEggs.eu. Carefully inspect each egg for cracks or irregularities. Consistency in size and shape is also important.
Temperature Control: Maintain a consistent temperature within the recommended range (around 37.5°C / 99.5°F) throughout the incubation period. Temperature fluctuations can negatively affect embryo development.
Humidity Management: Proper humidity is crucial. Aim for 55% humidity during the initial setting period, gradually increasing it to 65% during lockdown.
Egg Turning: Turn the eggs regularly. This prevents the embryo from sticking to the shell and ensures even development. Aim to turn the eggs every 3-4 hours during the incubation period, stopping a few days before hatching.
Sanitation: A clean and hygienic environment inside the incubator is essential to prevent bacterial or fungal growth.
Common Mistakes and How to Avoid Them
Even experienced keepers can make mistakes. Understanding these common pitfalls will help you avoid them and improve your hatch rates:
Inconsistent Turning: Inconsistent turning can lead to embryo malformations and lower hatch rates. Implement a regular schedule and a marking system, whether turning manually or using an automatic turner.
Neglecting Humidity: Incorrect humidity can cause chicks to stick to the shell or promote fungal growth. Invest in a reliable hygrometer and monitor humidity levels closely.
Poor Temperature Control: Temperature fluctuations can be detrimental to embryo development. Regularly calibrate your thermometer and ensure your incubator is placed away from drafts and direct sunlight.
Lack of Sanitation: A dirty incubator increases the risk of contamination. Thoroughly clean the incubator before and after each use.
Monitoring Your Progress and Troubleshooting Problems
Regular monitoring is key to successful incubation. Here are some strategies for tracking progress and addressing problems quickly:
Regular Candling: Candling allows you to observe embryo development and identify any potential issues early. Conduct candling sessions weekly, starting around day 7.
Record Keeping: Keep detailed records of temperature, humidity, turning frequency, and candling observations. This data can be invaluable for identifying patterns and improving future hatches.
Quick Response to Issues: Address any problems, such as temperature or humidity fluctuations, as quickly as possible to minimize their impact on the developing embryos.
Practical Tips for Continuous Improvement
Here are a few additional tips to optimize your incubation process:
Invest in Quality Equipment: A reliable incubator, thermometer, and hygrometer are essential investments for consistent results.
Have a Backup Plan: A backup power source and a secondary incubator can be invaluable in emergencies.
Seek Advice from Experienced Keepers: Don’t hesitate to contact other breeders for advice and support.
By following these key takeaways, you can significantly improve your pheasant hatching success rate and ensure a healthy, thriving flock. Consistent monitoring, meticulous record-keeping, and a proactive approach to problem-solving are crucial for achieving your incubation goals.